
Using a Virtual IP Address and Keepalived to Set Up a High-Availability Web Cluster
Scenarios
A virtual IP address is a private IP address assigned from a VPC subnet. You can use a virtual IP address and Keepalived to set up a high-availability active/standby web cluster. In such a cluster, if the active ECS goes down, the virtual IP address is bound to the standby ECS to provide services. This section describes how to use a virtual IP address and Keepalived to set up a high-availability web cluster.
Architecture
- ECS-HA1 works as the active ECS and provides services accessible from the Internet using the EIP bound to the virtual IP address. ECS-HA2 works as the standby ECS, with no services deployed on it.
- If ECS-HA1 goes down, ECS-HA2 takes over services, ensuring service continuity.

Advantages
A high-availability cluster can have one active ECS and one standby ECS or one active ECS and multiple standby ECSs. You can bind a virtual IP address to these ECSs. If the active ECS goes down, the standby ECS becomes the active ECS and continues to provide services.
Notes and Constraints
All servers of the HA cluster must be in the same subnet.
Resource Planning
In this example, the VPC, subnet, virtual IP address, EIP, and ECSs must be in the same region but can be in different AZs.

The following resource details are only for your reference. You can modify them if needed.
| Resource Type | Quantity | Description |
|---|---|---|
| VPC and subnet | 1 |
|
| ECS | 2 | In this example, two ECSs are required for active/standby switchover. Configure the two ECSs as follows:
|
| Virtual IP address | 1 | Assign a virtual IP address from Subnet-A01.
|
| EIP | 1 |
|
Procedure
You can follow the process in Figure 2 to set up a high-availability web cluster using a virtual IP address and Keepalived

Step 1: Create Cloud Resources
- Create a VPC and subnet.
For details, see Creating a VPC with a Subnet.
- Create two ECSs, one as the active ECS and the other as the standby ECS.
For details, see Purchasing an ECS in Custom Config Mode.
Configure the ECSs as follows:- Network: Select VPC-A and Subnet-A01 you have created.
- Security Group: Create security group Sg-A and add inbound and outbound rules to it. Each security group comes with preset rules. You need to check and modify the rules as required.
Add rules in Table 2 to Sg-A and associate Sg-A with ECS-HA1 and ECS-HA2.
Table 2 Sg-A rules Direction
Action
Type
Protocol & Port
Source/Destination
Description
Inbound
Allow
IPv4
TCP: 22
Source: 0.0.0.0/0
Allows remote logins to Linux ECSs over SSH port 22.
Inbound
Allow
IPv4
TCP: 3389
Source: 0.0.0.0/0
Allows remote logins to Windows ECSs over RDP port 3389.
Inbound
Allow
IPv4
TCP: 80
Source: 0.0.0.0/0
Allows external access to the website deployed on the ECSs over HTTP port 80.
Inbound
Allow
IPv4
All
Source: current security group (Sg-A)
Allows the ECSs in the security group to communicate with each other using IPv4 addresses.
Inbound
Allow
IPv6
All
Source: current security group (Sg-A)
Allows the ECSs in the security group to communicate with each other using IPv6 addresses.
Outbound
Allow
IPv4
All
Destination: 0.0.0.0/0
Allows ECSs in the security group to access external networks using IPv4 addresses.
Outbound
Allow
IPv6
All
Destination: ::/0
Allows ECSs in the security group to access external networks using IPv6 addresses.

In this example, Source is set to 0.0.0.0/0, which allows any external IP address to remotely log in to ECSs in Sg-A. To ensure security, you are advised to set Source to a specific IP address, for example, the IP address of your local PC.
If your ECSs are associated with different security groups, you need to add rules in Table 3 to allow the ECSs in the two security groups to communicate with each other.
Table 3 Rules of security groups Sg-A and Sg-B Security Group
Direction
Action
Type
Protocol & Port
Source/Destination
Description
Sg-A
Inbound
Allow
IPv4
All
Source: Sg-B
Allows ECSs in Sg-B to access those in Sg-A over any IPv4 protocol and port.
Sg-B
Inbound
Allow
IPv4
All
Source: Sg-A
Allows ECSs in Sg-A to access those in Sg-B over any IPv4 protocol and port.
- EIP: Select Not required.
- Assign a virtual IP address from Subnet-A01.
For details, see Assigning a Virtual IP Address.
- Assign an EIP.
For details, see Assigning an EIP.
Step 2: Configure Keepalived on ECS-HA1 and ECS-HA2
- Configure Keepalived on ECS-HA1.
- Bind the EIP to ECS-HA1.
For details, see Binding an EIP.
- Remotely log in to ECS-HA1.
For details, see How Do I Log In to My ECS?
- Run the following command to install the Nginx and Keepalived packages and related dependency packages:
yum install nginx keepalived -y
If information similar to the following is displayed, the installation is complete:[root@ecs-ha1 ~]# yum install nginx keepalived -y Loaded plugins: fastestmirror Determining fastest mirrors base | 3.6 kB 00:00:00 epel | 4.3 kB 00:00:00 extras | 2.9 kB 00:00:00 updates | 2.9 kB 00:00:00 (1/7): epel/x86_64/group | 399 kB 00:00:00 (2/7): epel/x86_64/updateinfo | 1.0 MB 00:00:00 (3/7): base/7/x86_64/primary_db | 6.1 MB 00:00:00 (4/7): base/7/x86_64/group_gz | 153 kB 00:00:00 (5/7): epel/x86_64/primary_db | 8.7 MB 00:00:00 (6/7): extras/7/x86_64/primary_db | 253 kB 00:00:00 (7/7): updates/7/x86_64/primary_db ..... Dependency Installed: centos-indexhtml.noarch 0:7-9.el7.centos gperftools-libs.x86_64 0:2.6.1-1.el7 lm_sensors-libs.x86_64 0:3.4.0-8.20160601gitf9185e5.el7_9.1 net-snmp-agent-libs.x86_64 1:5.7.2-49.el7_9.4 net-snmp-libs.x86_64 1:5.7.2-49.el7_9.4 nginx-filesystem.noarch 1:1.20.1-10.el7 openssl11-libs.x86_64 1:1.1.1k-7.el7 Complete!
- Modify the Nginx configuration file to add the configuration about port 80.
- Run the following command to open the /etc/nginx/nginx.conf file:
vim /etc/nginx/nginx.conf
- Press i to enter the editing mode.
- Replace the original content with the following:
user root; worker_processes 1; #error_log logs/error.log; #error_log logs/error.log notice; #error_log logs/error.log info; #pid logs/nginx.pid; events { worker_connections 1024; } http { include mime.types; default_type application/octet-stream; #log_format main '$remote_addr - $remote_user [$time_local] "$request" ' # '$status $body_bytes_sent "$http_referer" ' # '"$http_user_agent" "$http_x_forwarded_for"'; #access_log logs/access.log main; sendfile on; #tcp_nopush on; #keepalive_timeout 0; keepalive_timeout 65; #gzip on; server { listen 80; server_name localhost; #charset koi8-r; #access_log logs/host.access.log main; location / { root html; index index.html index.htm; } #error_page 404 /404.html; # redirect server error pages to the static page /50x.html error_page 500 502 503 504 /50x.html; location = /50x.html { root html; } } } - Press ESC to exit and enter :wq! to save the configuration.
- Run the following command to open the /etc/nginx/nginx.conf file:
- Modify the index.html file to verify whether the website is successfully accessed.
- Run the following command to open the /usr/share/nginx/html/index.html file:
vim /usr/share/nginx/html/index.html
- Press i to enter the editing mode.
- Replace the original content with the following:
Welcome to ECS-HA1
- Press ESC to exit and enter :wq! to save the configuration.
- Run the following command to open the /usr/share/nginx/html/index.html file:
- Run the following commands to set the automatic startup of Nginx upon ECS startup:
systemctl start nginx.service
Information similar to the following is displayed:[root@ecs-ha1 ~]# systemctl enable nginx Created symlink from /etc/systemd/system/multi-user.target.wants/nginx.service to /usr/lib/systemd/system/nginx.service. [root@ecs-ha1 ~]# systemctl start nginx.service
- Open a browser, enter the EIP address (124.X.X.187), and press Enter to verify the access to a single Nginx node. If the web page shown in the following figure is displayed, Nginx is successfully configured for ECS-HA1.Figure 3 ECS-HA1 access verification

- Modify the Keepalived configuration file.
- Run the following command to open the /etc/keepalived/keepalived.conf file:
vim /etc/keepalived/keepalived.conf
- Press i to enter the editing mode.
- Replace the IP parameters in the configuration file as follows:
- mcast_src_ip and unicast_src_ip: Change their values to the private IP address of an ECS. In this example, private IP address 192.168.0.195 of ECS-HA1 is used.
- virtual_ipaddress: Change the value to a virtual IP address. In this example, 192.168.0.177 is used.
! Configuration File for keepalived global_defs { router_id master-node } vrrp_script chk_http_port { script "/etc/keepalived/chk_nginx.sh" interval 2 weight -5 fall 2 rise 1 } vrrp_instance VI_1 { state MASTER interface eth0 mcast_src_ip 192.168.0.195 virtual_router_id 51 priority 100 advert_int 1 authentication { auth_type PASS auth_pass 1111 } unicast_src_ip 192.168.0.195 virtual_ipaddress { 192.168.0.177 } track_script { chk_http_port } } - Press ESC to exit and enter :wq! to save the configuration.
- Run the following command to open the /etc/keepalived/keepalived.conf file:
- Configure the Nginx monitoring script.
- Run the following command to open the /etc/keepalived/chk_nginx.sh file:
vim /etc/keepalived/chk_nginx.sh
- Press i to enter the editing mode.
- Replace the original content with the following:
#!/bin/bash counter=$(ps -C nginx --no-heading|wc -l) if [ "${counter}" = "0" ]; then systemctl start nginx.service sleep 2 counter=$(ps -C nginx --no-heading|wc -l) if [ "${counter}" = "0" ]; then systemctl stop keepalived.service fi fi - Press ESC to exit and enter :wq! to save the configuration.
- Run the following command to open the /etc/keepalived/chk_nginx.sh file:
- Run the following command to assign execute permissions to the chk_nginx.sh file:
chmod +x /etc/keepalived/chk_nginx.sh
- Run the following commands to set the automatic startup of Keepalived upon ECS startup:
systemctl start keepalived.service
- Unbind the EIP from ECS-HA1.
For details, see Unbinding an EIP.
- Bind the EIP to ECS-HA1.
- Configure Keepalived on ECS-HA2.
- Bind the EIP to ECS-HA2.
For details, see Binding an EIP.
- Remotely log in to ECS-HA2.
For details, see How Do I Log In to My ECS?
- Run the following command to install the Nginx and Keepalived packages and related dependency packages:
yum install nginx keepalived -y
If information similar to the following is displayed, the installation is complete:[root@ecs-ha2 ~]# yum install nginx keepalived -y Loaded plugins: fastestmirror Determining fastest mirrors base | 3.6 kB 00:00:00 epel | 4.3 kB 00:00:00 extras | 2.9 kB 00:00:00 updates | 2.9 kB 00:00:00 (1/7): epel/x86_64/group | 399 kB 00:00:00 (2/7): epel/x86_64/updateinfo | 1.0 MB 00:00:00 (3/7): base/7/x86_64/primary_db | 6.1 MB 00:00:00 (4/7): base/7/x86_64/group_gz | 153 kB 00:00:00 (5/7): epel/x86_64/primary_db | 8.7 MB 00:00:00 (6/7): extras/7/x86_64/primary_db | 253 kB 00:00:00 (7/7): updates/7/x86_64/primary_db ..... Dependency Installed: centos-indexhtml.noarch 0:7-9.el7.centos gperftools-libs.x86_64 0:2.6.1-1.el7 lm_sensors-libs.x86_64 0:3.4.0-8.20160601gitf9185e5.el7_9.1 net-snmp-agent-libs.x86_64 1:5.7.2-49.el7_9.4 net-snmp-libs.x86_64 1:5.7.2-49.el7_9.4 nginx-filesystem.noarch 1:1.20.1-10.el7 openssl11-libs.x86_64 1:1.1.1k-7.el7 Complete!
- Modify the Nginx configuration file to add the configuration about port 80.
- Run the following command to open the /etc/nginx/nginx.conf file:
vim /etc/nginx/nginx.conf
- Press i to enter the editing mode.
- Replace the original content with the following:
user root; worker_processes 1; #error_log logs/error.log; #error_log logs/error.log notice; #error_log logs/error.log info; #pid logs/nginx.pid; events { worker_connections 1024; } http { include mime.types; default_type application/octet-stream; #log_format main '$remote_addr - $remote_user [$time_local] "$request" ' # '$status $body_bytes_sent "$http_referer" ' # '"$http_user_agent" "$http_x_forwarded_for"'; #access_log logs/access.log main; sendfile on; #tcp_nopush on; #keepalive_timeout 0; keepalive_timeout 65; #gzip on; server { listen 80; server_name localhost; #charset koi8-r; #access_log logs/host.access.log main; location / { root html; index index.html index.htm; } #error_page 404 /404.html; # redirect server error pages to the static page /50x.html error_page 500 502 503 504 /50x.html; location = /50x.html { root html; } } } - Press ESC to exit and enter :wq! to save the configuration.
- Run the following command to open the /etc/nginx/nginx.conf file:
- Modify the index.html file to verify whether the website is successfully accessed.
- Run the following command to open the /usr/share/nginx/html/index.html file:
vim /usr/share/nginx/html/index.html
- Press i to enter the editing mode.
- Replace the original content with the following:
Welcome to ECS-HA2
- Press ESC to exit and enter :wq! to save the configuration.
- Run the following command to open the /usr/share/nginx/html/index.html file:
- Run the following commands to set the automatic startup of Nginx upon ECS startup:
systemctl start nginx.service
Information similar to the following is displayed:[root@ecs-ha2 ~]# systemctl enable nginx Created symlink from /etc/systemd/system/multi-user.target.wants/nginx.service to /usr/lib/systemd/system/nginx.service. [root@ecs-ha2 ~]# systemctl start nginx.service
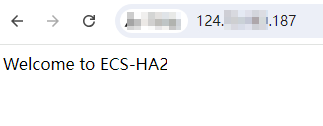
- Open a browser, enter the EIP address (124.X.X.187), and press Enter to verify the access to a single Nginx node. If the web page shown in the following figure is displayed, Nginx is successfully configured for ECS-HA2.Figure 4 ECS-HA2 access verification
- Modify the Keepalived configuration file.
- Run the following command to open the /etc/keepalived/keepalived.conf file:
vim /etc/keepalived/keepalived.conf
- Press i to enter the editing mode.
- Replace the IP parameters in the configuration file as follows:
- mcast_src_ip and unicast_src_ip: Change their values to the private IP address of an ECS. In this example, private IP address of ECS-HA2 (192.168.0.233) is used.
- virtual_ipaddress: Change the value to a virtual IP address. In this example, 192.168.0.177 is used.
! Configuration File for keepalived global_defs { router_id master-node } vrrp_script chk_http_port { script "/etc/keepalived/chk_nginx.sh" interval 2 weight -5 fall 2 rise 1 } vrrp_instance VI_1 { state BACKUP interface eth0 mcast_src_ip 192.168.0.233 virtual_router_id 51 priority 90 advert_int 1 authentication { auth_type PASS auth_pass 1111 } unicast_src_ip 192.168.0.233 virtual_ipaddress { 192.168.0.177 } track_script { chk_http_port } } - Press ESC to exit and enter :wq! to save the configuration.
- Run the following command to open the /etc/keepalived/keepalived.conf file:
- Configure the Nginx monitoring script.
- Run the following command to open the /etc/keepalived/chk_nginx.sh file:
vim /etc/keepalived/chk_nginx.sh
- Press i to enter the editing mode.
- Replace the original content with the following:
#!/bin/bash counter=$(ps -C nginx --no-heading|wc -l) if [ "${counter}" = "0" ]; then systemctl start nginx.service sleep 2 counter=$(ps -C nginx --no-heading|wc -l) if [ "${counter}" = "0" ]; then systemctl stop keepalived.service fi fi - Press ESC to exit and enter :wq! to save the configuration.
- Run the following command to open the /etc/keepalived/chk_nginx.sh file:
- Run the following command to assign execute permissions to the chk_nginx.sh file:
chmod +x /etc/keepalived/chk_nginx.sh
- Run the following commands to set the automatic startup of Keepalived upon ECS startup:
systemctl start keepalived.service
- Unbind the EIP from ECS-HA2.
For details, see Unbinding an EIP.
- Bind the EIP to ECS-HA2.
Step 3: Bind the Virtual IP Address to the Active and Standby ECSs and EIP
- Bind the virtual IP address to both ECS-HA1 and ECS-HA2.
For details, see Binding a Virtual IP Address to an Instance or EIP.
- Disable Source/Destination Check for the network interfaces of the active and standby ECSs. When you bind a virtual IP address to an ECS, Source/Destination Check is disabled by default. You can perform the following operations to check whether the function is disabled. If the function is not disabled, disable it.
- In the ECS list, click the name of the target ECS.
- On the Network Interfaces tab, click
 to expand the details area and check whether Source/Destination Check is disabled.
 If the information shown in Figure 5 is displayed, Source/Destination Check is disabled.
- Bind the virtual IP address to EIP-A.
For details, see Binding a Virtual IP Address to an Instance or EIP.

Step 4: Disable IP Forwarding on the Standby ECS
If a virtual IP address is bound to active/standby ECSs, you need to disable IP forwarding on the standby ECS. If an active/standby ECS switchover happens, ensure that IP forwarding of the new standby ECS is also disabled.
To make sure you do not miss any settings, it is better to disable IP forwarding for both the active and standby ECSs.
- Open a browser, enter the EIP address (124.X.X.187), and press Enter to access the active ECS. If the following page is displayed, the ECS-HA1 is used as the active ECS.Figure 6 Active ECS verification

- Remotely log in to the standby ECS (ECS-HA2 in this example).
For details, see How Do I Log In to My ECS?
- Disable IP forwarding by following the operations in Table 4. In this example, the ECS runs the Linux OS.
Step 5: Verify the Automatic Switchover Between the Active and Standby ECSs
- Restart the active and standby ECSs.
- Remotely log in to ECS-HA1.
For details, see How Do I Log In to My ECS?
- Run the following command to restart ECS-HA1:
reboot
- Repeat 1.a to 1.b to restart ECS-HA2.
- Remotely log in to ECS-HA1.
- Check whether the website on the active ECS can be accessed.
- Open a browser, enter the EIP address (124.X.X.187), and press Enter. If the following page is displayed, ECS-HA1 is used as the active ECS and the website can be accessed.Figure 7 Active ECS ECS-HA1 verification

- Remotely log in to ECS-HA1 and run the following command to check whether the virtual IP address is bound to the network interface (eth0) of ECS-HA1:
ip addr show
If information similar to the following is displayed, the virtual IP address (192.168.0.177) has been bound to the network interface (eth0) of ECS-HA1, and this ECS is the active one.[root@ecs-ha1 ~]# ip addr show 1: lo: <LOOPBACK,UP,LOWER_UP> mtu 65536 qdisc noqueue state UNKNOWN group default qlen 1000 link/loopback 00:00:00:00:00:00 brd 00:00:00:00:00:00 inet 127.0.0.1/8 scope host lo valid_lft forever preferred_lft forever inet6 ::1/128 scope host valid_lft forever preferred_lft forever 2: eth0: <BROADCAST,MULTICAST,UP,LOWER_UP> mtu 1500 qdisc mq state UP group default qlen 1000 link/ether fa:16:3e:fe:56:19 brd ff:ff:ff:ff:ff:ff inet 192.168.0.195/24 brd 192.168.0.255 scope global noprefixroute dynamic eth0 valid_lft 107898685sec preferred_lft 107898685sec inet 192.168.0.177/32 scope global eth0 valid_lft forever preferred_lft forever inet6 fe80::f816:3eff:fefe:5619/64 scope link valid_lft forever preferred_lft forever - Run the following command to disable Keepalived on ECS-HA1:
systemctl stop keepalived.service
- Open a browser, enter the EIP address (124.X.X.187), and press Enter.
- Check whether ECS-HA2 becomes the active ECS.
- Remotely log in to ECS-HA2 and run the following command to check whether the virtual IP address is bound to the network interface (eth0) of ECS-HA2:
ip addr show
If information similar to the following is displayed, the virtual IP address (192.168.0.177) has been bound to the network interface (eth0) of ECS-HA2, and this ECS becomes the active one.[root@ecs-ha2 ~]# ip addr show 1: lo: <LOOPBACK,UP,LOWER_UP> mtu 65536 qdisc noqueue state UNKNOWN group default qlen 1000 link/loopback 00:00:00:00:00:00 brd 00:00:00:00:00:00 inet 127.0.0.1/8 scope host lo valid_lft forever preferred_lft forever inet6 ::1/128 scope host valid_lft forever preferred_lft forever 2: eth0: <BROADCAST,MULTICAST,UP,LOWER_UP> mtu 1500 qdisc mq state UP group default qlen 1000 link/ether fa:16:3e:fe:56:3f brd ff:ff:ff:ff:ff:ff inet 192.168.0.233/24 brd 192.168.0.255 scope global noprefixroute dynamic eth0 valid_lft 107898091sec preferred_lft 107898091sec inet 192.168.0.177/32 scope global eth0 valid_lft forever preferred_lft forever inet6 fe80::f816:3eff:fefe:563f/64 scope link valid_lft forever preferred_lft forever - Open a browser, enter the EIP address (124.X.X.187), and press Enter to check whether the website on the active ECS (ECS-HA2) can be accessed. If the following page is displayed, ECS-HA2 is used as the active ECS and the website can be accessed.Figure 8 Active ECS ECS-HA2 verification

- Remotely log in to ECS-HA2 and run the following command to check whether the virtual IP address is bound to the network interface (eth0) of ECS-HA2:
Feedback
Was this page helpful?
Provide feedbackThank you very much for your feedback. We will continue working to improve the documentation.See the reply and handling status in My Cloud VOC.
For any further questions, feel free to contact us through the chatbot.
Chatbot


