
Help Center/ CodeArts Artifact/ FAQs/ Self-Hosted Repo/ How Do I Upload Snapshots to a Maven Repository?
Updated on 2025-12-05 GMT+08:00
How Do I Upload Snapshots to a Maven Repository?
Background
Snapshots can be uploaded in any of the following ways:
Uploading Snapshots on the Release Repos Page
- Use your Huawei Cloud account to access self-hosted repos.
- Click the Snapshot repository in the repository list. Click Upload. In the displayed dialog box, select GAV.
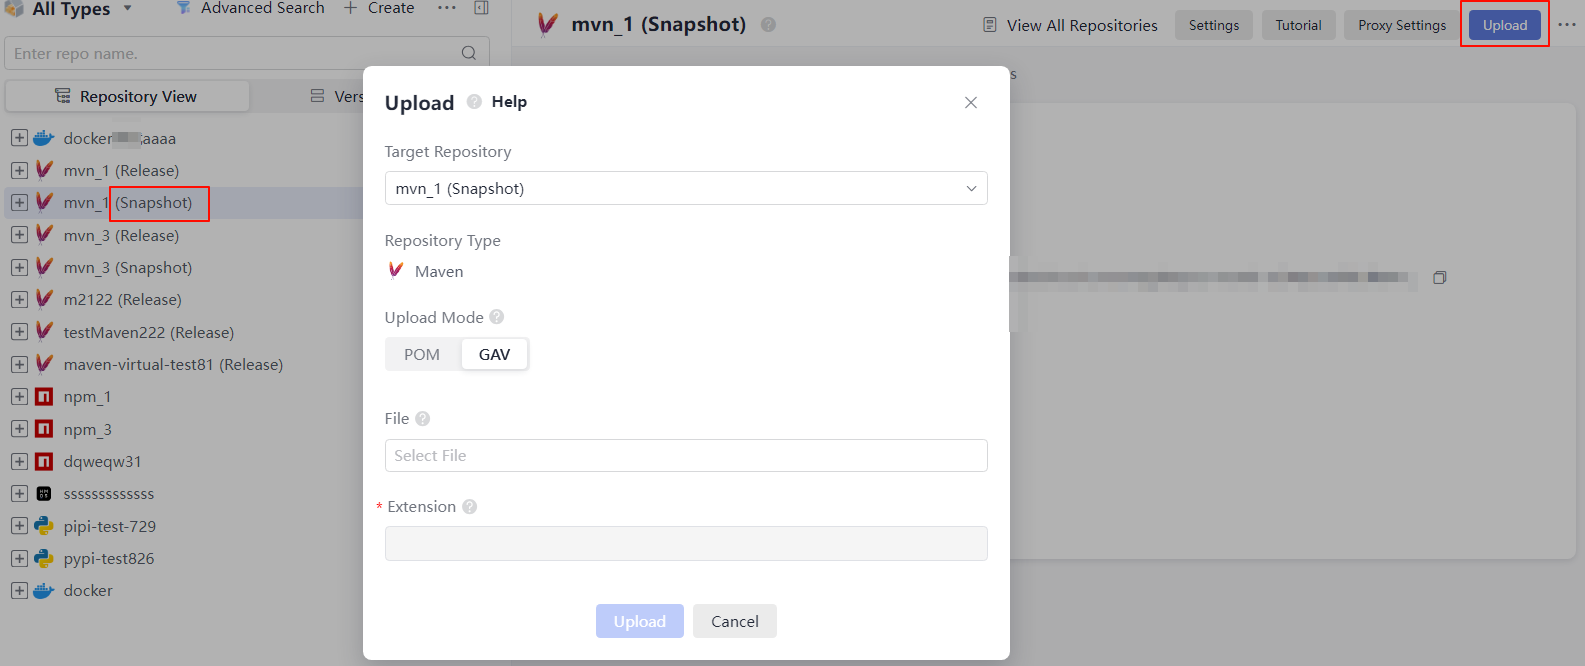 There are two GAV definition modes.
GAV Definition Mode
Description
POM
GAV information is extracted from POM files.
GAV
GAV information is manually specified.
- Set related parameters as prompted and upload the package.
Uploading Snapshots Using the Maven CLI
- Use your Huawei Cloud account to access self-hosted repos.
- Select Maven as the package type, and choose the Snapshot repository from the repository list on the left.
- Click Tutorial in the upper-right corner of the page.
- Configure the local Maven tool by following the configuration guide.
- Run mvn deploy to upload the Maven project. In the Maven CLI, access the directory where the pom.xml file of the Maven project is stored, then run the following command to upload a local JAR package:
mvn deploy:deploy-file -DgroupId=com.huawei -DartifactId=aopalliance -Dversion=1.0-SNAPSHOT -Dpackaging=jar -Dfile=D:\aopalliance-1.0-SNAPSHOT.jar -Durl={Maven Snapshot address} -DrepositoryId=snapshots- Set DgroupId, DartifactId, Dversion, and Dpackaging as required.
- Set Dfile to the absolute path of the local JAR package.
- Set Durl to the Maven snapshot path, which can be obtained by clicking
 in the following figure.
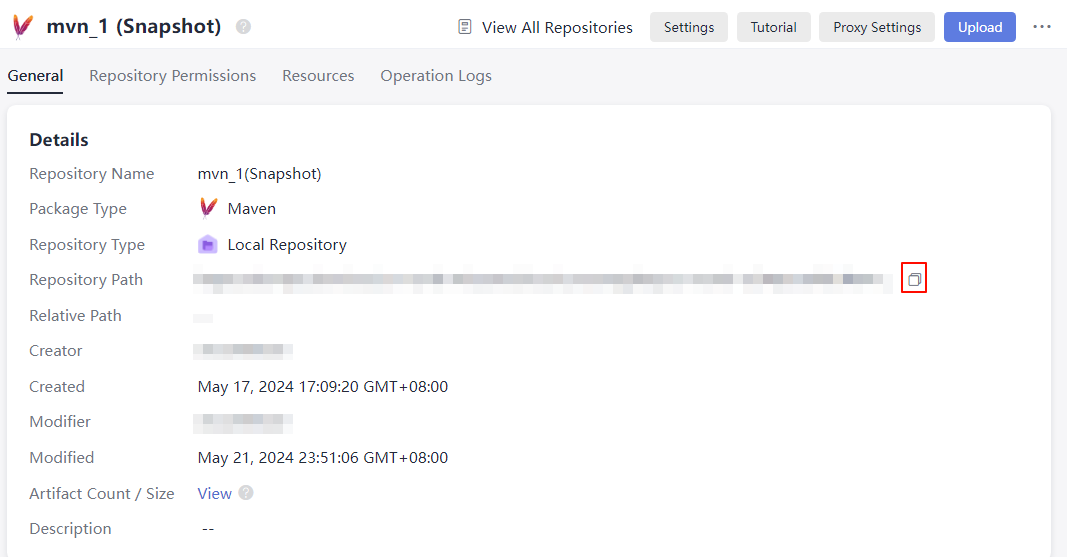
Releasing Snapshots to a Maven Repository Through CodeArts Build
- Log in to the Huawei Cloud console with your Huawei Cloud account.
- Click
 in the upper-left corner and choose Developer Services > CodeArts from the service list.
 - Click Access Service. The homepage of CodeArts is displayed.
- Choose from the top menu bar.
- Go to Repo, open the pom.xml file, and define the GAV information of the package to be uploaded.
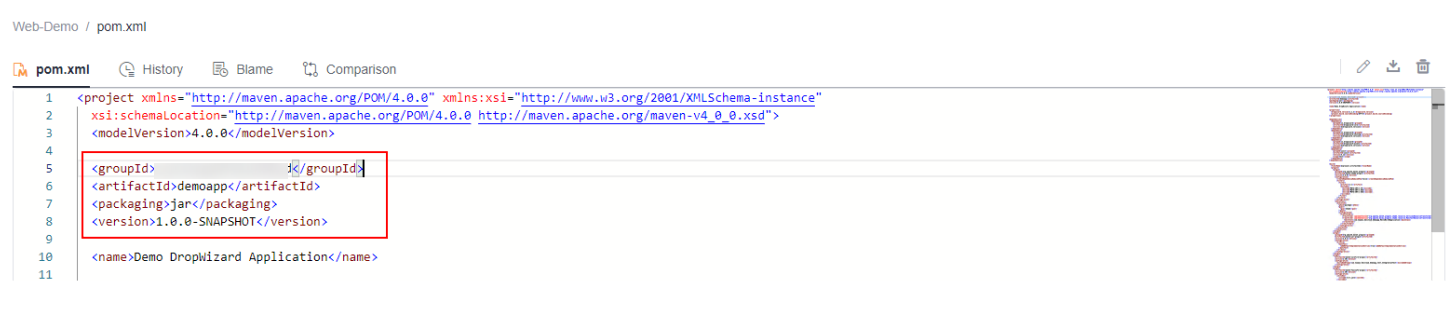
- When a build task is run, CodeArts Build identifies the package properties uploaded to the Maven repository based on the definition.
- version: Releases are uploaded by default. To upload a Snapshot, add the suffix -SNAPSHOT to the value of version, for example, 1.0-SNAPSHOT.
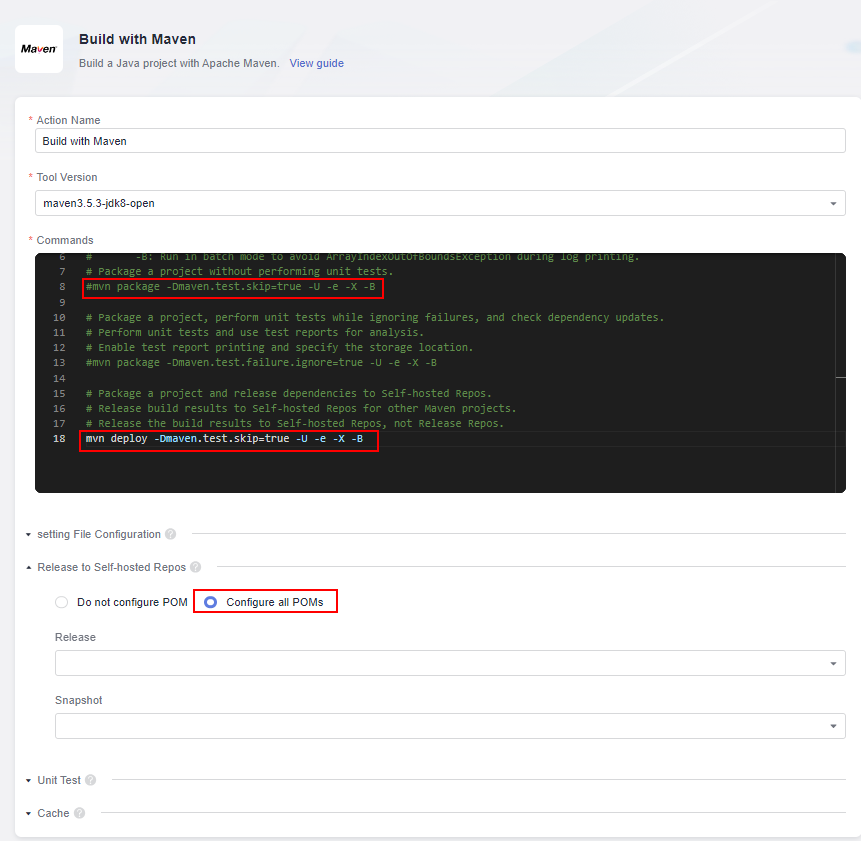
- Edit a build task in the build action Build with Maven:
- In the command box, comment out the mvn package command (add # before the command) and uncomment the mvn deploy command (delete # before the command).
- Click Release to Self-hosted Repos, and select Configure all POMs.
- Run a build task.
After the build task is executed, you can find the generated Maven artifact in the Maven repository.
Parent topic: Self-Hosted Repo
Feedback
Was this page helpful?
Provide feedbackThank you very much for your feedback. We will continue working to improve the documentation.See the reply and handling status in My Cloud VOC.
The system is busy. Please try again later.
For any further questions, feel free to contact us through the chatbot.
Chatbot


