
Uploading Artifacts to a Maven Repository
During development, developers often need to share packages with teammates. Self-hosted repos provide a shared space to store and upload these packages, making it easy for others to access and use them.
This document describes how to upload Artifacts to Maven repository, helping you quickly get started. Figure 1 shows the main operation process.
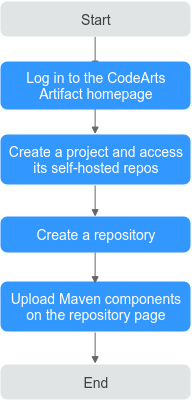
Follow these steps to upload artifacts to a Maven repository:
- Access the CodeArts Artifact homepage. Before using CodeArts Artifact, go to the CodeArts Artifact homepage.
- Create a project and access its self-hosted repos: Create a project on the CodeArts homepage. Then, access the self-hosted repos in the project.
- Create a repository: Create a Maven repository.
- Upload Maven artifacts on the self-hosted repo page: Upload an artifact to a Maven repository on the self-hosted repo page.
Prerequisites
Logging In to CodeArts Artifact Homepage
- Log in to the Huawei Cloud console.
- Click
 in the upper-left corner of the page and choose from the service list.
 - Click Access Service. The homepage of CodeArts Artifact is displayed.
Creating a Project and Accessing its Self-Hosted Repos
- Log in to the Huawei Cloud console with your Huawei Cloud account.
- Click
 in the upper-left corner and choose Developer Services > CodeArts from the service list.
 - Click Access Service. The homepage of CodeArts is displayed.
- Click Create Project.
- Hover over the Scrum card. Click Select to use this template to create a project.
- Set Project Name to Scrum01 and retain the default values for other parameters.
- Click OK. The Scrum01 project is displayed.
- In the navigation pane, choose Artifact > Self-hosted Repos.
Creating a Repository
- Enter the self-hosted repo page of the project after completing the operations in Creating a Project and Accessing its Self-Hosted Repos.
- Click Create Repository.
- Configure the basic information and click Submit.
- Repository Type: Local Repo and Virtual Repo. Local Repo is selected by default.
- Repository Name: Enter a repository name.
- Package Type: Select Maven.
- Project: The default value is the current project. You can select another target project from the drop-down list box.
- Include Patterns: (Optional) Configure a path whitelist for the repository.
- Version Policy: If both of them are selected, the Maven repository generates two types of repositories: Release and Snapshot. Retain the default values.
- Description: (Optional) Enter up to 200 characters.
- The created Maven repository is displayed in the Repository View.
Uploading Maven Artifacts on the Self-Hosted Repo Page
- Click the target repository in the left pane after completing the operations in Creating a Repository.
- Click Upload on the right of the page.
- In the displayed dialog box, set Upload Mode to POM.
- In POM, click Select File and upload packages whose name ends with pom.xml or .pom from the localhost.
- Click Upload.
- In the Repository View, click the name of the uploaded software package to view its details.
Related Tasks
CodeArts Artifact allows you to upload packages either from the page or through CodeArts Build to self-hosted repos. For details, see Building with Maven.
Feedback
Was this page helpful?
Provide feedbackThank you very much for your feedback. We will continue working to improve the documentation.See the reply and handling status in My Cloud VOC.
For any further questions, feel free to contact us through the chatbot.
Chatbot


