
Releasing/Obtaining a Maven Component via a Build Task
This section describes how to release a Maven component to a self-hosted repo via a build task and obtain the component from the repository for deployment.
Prerequisites
- You already have a project. If no project is available, create one.
- You have permissions for the current repository. For details, see Managing Repository Permissions
- You have created a Maven repository and associated it with the project
Releasing a Maven Component to a Self-Hosted Repo
- Configure a repository.
- Log in to CodeArts and go to a created project. Choose on the top navigation bar.
- Create a Maven repository. For details, see Creating a Repository Using a Template. This procedure uses the Java Maven Demo template.
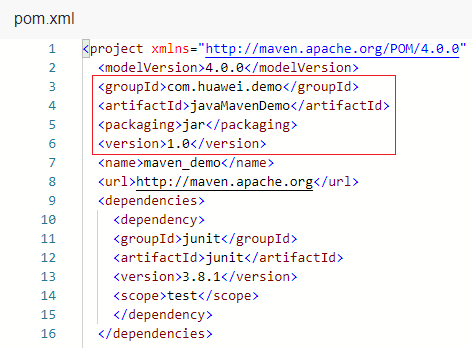
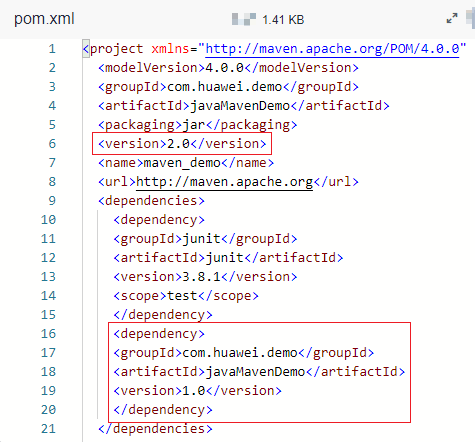
- Go to the code repository and view the component configuration in the pom.xml file.
- Configure and run a build task.
- On the Repo page, select a repository and click Create Build Task in the upper right.
Select Blank Template and click OK.
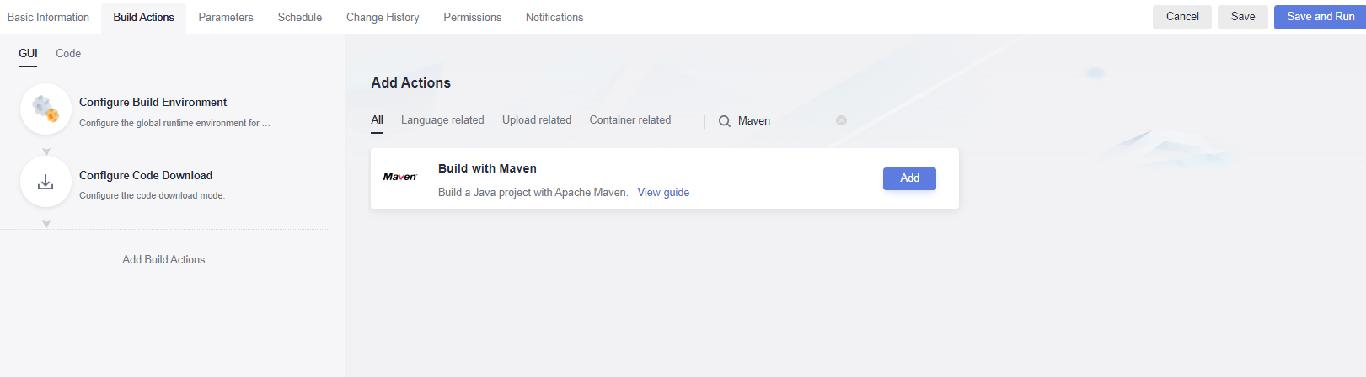
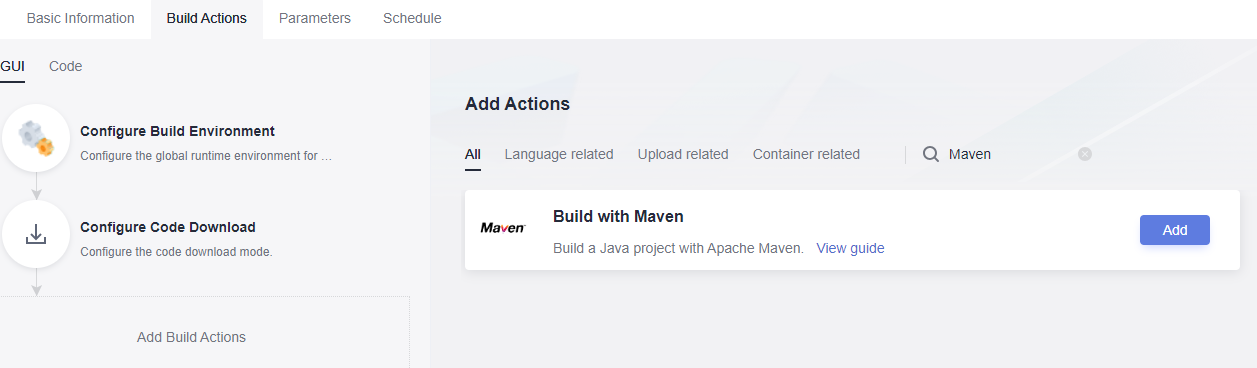
- Add the Build with Maven action.
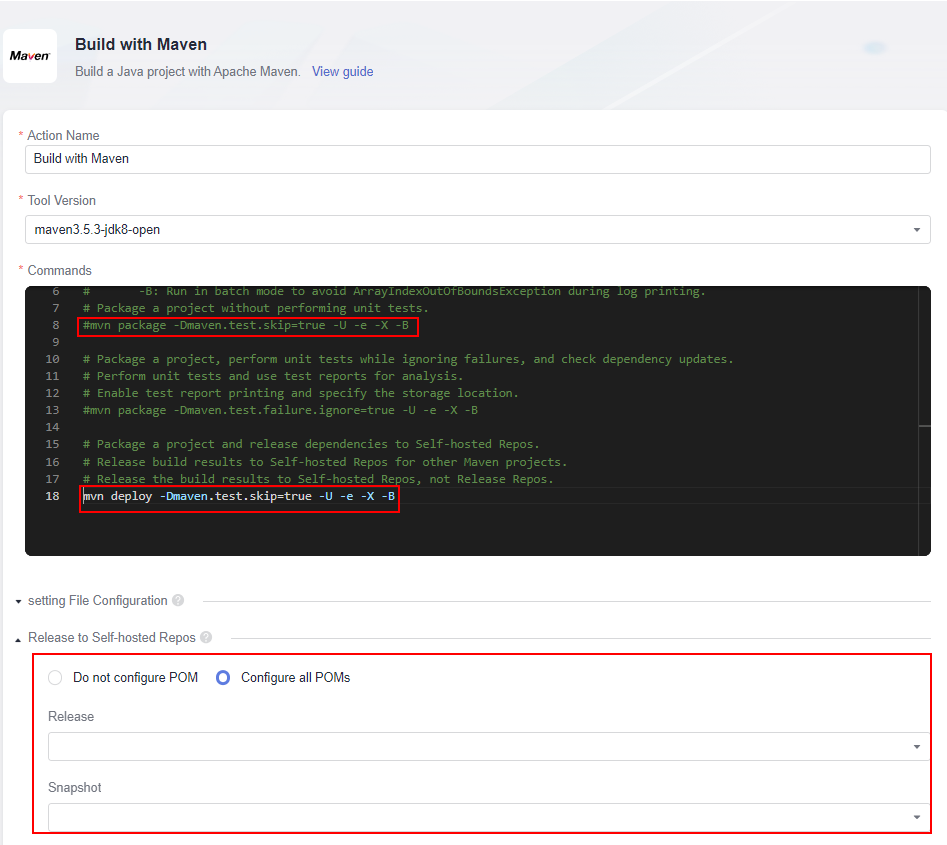
- Edit the Build with Maven action.
- Select the desired tool version. In this example, maven3.5.3-jdk8-open is used.
- Find the following command and delete # in front of this command:
#mvn deploy -Dmaven.test.skip=true -U -e -X -B
Find the following command and add # in front of this command:mvn package -Dmaven.test.skip=true -U -e -X -B
- Select Configure all POMs under Release to Self-hosted Repos, and select the Maven repository associated with the project.

If no option is available in the drop-down list, associate the Maven repository with the project of the build task by referring to Associating Maven Repository with Projects.
- On the Repo page, select a repository and click Create Build Task in the upper right.
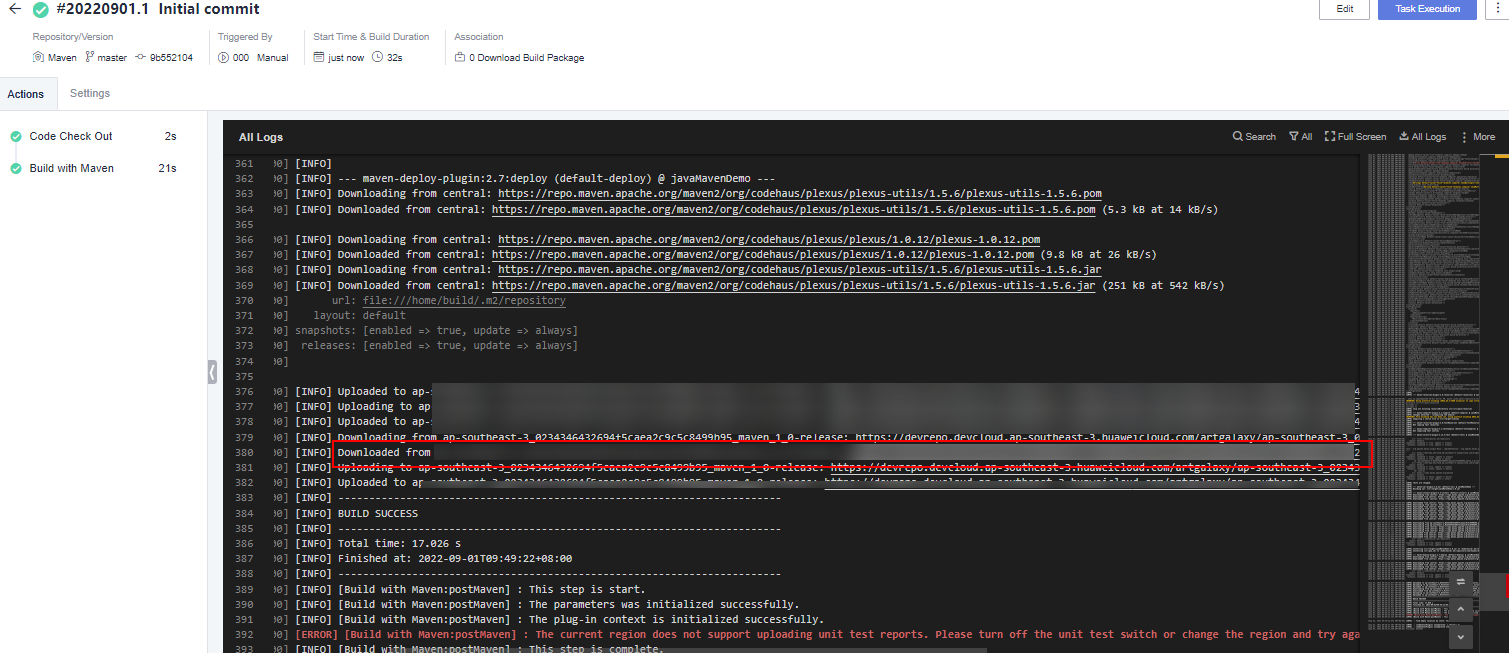
- Click Save and Run on the right of the page to start the build task.
After the task is successfully executed, go to the self-hosted repo page and find the uploaded Maven component.
Obtaining a Maven Component from a Self-Hosted Repo
The following procedure uses the Maven component released in Releasing a Maven Component to a Self-Hosted Repo as an example to describe how to obtain the component from a self-hosted repo as a dependency.
- Configure a repository.
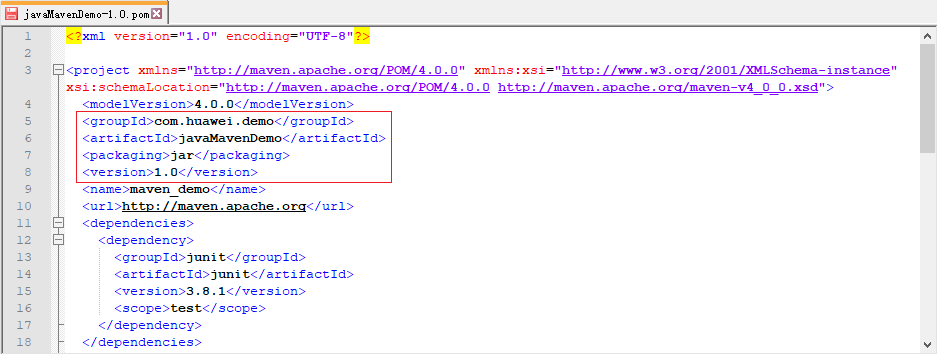
- Go to the Maven repository and find the Maven component. Click the .pom file with the same name as the component and click Download on the right.
- Open the downloaded file and locate the <groupId>, <artifactId>, and <version> lines.
- Go to Repo. Create a Maven repository. For details, see Creating a Repository Using a Template. This procedure uses the Java Maven Demo template.
- Go to the code repository and edit the pom.xml file. Copy the dependency code segment to the dependencies code segment and modify the version number (for example, 2.0).
- Configure and run a build task.
- On the Repo page, select a repository and click Create Build Task in the upper right.
Select Blank Template and click OK.
- Add the Build with Maven action.
- Click Save and Run on the right of the page to start the build task.
After the task is successfully executed, view the task details. If information similar to the following is found in the log, the dependency has been downloaded from the self-hosted repo.
- On the Repo page, select a repository and click Create Build Task in the upper right.
Feedback
Was this page helpful?
Provide feedbackThank you very much for your feedback. We will continue working to improve the documentation.See the reply and handling status in My Cloud VOC.
For any further questions, feel free to contact us through the chatbot.
Chatbot


