Updated on 2024-02-02 GMT+08:00

Managing Tables

You can manage metadata databases and metadata tables in the data catalog and create data tables based on the service plan.

Prerequisites

  • A LakeFormation instance has been created and is running properly.
  • A catalog and a database have been created.
  • You have created an OBS parallel file system for storing tables by referring to Creating a Metadata Storage Path.

Creating a Table

  1. Log in to the LakeFormation console.
  2. In the upper left corner, click and choose Analytics > LakeFormation to access the LakeFormation console.
  3. Select a LakeFormation instance from the drop-down list box on the left, choose Metadata > Table, and select names of the target catalog and database from the Catalog and Database drop-down lists in the upper right corner. You can view the tables contained in the selected database.
  4. Click Create and set related parameters.

    1. In the Basic Information area, set the related parameters.
      Table 1 Parameters for creating a table

      Parameter

      Description

      Table Name

      Enter a metadata table name.

      The value should contain 1 to 256 characters. Only letters, numbers, and underscores (_) are allowed.

      Catalog

      Select the catalog to which the table to be created belongs.

      Database

      Select the database to which the table to be created belongs.

      Table Type

      Type of the table to be created. Currently, the following types are supported:

      • MANAGED_TABLE: management table. If a management table or partition is deleted, the data and metadata associated with the table or partition are deleted.
      • EXTERNAL_TABLE: external table. An external table is used when the file already exists or is stored in a remote location.
      • VIRTUAL_VIEW: virtual view. It does not store actual data or occupy physical space.
      • MATERIALIZED_VIEW: materialized view. It stores actual data and occupies physical space.

      Data Storage Location

      File directory of the OBS parallel file system to which the table is mapped.

      Click , select a location for storing the table in the OBS parallel file system, and click OK.
      • The selected location must start with obs:// and must contain one storage object. For example, select obs://lakeformation-test/catalog1/database1/table1. If no suitable parallel file system is available, click go to OBS and create one.
      • The path must be different from the storage path of the catalog and database to which the belongs.
      • If a table storage path is added for the database to which the table belongs, set this parameter to the subpath of the table storage path or that of the path specified by Select Location during database creation.

      Compress Data

      Whether to compress a data table.

      By using table compression, you can store data in a compressed format and improve performance and storage space.

      Data Source Format

      Data source format of the table to be created. Currently, the following types are supported:

      • Avro
      • Json
      • Xml
      • Parquet
      • Csv
      • Orc
      • Text
      • Rc
      • Sequence
      • Custom

        Parameters Input Format, Output Format, Serde name, and SerializationLib are displayed if Data Source Format is set to Custom. Set these parameters based on the site requirements.

      Separator

      This parameter is displayed if Data Source Format is set to Csv. The values include:

      • Comma(,)
      • Vertical bar(|)
      • Semicolon(;)
      • Tab(\u0009)
      • Ctrl-A(\u0001)

      Description

      Description of the created table.

      The content length must be between 0 and 4000 bytes (3 bytes per Chinese character).

    2. (Optional) Click Add in the Table Field area. Manually add metadata table fields as required. Click OK.

      Click to add more table fields. Click to delete a table field.

      A table field is an independent piece of information that forms a record in a table.

    3. (Optional) Click Add in the Partition Key area. Manually add the partition key of the metadata as required. Click OK.

      Click to add more partition keys. Click to delete a partition key.

      A partition key is an ordered set of one or more table columns. The values in the table partition keys are used to determine the data partition that a row belongs to.

    4. (Optional) Click Add in the Table Attributes area. Add metadata table attributes as required. Click OK.

      Click to add more table attributes. Click to delete a table attribute.

      A table attribute enables you to tag table definitions with your own metadata key-value pairs.

    5. Click Submit.

  5. After the table is created, you can view the table name/ID, catalog, database, type, and storage location on the Table page.

    Click Modify in the Operation column to modify the configurations of a table.

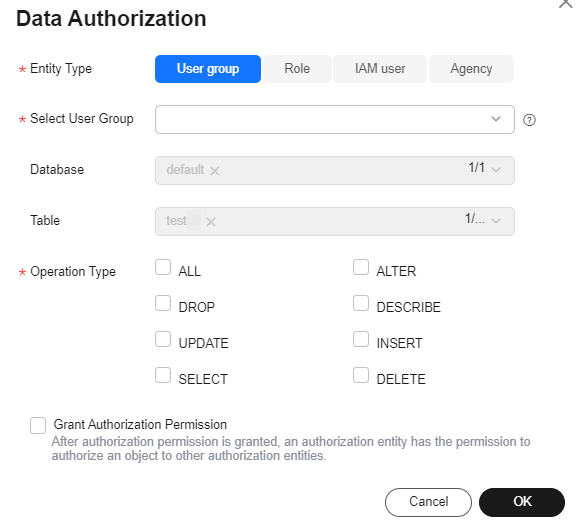
    Click More and then click Authorize in the Operation column to authorize a table.

    Click More to authorize or delete a datable, or view the permissions of a table.

    If files are deleted when metadata is deleted, the system processes the files based on the deletion policy that you have configured. For how to configure a deletion policy, see Configuring Metadata Lifecycle. If no deletion policy is configured, data is moved to the recycle bin (OBS path lake-formation-trash-dir/table_id) by default.

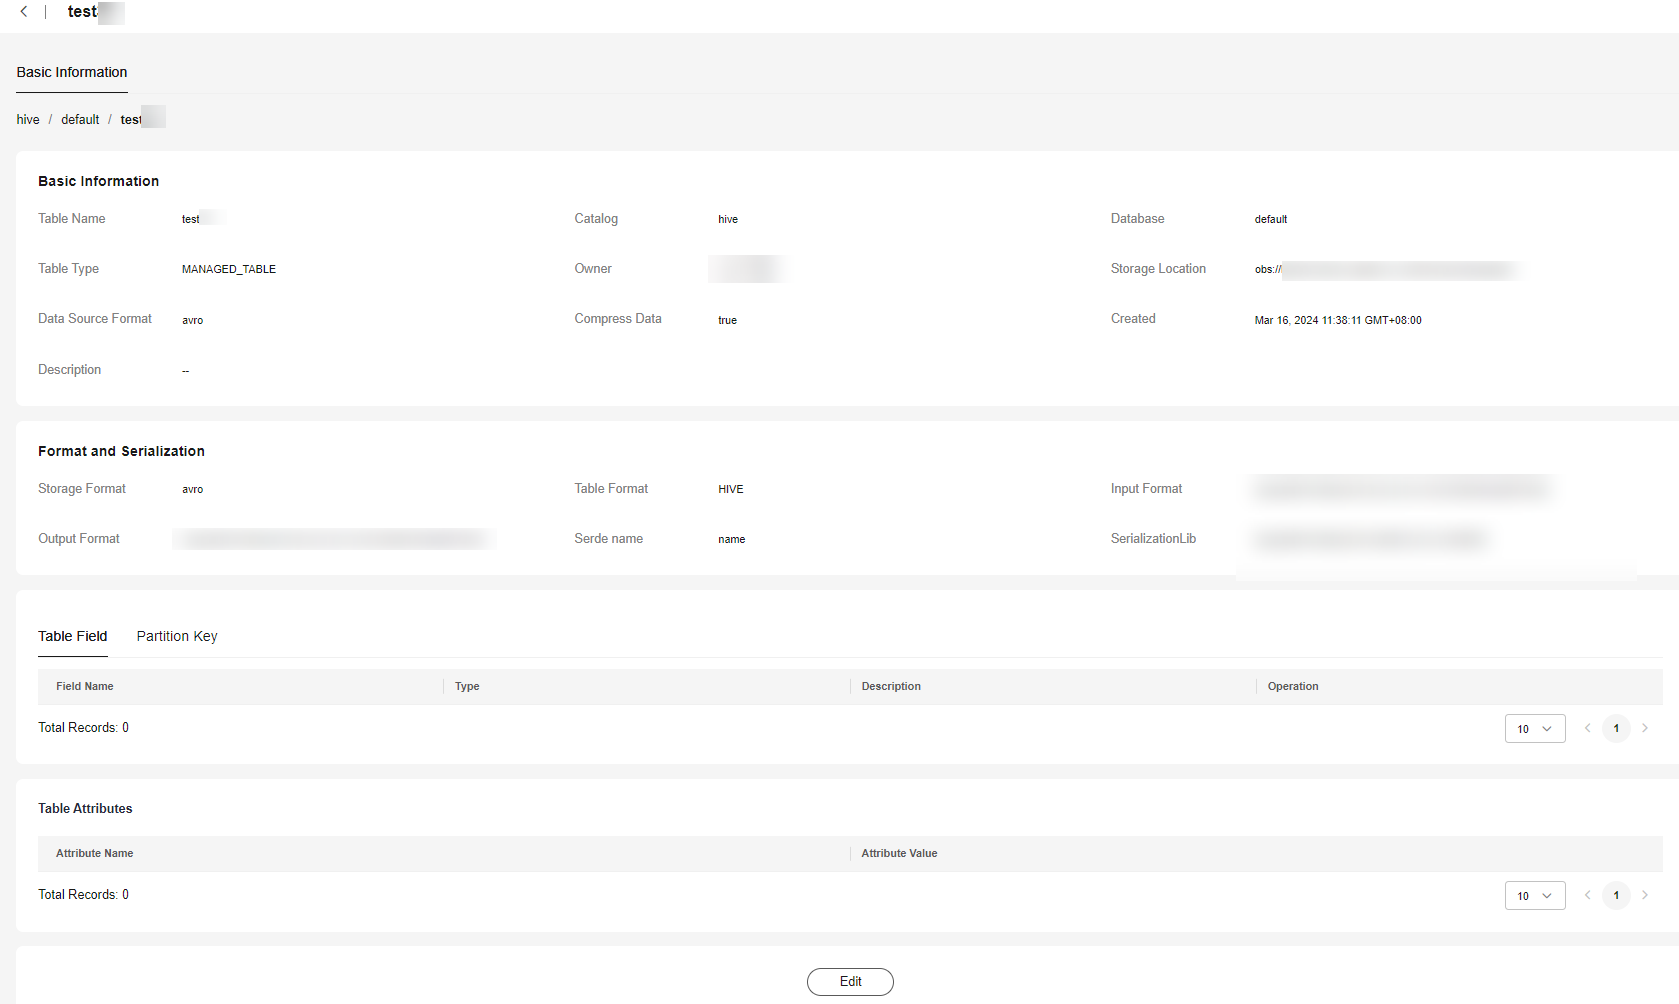
  6. Click a table name to view its detailed metadata information.

    • The format and serialization information includes the storage format, input format, and output format.
    • The field information includes the table field name, type, and description, and the field name, type, and description of the partition key.
    • The table attribute information includes the name and value of each attribute in the table.

    Locate the row that contains the target table and click Edit to modify the fields in it.