
Server-based Migration to the Cloud Without Business Interruption (VPN + Enterprise Switch)
Architecture
The simulated scenario is described as follows:
- AP-Singapore: is used to simulate an on-premises data center. Workloads of department A are running on the ECSs with IP addresses 10.0.1.131 and 10.0.1.8 in subnet-1. The two ECSs form a cluster to provide services.
- CN-Hong Kong: is used to simulate the cloud. On-premises workloads of department A will be migrated to the ECS with IP address 10.0.1.8 on the cloud.
- Use VPN and an enterprise switch to connect subnets in AP-Singapore and CN-Hong Kong at Layer 2 and migrate the ECS with IP address 10.0.1.8 from the on-premises subnet to the cloud subnet.
- Delete the ECS with IP address 10.0.1.8 in the data center after the migration. The ECS with IP address 10.0.1.131 in the data center and the ECS with IP address 10.0.1.8 on the cloud can communicate with each other.

Resource and Cost Planning
|
Region |
Resource |
Resource Name |
Description |
Quantity |
|---|---|---|---|---|
|
CN-Hong Kong: Huawei Cloud (Local) |
VPC |
vpc- hongkong |
CIDR block: 10.0.0.0/16 |
1 |
|
Subnet |
subnet-1 |
CIDR block: 10.0.1.0/24 Layer 2 connection subnet on Huawei Cloud. ECS in the on-premises data center will be migrated to this subnet. |
2 |
|
|
subnet-5 |
CIDR block: 10.0.5.0/24 This is the tunnel subnet on Huawei Cloud, used by the VPN. |
|||
|
ECS |
ecs- hongkong-8 |
Private IP address: 10.0.1.21 ECS on Huawei Cloud. Its IP address is changed from 10.0.1.21 to 10.0.1.8 after migration. |
1 |
|
|
VPN |
vpn- hongkong |
|
1 |
|
|
Enterprise switch |
l2cg- hongkong |
|
1 |
|
|
Layer 2 connection |
l2conn- hongkong |
|
1 |
|
|
AP-Singapore On-premises data center (Remote) |
VPC |
vpc- singapore |
CIDR block: 10.0.0.0/16 |
1 |
|
Subnet |
subnet-1 |
CIDR block: 10.0.1.0/24 Layer 2 connection subnet that the ECS to be migrated in the on-premises data center is located. |
2 |
|
|
subnet-3 |
CIDR block: 10.0.3.0/24 Tunnel subnet in the on-premises data center. VPN is located in this subnet. |
|||
|
ECS |
ecs- singapore-131 |
Private IP address: 10.0.1.131 ECS in the on-premises data center |
2 |
|
|
ecs- singapore-8 |
Private IP address: 10.0.1.8 ECS to be migrated in the on-premises data center |
|||
|
VPN |
vpn- singapore |
|
1 |
|
|
Enterprise switch |
l2cg- singapore |
|
1 |
|
|
Layer 2 connection |
l2conn- singapore |
|
1 |
Step 1: Create VPCs and Subnets
- Log in to the Huawei Cloud management console and select the AP-Singapore region.
- Choose Networking > Virtual Private Cloud, and click Create VPC.
- Configure a VPC in AP-Singapore based on Resource and Cost Planning and click Create Now.
- Region: AP-Singapore
- Name: vpc-singapore
- IPv4 CIDR Block: 10.0.0.0/16
- Name: subnet-1
- IPv4 CIDR Block: 10.0.1.0/24
- Click Add Subnet.
- Name: subnet-3
- IPv4 CIDR Block: 10.0.3.0/24
- For parameters not mentioned, retain their default values or configure them as prompted.
- View the created VPC in the VPC list.
- Click Create VPC, configure the VPC in CN-Hong Kong based on Resource and Cost Planning, and click Create Now.
- Region: CN-Hong Kong
- Name: vpc-hongkong
- IPv4 CIDR Block: 10.0.0.0/16
- Name: subnet-1
- IPv4 CIDR Block: 10.0.1.0/24
- Click Add Subnet.
- Name: subnet-5
- IPv4 CIDR Block: 10.0.5.0/24
- For parameters not mentioned, retain their default values or configure them as prompted.
- View the created VPC in the VPC list.
Step 2: Create ECSs
- Under Compute, select Elastic Cloud Server. On the Elastic Cloud Server page displayed, click Buy ECS.
- Buy an ECS in AP-Singapore based on Resource and Cost Planning and click Next: Configure Network.
- Billing Mode: Pay-per-use
- Region: AP-Singapore
- Specifications: Select based on service requirements. This practice uses c6.large.2 as an example.
- Image: Select Public image. This practice uses CentOS 8.0 as an example.
- For parameters not mentioned, retain their default values or configure them as prompted.
- Configure the ECS network and click Next: Configure Advanced Settings.
- Network: Select vpc-singapore, Manually specify IP address, and set the IP address.
- Security Group: Select Sys-FullAccess. This practice uses a security group that allows all inbound and outbound traffic. You can select a security group based on service requirements.
- EIP: Not required
- For parameters not mentioned, retain their default values or configure them as prompted.
- Set the ECS name and password, and click Next: Confirm.
- ECS Name: ecs-singapore-131
- Login Mode: Select Password and enter a password.
- For parameters not mentioned, retain their default values or configure them as prompted.
- Confirm the ECS information, agree to the agreement, and click Submit.
- In the ECS list, locate the row that contains the ECS and click Remote Login in the Operation column. In the displayed dialog box, click Log In under Other Login Modes.
- Log in to the ECS as user root and check whether the private IP address of the ECS is the one you planned:
ifconfig

- Repeat 1 to 7 to create ecs-singapore-8 (10.0.1.8) in AP-Singapore and ecs-hongkong-8 (10.0.1.8) in CN-Hong Kong.
- Log in to ecs-singapore-131 as user root and run the following command to check whether the ECSs in the subnet can communicate with each other:
ping 10.0.1.8
Step 3: Create VPN
- Choose Networking > Virtual Private Network, click VPN Gateways and then Buy VPN Gateway.
- Configure all required parameters based on Resource and Cost Planning and click Buy Now.
- VPN gateway
- Billing Mode: Pay-per-use
- Region: AP-Singapore
- VPC: vpc-singapore
- Billed By: Traffic
- VPN connection
- Name: vpn-singapore
- Local Subnet: subnet-3
- Remote Gateway: Enter 1.1.1.1. Change this value to that of the gateway in CN-Hong Kong after it is created.
- Remote Subnet: Enter 10.0.5.0/24, the subnet in CN-Hong Kong.
- PSK: Enter a PSK. Make a note of the PSK, which will be used when you create a VPN connection in CN-Hong Kong.
- For parameters not mentioned, retain their default values or configure them as prompted.
- VPN gateway
- Confirm the settings and click Buy Now.
- On the VPN Connections tab, make a note of the local gateway and local subnet, which will be used when creating a VPN gateway in CN-Hong Kong.
- Repeat 1 to 4 to create a VPN in CN-Hong Kong. The key parameters are as follows:
- VPN gateway
- Billing Mode: Pay-per-use
- Region: CN-Hong Kong
- VPC: vpngw-hongkong
- Billed By: Traffic
- VPN connection
- Name: vpn-hongkong
- Local Subnet: subnet-5
- Remote Gateway: Enter 119.3.121.173, the gateway in AP-Singapore.
- Remote Subnet: Enter 10.0.3.0/24, the local subnet in AP-Singapore.
- PSK: Enter the PSK that is the same as the one when creating the VPN gateway in AP-Singapore.
- For parameters not mentioned, retain their default values or configure them as prompted.
- VPN gateway
- On the VPN Connections tab, make a note of the local gateway for changing the value of the remote gateway of the VPN gateway in AP-Singapore.
- Switch to the AP-Singapore region, go to the VPN console, locate the row that contains vpn-singapore, choose More > Modify, change the value of Remote Gateway to the value of Local Gateway of vpn-hongkong, and click OK.
- Submit a service ticket to check whether your VPN connection supports VXLAN interconnection with an enterprise switch. If your connection does not support this, contact the VPN service to enable the interconnection.
A VPN has been configured for the subnets in AP-Singapore and CN-Hong Kong and the VPN status is not connected. The VPN takes effect only when there are traffic requests between the two subnets.
Step 4: Buy Enterprise Switch
- On the console homepage, choose Networking > Enterprise Switch.
The enterprise switch page is displayed.
- In the upper right corner of the page, click Buy.
The page for buying an enterprise switch is displayed.
- Configure parameters and click Next.
- Region: AP-Singapore
- Tunnel Connection: VPN
- Connection Gateway: vpngw-singapore
- Tunnel Subnet: subnet-3
- Name: l2cg-singapore
- For parameters not mentioned, retain their default values or configure them as prompted.
- This operation takes about 6 minutes. Make a note of the local tunnel IP address (10.0.3.131) of l2cg-singapore.
During the creation, refresh the page.
- Repeat 1 to 3 to create an enterprise switch in CN-Hong Kong. Configure the parameters as follows:
- Region: CN-Hong Kong
- Tunnel Connection: VPN
- Connection Gateway: vpngw-hongkong
- Tunnel Subnet: subnet-5
- Name: l2cg-hongkong
- For parameters not mentioned, retain their default values or configure them as prompted.
- This operation takes about 6 minutes. Make a note of the local tunnel IP address (10.0.5.196) of l2cg-hongkong.
During the creation, refresh the page.
- On the l2cg-hongkong tab, click Create Connection, configure Remote Access Information, and click Create.
- Tunnel VNI: 1000
- Tunnel IP Address: Enter 10.0.3.131, the local tunnel IP address of l2cg-singapore.
- Name: l2conn-hongkong
- For parameters not mentioned, retain their default values or configure them as prompted.
- This operation takes about 2 minutes. When the status changes to Connected, the Layer 2 connection in CN-Hong Kong is successfully created.
During the creation, refresh the page.
- On the l2cg-singapore tab, click Create Connection, configure Remote Access Information, and click Create.
- Tunnel VNI: 1000
- Tunnel IP Address: Enter 10.0.5.196, the local tunnel IP address of l2cg-hongkong.
- Name: l2conn-singapore
- For parameters not mentioned, retain their default values or configure them as prompted.
- This operation takes about 2 minutes. When the status changes to Connected, the Layer 2 connection in AP-Singapore is successfully created.
During the creation, refresh the page.
Step 5: Migrate an On-Premises Server to the Cloud
- Migrate ecs-singapore-8 (10.0.1.8) from AP-Singapore to ecs-hongkong-8 (10.0.1.21) in CN-Hong Kong.
For details, see Server Migration Service Quick Start.
- Check whether ecs-singapore-131 (10.0.1.131) in AP-Singapore and ecs-hongkong-8 (10.0.1.21) in CN-Hong Kong can communicate at Layer 2.
- Choose Compute > Elastic Cloud Server and switch to the AP-Singapore region.
- Log in to ecs-singapore-131.
Multiple methods are available for logging in to an ECS. For details, see Logging In to an ECS.
In this example, use VNC provided on the management console to log in to an ECS.
- Run the following command to check whether ecs-singapore-131 can access ecs-hongkong-8:
- Choose Compute > Elastic Cloud Server and switch to the CN-Hong Kong region.
- Log in to ecs-hongkong-8.
Multiple methods are available for logging in to an ECS. For details, see Logging In to an ECS.
In this example, use VNC provided on the management console to log in to an ECS.
- Run the following command to check whether ecs-hongkong-8 can access ecs-singapore-131:
Step 6: Changing the IP Address of the ECS on the Cloud
- Choose Compute > Elastic Cloud Server and switch to the AP-Singapore region.
- Locate the row that contains ecs-singapore-8 (10.0.1.8), click More in the Operation column, and click Stop.
- Choose Compute > Elastic Cloud Server and switch to the CN-Hong Kong region.
- Locate the row that contains ecs-hongkong-8 (10.0.1.21), click More in the Operation column, and click Stop.
- Stop ecs-hongkong-8 and choose More > Manage Network > Modify Private IP.
Change the private IP address of ecs-hongkong-8 from 10.0.1.21 to 10.0.1.8.
Step 7: Verify Network Communication Between Cloud and On-premises Servers
- Choose Compute > Elastic Cloud Server and switch to the AP-Singapore region.
- Locate the row that contains ecs-singapore-8 (10.0.1.8), click More in the Operation column, choose Delete and release its EIP and data disks.
This is to delete the on-premises server after its workloads are migrated to the cloud.
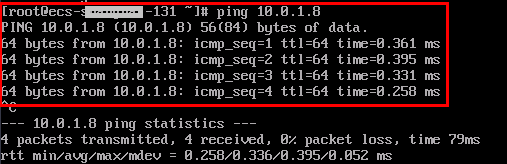
- Log in to ecs-singapore-131 (10.0.1.131).
Multiple methods are available for logging in to an ECS. For details, see Logging In to an ECS.
In this example, use VNC provided on the management console to log in to an ECS.
- Run the following command to check whether ecs-singapore-131 can access ecs-hongkong-8:
ping 10.0.1.8
If information similar to the following is displayed, the two ECSs can communicate with each other.

- Choose Compute > Elastic Cloud Server and switch to the CN-Hong Kong region.
- Log in to ecs-hongkong-8 (10.0.1.8).
Multiple methods are available for logging in to an ECS. For details, see Logging In to an ECS.
In this example, use VNC provided on the management console to log in to an ECS.
- Run the following command to check whether ecs-hongkong-8 can access ecs-singapore-131:
ping 10.0.1.131
If information similar to the following is displayed, the two ECSs can communicate with each other.

- Choose Networking > Virtual Private Network and switch to the AP-Singapore or CN-Hong Kong region. The VPN connection status changes to normal.
On-premises and cloud servers can communicate at Layer 2 and workloads can be migrated on a server basis without interrupting services.
Feedback
Was this page helpful?
Provide feedbackThank you very much for your feedback. We will continue working to improve the documentation.See the reply and handling status in My Cloud VOC.
For any further questions, feel free to contact us through the chatbot.
Chatbot


