Creating a Blank BPM
If the preset BPM templates cannot meet your service requirements, you can create a blank BPM and design it by yourself. Similar to flows, a BPM is also a visual tool. However, it focuses on the service processes that involve user behaviors, such as approvals and ticket handling.
Creating a Blank BPM
- Log in to the application designer by referring to Logging In to the Application Designer.
- In the navigation pane, choose BPMs.
- (Optional) Click
 next to BPM to add a folder.
By default, BPMs are stored in the root folder. Before creating a BPM, you can create a folder for storing the BPM. You can drag the BPM to a specified folder.
- Move the cursor to a folder and click
 . The page for adding a BPM is displayed.
If no folder is created, click
 next to BPM. The page for adding a BPM is displayed.
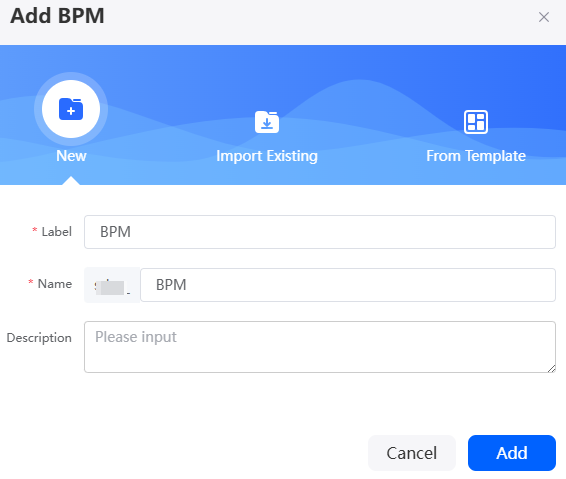
 - Specify the label and name and click Add.
Figure 1 Setting the label and name

- Design a BPM based on service requirements.
- Add work queues and lanes by referring to Creating a Work Queue and Defining a Lane.
- Add diagram elements required by the work queue. For details about the diagram elements, see Adding Diagram Elements for BPMs.
- Connect diagram elements and specify their logical relationships.
Identify the required diagram elements and their logical order for the BPM, tailored to the specific service scenario. Then, arrange and connect these elements in the correct sequence according to the established logic.
- After the BPM is configured, click
 in the upper part of the page to save it.
 - Click
 to activate the BPM.
A BPM can be used in other processes only after it is activated.
Feedback
Was this page helpful?
Provide feedbackThank you very much for your feedback. We will continue working to improve the documentation.See the reply and handling status in My Cloud VOC.
For any further questions, feel free to contact us through the chatbot.
Chatbot


