Creating a BPM Using a Template
Scenario
- General: General Approval, Multi-level Approval, and Parallel Approval
- HR: Absence Request, Travel Request, Performance Evaluation, Probation Confirmation, and Work Handover
- Finance: Loan Request, ERP Credit Line Increase Approval, and Business Plan Approval
- Project: Schedule Management, Version Management, and Release Management
Creating a BPM Based on a Template
- Log in to the application designer by referring to Logging In to the Application Designer.
- In the navigation pane, choose BPMs.
- Click + next to BPM.
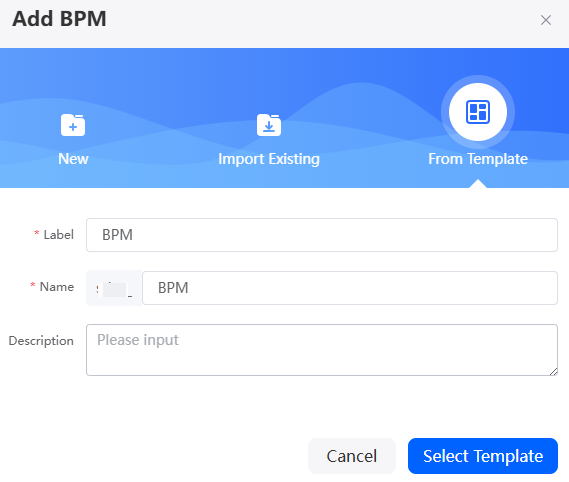
- On the displayed dialog box, select From Template, specify the label and name, and click Select Template.
Figure 1 Setting the label and name

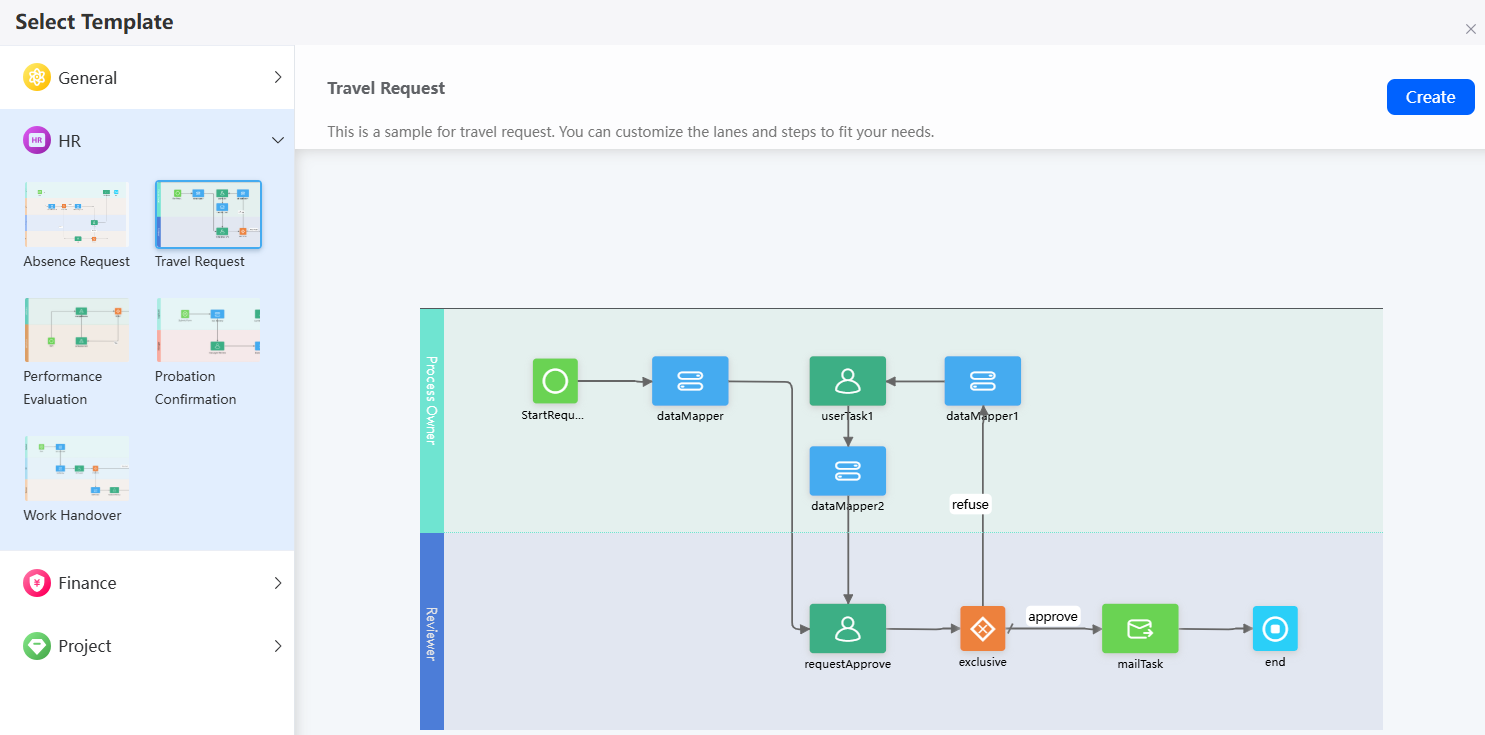
- On the Select Template page, select a template and click Create.
Figure 2 Selecting a template

- Create a lane and a work queue by referring to Creating a Work Queue and Defining a Lane.
- After the BPM is configured, click
 in the upper part of the page to save it.
 - Click
 to activate the BPM.
A BPM can be used in other processes only after it is activated.
Related Documents
Employee business trips are a common scenario, involving steps like applying, getting approval, planning itineraries, and reimbursing expenses. You can quickly create an approval application using the business trip template. For details, see Creating a Business Trip Approval Workflow Using Templates.
Feedback
Was this page helpful?
Provide feedbackThank you very much for your feedback. We will continue working to improve the documentation.See the reply and handling status in My Cloud VOC.
For any further questions, feel free to contact us through the chatbot.
Chatbot


