Creating a Form
A form is made up of widgets such as text boxes, option buttons, and drop-down lists. It collects user data. You can create multiple forms in an application. Each form is for a data type.
- Creating a blank form: Drag and arrange widgets that match the field data type on the canvas to create a form. A form, along with its views and statistical tables, make up an application.
- Creating a form from Excel: Design the form fields and data in Excel. Then, import it to quickly create a form. The Excel file must meet these rules:
- Upload one Excel file with as many sheets as you need. Each sheet becomes a separate form.
- Each file must not exceed 10 MB.
- Each sheet can have up to 200 columns and 10,000 rows.
Prerequisites
You have created a no-code application. If not, see Creating a No-Code Application.
- Log in to the no-code workbench by referring to Logging In to the No-Code Workbench.
- In All Apps, hover over the target application's ... and choose Edit.
- In the list on the left of the application editing page, click Create and choose Create Form.
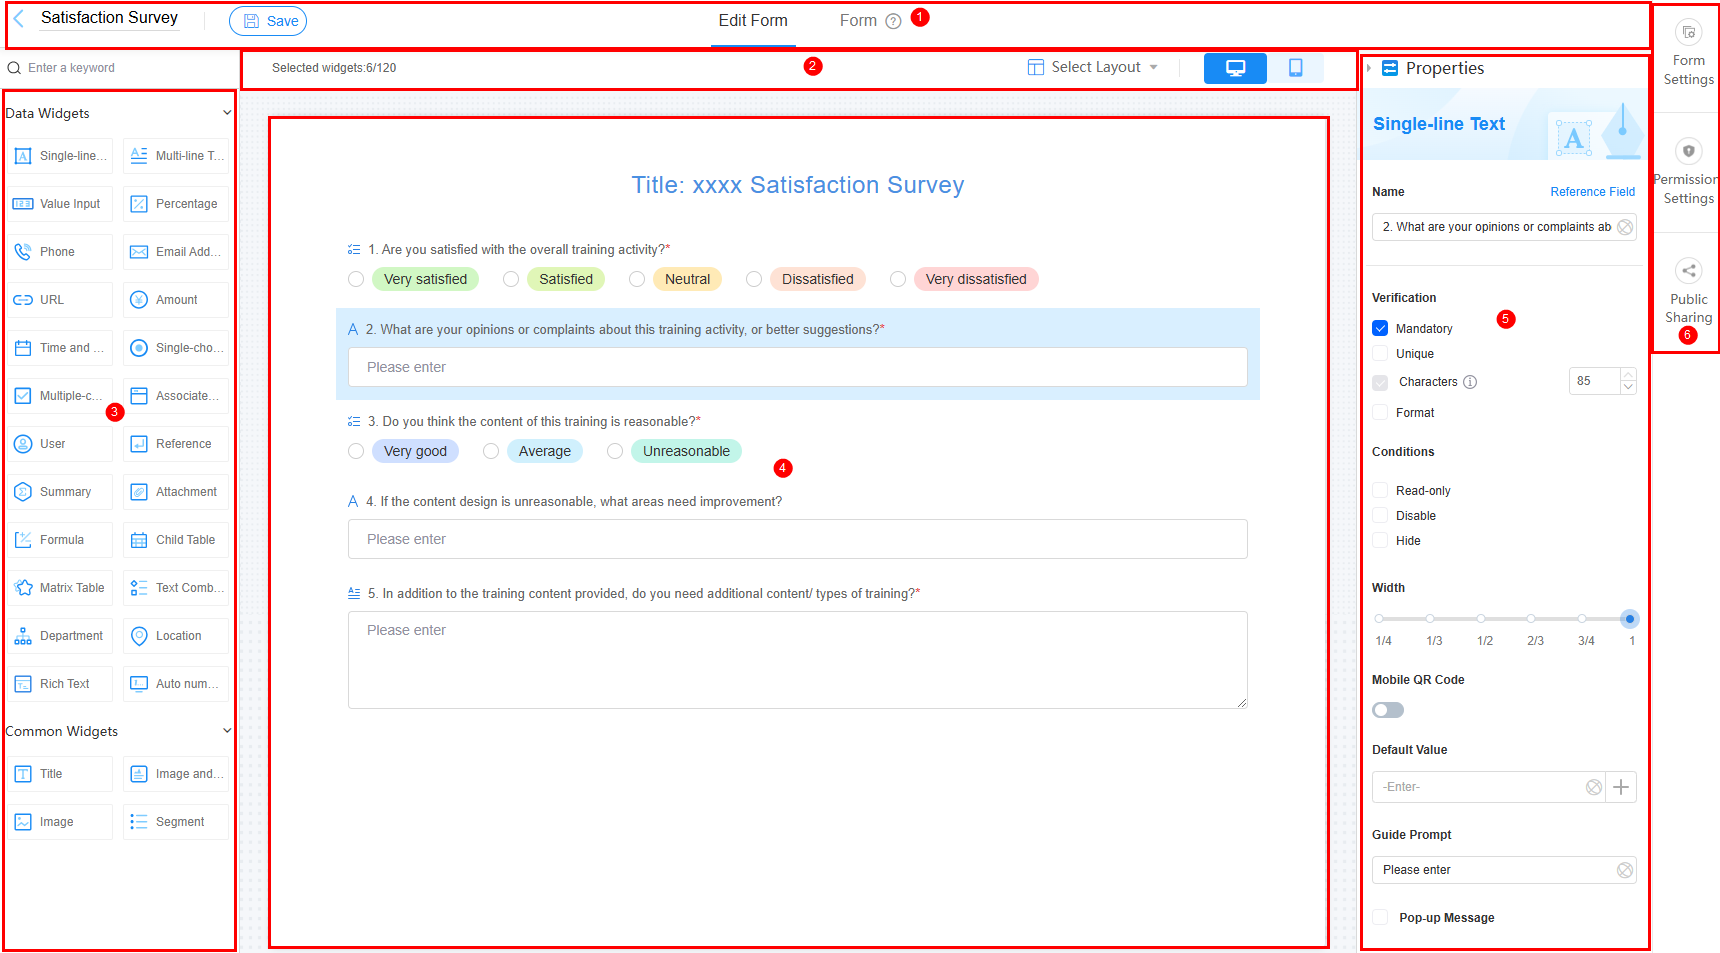
- On the displayed page, move the cursor to Create Blank Form and click Create to access the application editor. See Figure 1.
Table 1 Editor functions Area
Description
1
This area offers:
- Form name setting.
- Form data saving.
- Form editing: Drag and drop widgets to design the form.
- Form filling: Share a fill-in page for surveys, votes, or clock-ins and set rules as needed.
2
- Click Select Layout to adjust the number of form columns.
- Choose where the form appears: PC or mobile.
3
Widget area: data widgets and common widgets. For details about each widget, see Setting Form Widget Properties.
4
Form design area.
5
Widget property panel.
6
See Customizing a Form and Setting the Form Visibility Permission to set form properties.
- Design a form.
A form is made up of widgets such as text boxes, option buttons, and drop-down lists. You can create multiple forms in an application. Each form is for a data type. See Adding Widgets For a Form and Setting Form Widget Properties to add widgets to a form and set widget properties.
On the workbench, you can build forms for surveys, meeting room bookings, expense claims, meal orders, health check-ins, or polls.
Figure 2 Meal order form
- Customize the form.
Creating a Form Filling Page for a Form: Create a data entry page for users to vote, answer surveys, or clock in/out. Set rules such as allowing repeat entries or showing only selected fields.
Customizing a Form: Set the form's data title, features, and submission prompts.
Setting the Form Visibility Permission: Grant the view permission for the form.
Sharing Forms: Open the form via a link or QR code without logging in.
- Click the save button.
The form appears in the application editor.
- Log in to the no-code workbench by referring to Logging In to the No-Code Workbench.
- In All Apps, hover over the target application's ... and choose Edit.
- In the list on the left of the application editing page, click Create and choose Create Form.
- On the Create Form page, move the cursor to Create from Excel and click Create.
Figure 3 Selecting Create from Excel

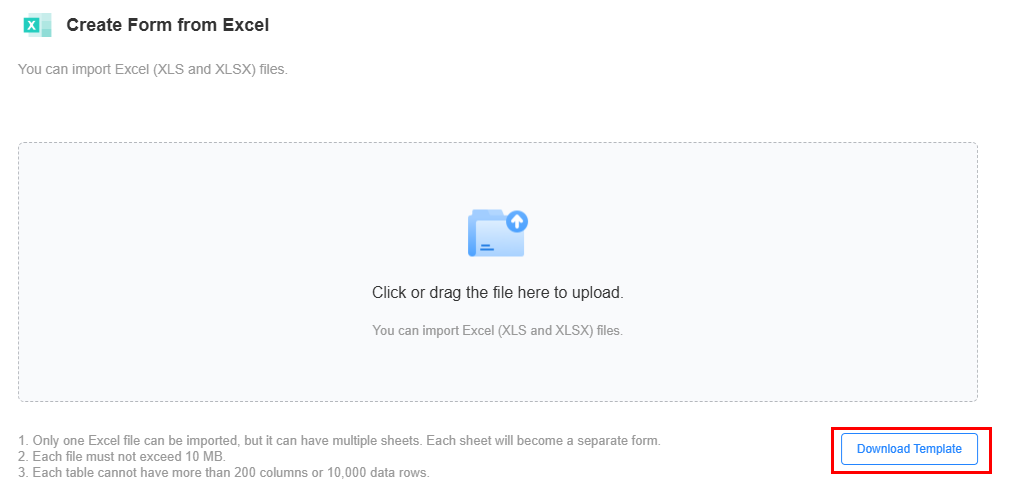
- On the displayed page, download the template.
- The downloaded template is Supplier List.xlsx. Modify the data for your needs.
Notes:
- Upload one Excel file with as many sheets as you need. Each sheet becomes a separate form.
- Each file must not exceed 10 MB.
- Each sheet can have up to 200 columns and 10,000 rows.
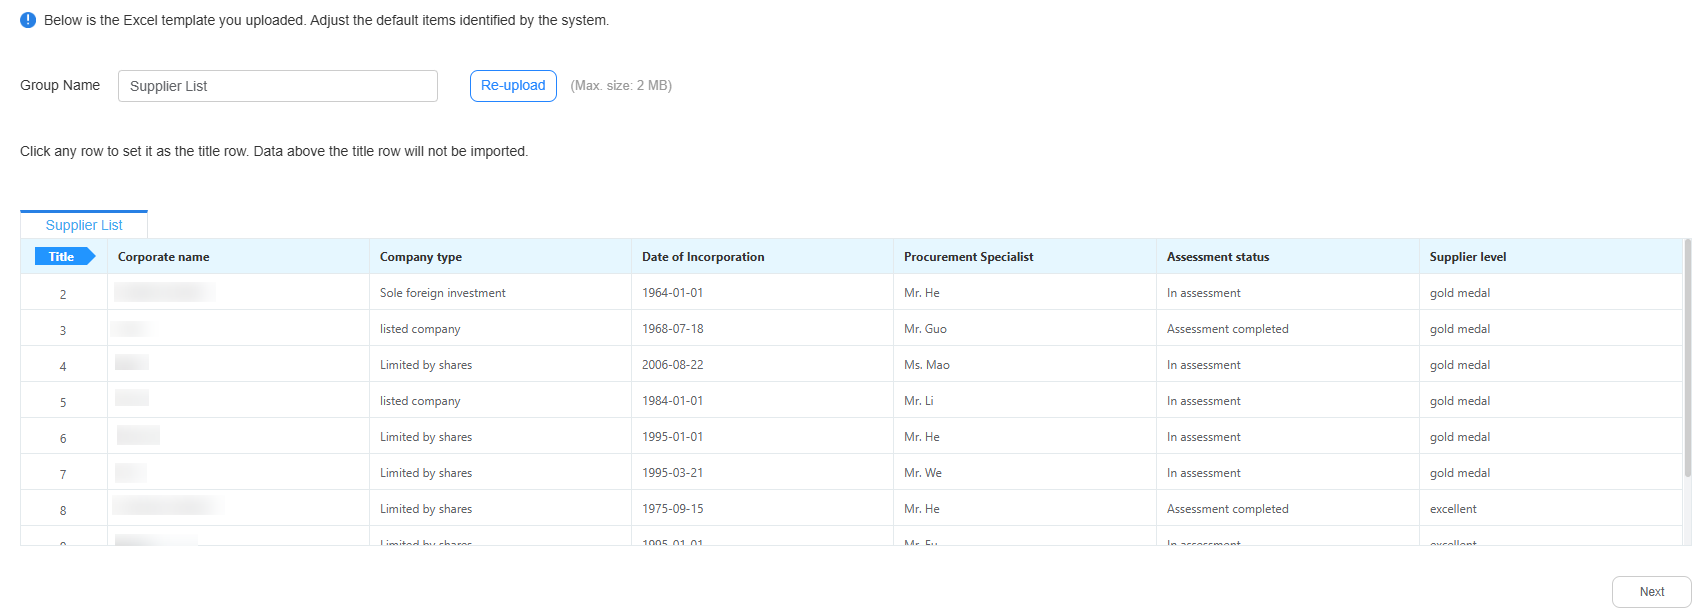
- Drag the Supplier List.xlsx file to the middle area, see Figure 4. Figure 5 is displayed.
- Click Next and check the title types the system has assigned.
Figure 6 Checking or modifying the title types

- Click Import to create a form from the Excel file.
Figure 7 Creating a supplier list form

Related Documents
After creating a form, create a data entry page for voting, surveys, or clock-ins, and set rules. For details, see Creating a Form Filling Page for a Form.
Feedback
Was this page helpful?
Provide feedbackThank you very much for your feedback. We will continue working to improve the documentation.See the reply and handling status in My Cloud VOC.
For any further questions, feel free to contact us through the chatbot.
Chatbot


