Customizing a Form
Setting Data Titles
To quickly identify form data, you can set a short name for each piece of data. This helps when linking records or viewing form details. For example, in a team member form, you can use the member's name as the data title.
- Log in to the no-code workbench by referring to Logging In to the No-Code Workbench.
- In All Apps, hover over the target application's … and choose Edit.
- On the left of the page, select the form to be set and click
 . The form editing page is displayed.
 - Click Form Settings on the right of the page.
- In the navigation pane, choose Data Title and set the data title.
Figure 1 Setting data titles
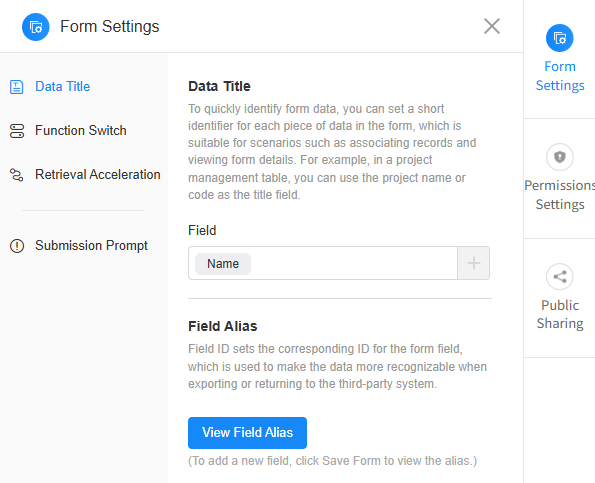 Figure 2 Viewing field aliases
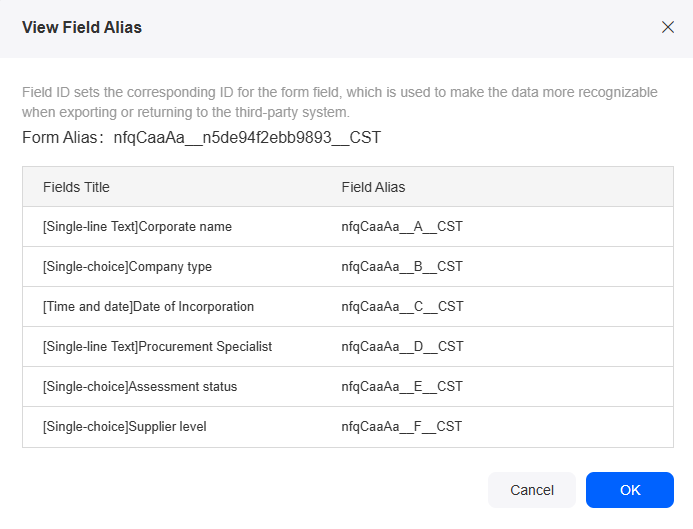
Table 1 Data title parameters Parameter
Description
Field
Set the title field, click +, and select a field in the form.
Field Alias
Set names for form fields to make data export or transfer to third-party systems easier.
You can click View Field Alias to view the aliases of the form and fields in the form.
Setting Function Switches
Customize the form page's function switches to make the form easier to use.
- Log in to the no-code workbench by referring to Logging In to the No-Code Workbench.
- In All Apps, hover over the target application's … and choose Edit.
- On the left of the page, select the form to be set and click
 . The form editing page is displayed.
 - Click Form Settings on the right of the page.
- In the navigation pane, choose Function Switch and configure general and sharing settings.
Figure 3 General and sharing settings
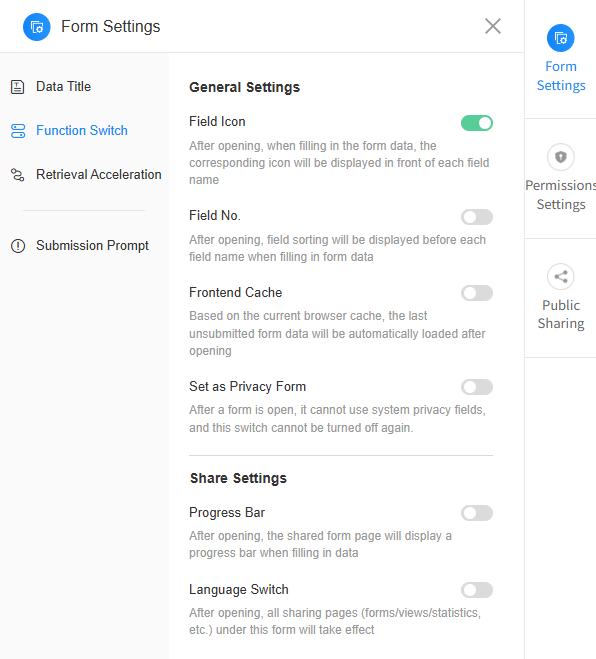 Figure 4 Effect
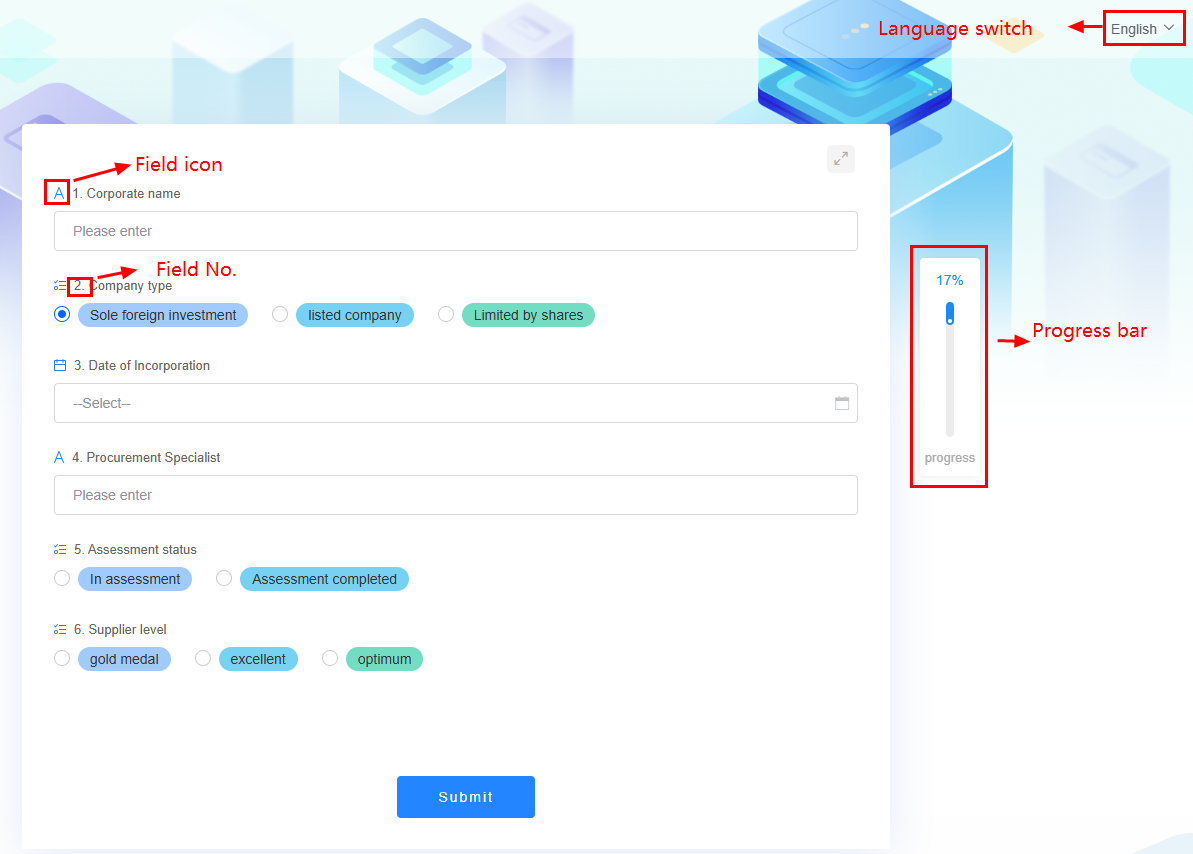
Table 2 Function switch parameters Parameter
Description
Field Icon
If enabled, an icon will appear before each field name.
Field No.
If enabled, a sequence number will appear before each field name.
Frontend Cache
If enabled, the system will save unsaved data, preventing it from being lost if users accidentally close the page.
Set as Privacy Form
If enabled, the form cannot use system privacy fields and cannot be closed again. Exercise caution when enabling this function.
Progress Bar
If enabled, a progress bar will show when users open the shared form to fill in data.
Language Switch
If enabled, a language switch will show on all shared pages (forms, views, and statistics).
Retrieval Acceleration
Proper indexes are created to accelerate data search under specific query conditions.
- Log in to the no-code workbench by referring to Logging In to the No-Code Workbench.
- In All Apps, hover over the target application's … and choose Edit.
- On the left of the page, select the form to be set and click
 . The form editing page is displayed.
 - Click Form Settings on the right of the page.
- In the navigation pane, choose Retrieval Acceleration.
Figure 5 Retrieval acceleration settings
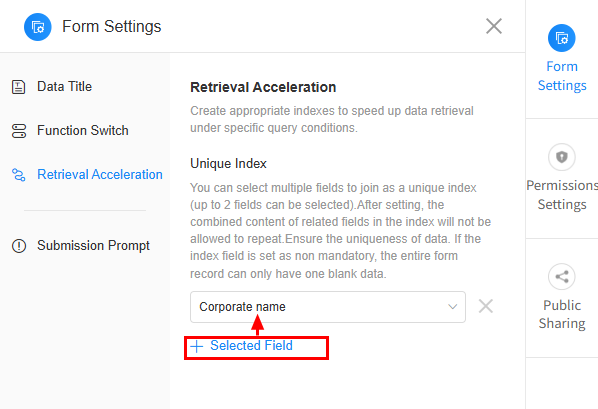
Table 3 Retrieval acceleration parameters Parameter
Description
Unique Index
You can choose up to two fields as a unique index. After setting, the combination of these fields must be unique. If the index field is optional, only one record with empty data is allowed in the entire form.
Submission Prompts
Set a message to show after submitting the form to improve user experience.
- Log in to the no-code workbench by referring to Logging In to the No-Code Workbench.
- In All Apps, hover over the target application's … and choose Edit.
- On the left of the page, select the form to be set and click
 . The form editing page is displayed.
 - Click Form Settings on the right of the page.
- In the navigation pane, choose Submission Prompt.
Figure 6 Submission prompt settings
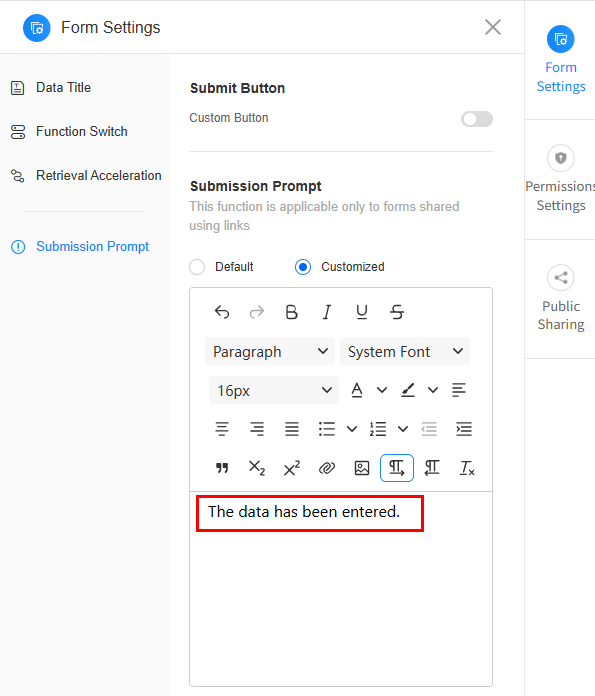
Table 4 Submission prompt parameters Parameter
Description
Submit Button > Custom Button
Customize the submit button text. Internationalization is supported.
Submission Prompt
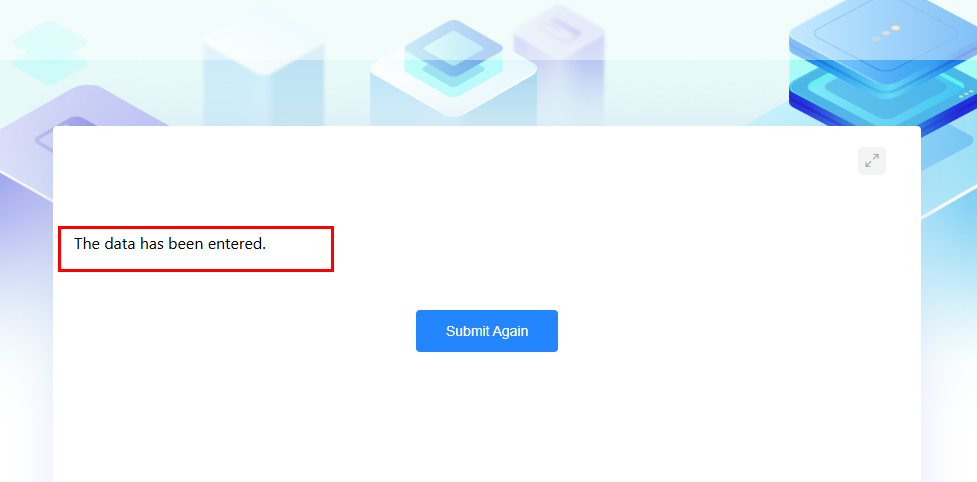
This applies to forms shared via links. The configured prompt will show when data is submitted. For example, if the prompt message is set to "Please fill in data", the latest effect is shown in Figure 7.
Feedback
Was this page helpful?
Provide feedbackThank you very much for your feedback. We will continue working to improve the documentation.See the reply and handling status in My Cloud VOC.
For any further questions, feel free to contact us through the chatbot.
Chatbot

