
Designing and Executing a Test Plan
Designing a Test Plan
Designing a test plan is to design test cases, develop automated testing scripts, and prepare test data based on the test requirements specified in the test plan.
- Log in to the CodeArts homepage, search for your target project, and click the project name to access the project.
- In the navigation pane, choose .
- Select a test plan to be designed from the list.
- Move the cursor over Design to view the design progress of the test plan, including the number of test cases, total number of requirements, and number of covered requirements.
When the number of test cases is greater than 0, the circle around Design changes from gray to blue, indicating that the test plan is being designed, as shown in the following figure.
- Click Design. The Testing Case page is displayed.

- Move the cursor over Design to view the design progress of the test plan, including the number of test cases, total number of requirements, and number of covered requirements.
- On the Manual Test tab page, click Import in the right area and select Adding an Existing Case from the drop-down list.

If no test case has been created or you need to create a test case, click Create Case. For details, see Creating a Manual Test Case. The new test case is also added to the test case library.
- In the displayed dialog box, select a test case and click OK.
- Click the Auto API Test tab to add or create API automation test cases to the test plan. For details about the method, see Step 4. For details about how to create a case, see Creating an API Automation Test Case.
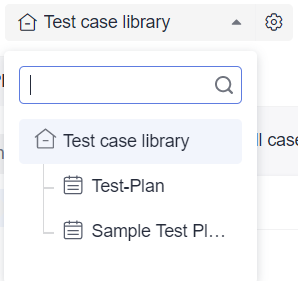
- Click the test plan name in the upper left corner of the page to switch to another test plan or view the global test case library.
The global test case library displays all test cases (including test cases that belong to or do not belong to the test plan) in the current version. You can maintain the global test case library as required.
Executing a Test Plan
- Return to the Testing Plan page and select the test plan to be executed from the list.
- Move the cursor over Execute to view the execution progress of the test plan, including the test progress, number of executed test cases, pass rate, and completed defects/total defects.
When the number of executed test cases is greater than 0, the circle around Execute changes from gray to blue, indicating that the test plan is under test.
- Click Execute. The Testing Execution page is displayed.

- Move the cursor over Execute to view the execution progress of the test plan, including the test progress, number of executed test cases, pass rate, and completed defects/total defects.
- On the Manual Test tab page, click
 in the Operation column to execute a manual test suite of multiple test cases. If no test suite is available, create one by following instructions provided in Creating a Manual Test Suite.
- Click the Auto API Test tab and execute an API automation suite. For details, see Executing an API Automation Test Suite.
- After you manually set the status of all test cases in the test plan to Completed, the status of the test plan is automatically updated to Completed.
On the Testing Plan page, click Execute. The Testing Execution page is displayed. You can create a test suite to execute the cases in the test plan.
Feedback
Was this page helpful?
Provide feedbackThank you very much for your feedback. We will continue working to improve the documentation.See the reply and handling status in My Cloud VOC.
For any further questions, feel free to contact us through the chatbot.
Chatbot


