
Editing RR Details
On the page for editing RR details, you can modify the description, priority, and current owner, add attachments and workload, view review records and the operation history, and associate work items.
Adding Tags
- In the RR list, click a title to go to the details page.
- Click
 next to Tag in the upper part of the page and select Create Tag.
- In the displayed Create Tag dialog box, enter Tag Name and select Tag Color.
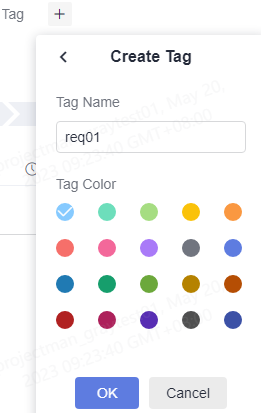
- Click OK. The tag is created.
The new tag is displayed next to the RR ID in the RR list.

- (Optional) Hide the tag.
- Click
 next to Tag. In the dialog box that is displayed, deselect √ to hide the tag.
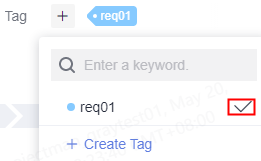
- Move the cursor to the tag name and click
 to hide the tag.
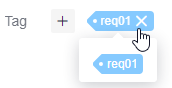

If you need to add tags for multiple RRs, you can select the desired RRs in the RR list, click Batch Edit in the lower part of the page, and select Tag.
- Click
Adding Comments
- In the work item list, click a title to go to the details page.
- On the Details tab page, click the Comments text box.
- Enter the comment.
You can upload images, enter links, associate work items, and use @ to notify project members in comments.
- Click Submit. The comment is submitted.
Submitted comments can be replied, edited, pinned to the top, and deleted.
Adding Attachments
Attachments can be pictures, workbooks, manuscripts, and text files. A maximum of 100 attachments can be added to each work item, and their total size cannot exceed 50 MB.
- In the work item list, click a title to go to the details page.
- Click the Attachment tab.
- Click "Click or drag the file here to upload it.", select a local file, and upload the file to the work item as an attachment.
Local files can be directly dragged to the text box. When the upload progress reaches 100%, the system displays a message indicating that the attachment is uploaded successfully.
Move the cursor to the file that is successfully uploaded. The operations that can be performed are displayed.
- Click
 to download the file to the local device.
 - Click
 to delete the uploaded file.
- Click
Setting Related Items
A work item can be associated with other types of work items in a project.
- Related Upstream Requirements: requirements coordinated from upstream projects.
The upstream requirement information is displayed in the current project only when the current project is selected as the responsible project for Related Downstream Requirements in the RR of another project.
Assume that the name of the current project is "IPD Project" and that of another project is "IPD Project 2". The method of synchronizing upstream requirement information is as follows:- Create a project named "IPD Project 2".
- Create an RR in "IPD Project 2".
- After the RR is created, enter its details page.
- Choose Related Items > Related Downstream Requirements and click Distribute Requirement.
- Set Responsible Project to IPD-Project and the raw requirement name to RR-Synergy.
- After the distribution is complete, click the requirement title "RR-Synergy" to access "IPD Project" where this requirement is located.
On the RR-Synergy details page, choose Related Items > Related Upstream Requirements to view the corresponding requirement information.
In the RR list, Collaboration Status of the RR-Synergy requirement is Received in orange, and Status is Analyzing.
Different colors of Received indicate different meanings.
 : Before a requirement is accepted, the color of Received is orange.
 : After a requirement is accepted, the color of Received turns green.
 : After a requirement is rejected, the color of Received turns red.
- Related Downstream Requirements: requirements for collaboration with downstream projects.
Batch distribution is supported. A maximum of 10 requirements can be distributed at a time. One requirement is displayed by default and cannot be deleted.
- Click Distribute Requirement. The Distribute Requirement dialog box is displayed.
- Configure the information about requirement distribution.
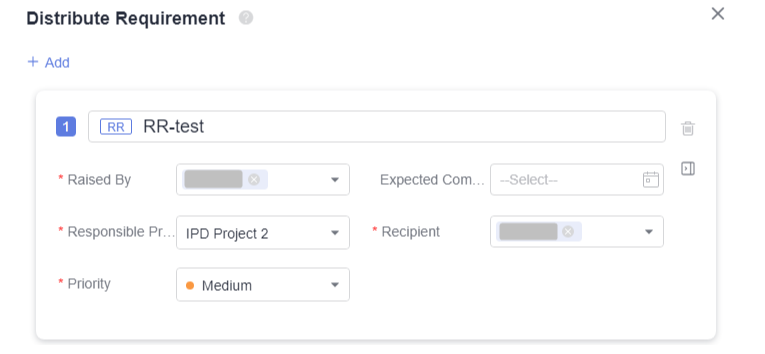
The current project cannot be selected for Responsible Project. If only the current project exists in the system, no value is available for this parameter, and requirement distribution cannot be performed.
- Click OK. The requirement is distributed.
Click the requirement title "RR-test" to access "IPD Project 2" where this requirement is located.
In the RR list, Collaboration Status of "RR-test" is Delivered in orange.
Related downstream requirements are not removal operations. The work items of this project are still displayed.
The colors of Delivered indicate the same meanings as those of Received.
- Subrequirement: child work items broken down from the current work item.
The operations vary according to the state. Perform operations based on the functions displayed on the page and the actual project situation.
- To break down into child requirements, click Break Down to add a child requirement. For details about how to set parameters, see Creating R&D Requirements.
Requirements can be broken down in batches. A maximum of 10 requirements can be broken down at a time. One requirement is displayed by default and cannot be deleted. Click
 to expand and configure more information.
After the child requirement is added successfully, you can view and edit the child requirement on the R&D Requirements page. For details, see Processing R&D Requirements.
- To associate with existing child requirements, complete operations in Creating R&D Requirements first.
You can click
 to cancel the association.
Click Break Down and Associate in the upper right corner of the page to add or associate an existing sub-requirement.
- To break down into child requirements, click Break Down to add a child requirement. For details about how to set parameters, see Creating R&D Requirements.
- Associate Work Item: associated work items of other types in the project.
The operations vary according to the state. Perform operations based on the functions displayed on the page and the actual project situation.
- To associate with existing RRs, complete operations in Creating RRs first.
- To create a task, choose . For details about how to set the parameters, see Creating Tasks.
After the task is created, you can view and edit the task on the Tasks page. For details, see Processing Tasks.
- To associate with existing tasks, complete operations in Creating Tasks first.
- To create an SF, choose Create > SF. For details about how to set SF parameters, see Creating an SF.
After the SF is created, you can view and edit the SF. For details, see Processing an SF.
- To associate with existing SFs, complete operations in Creating an SF first.
- Files: raw requirement files.
Select a file which is related to the raw requirement. You can upload a local file.
- Wiki: raw requirement wikis.
Select a Wiki which is related to the raw requirement. You can create a Wiki.
Viewing Review Records
You can view the review records related to the requirement only when either of the following situations occurs:
- You can view the review records in Review of the corresponding requirement details page only when the requirement has been changed as in Changing and Reviewing RRs or there are general review records.
- When you modify the details of an RR, a change process is automatically triggered. Only then will you be able to view the review record in Review of the corresponding requirement details page.
- In the RR list, click the title of an RR in the Planning or Implementing state. The requirement details page is displayed.
- On the Details page, modify controlled fields (such as the requirement title, description, priority, planned workload, and planned completion date). A dialog box is displayed, indicating that the change approval process is required.
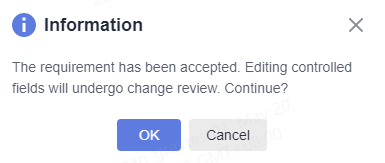
- Click OK to enter the review process.
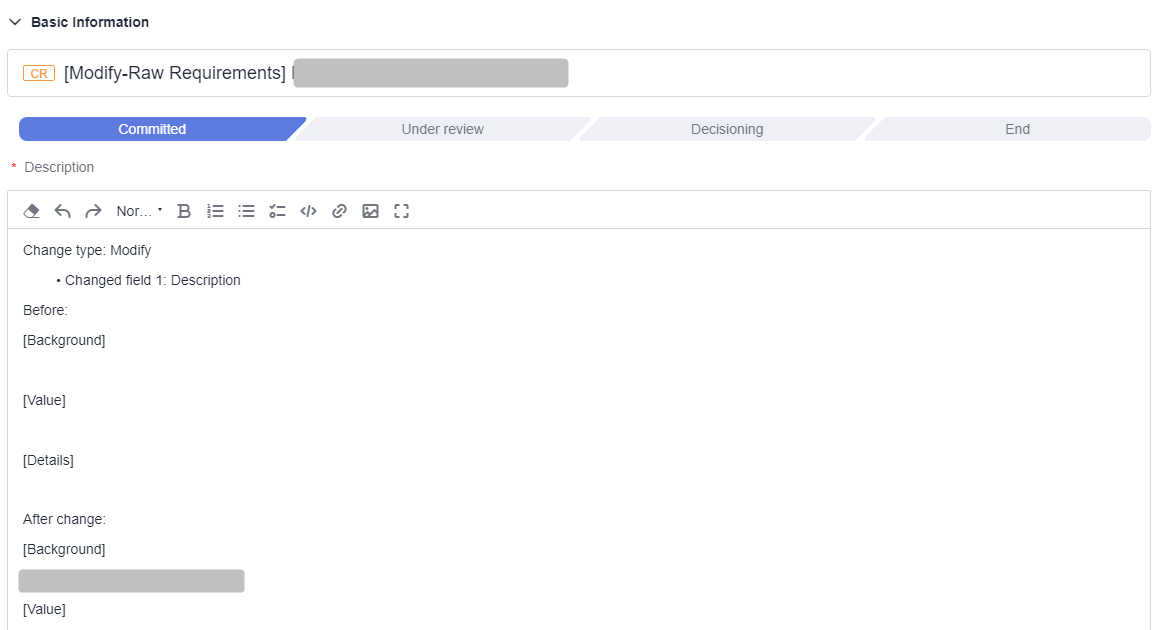
- After entering the information, click Submit. The Review page is displayed.
The changed content is displayed in the requirement only after it passes the review. For details about the change process, see Changing and Reviewing RRs.
- Return to the Raw Requirements page and go to the requirement details page. You can view the review record of the requirement in Review.
Adding Workload
- In the work item list, click a title to go to the details page.
- Click the Workload tab.
- Click Add Workload. The Add Workload dialog box is displayed.
- Enter the workload information.
- The end date cannot be earlier than the start date.
- Decide whether to select Weekends included. If not, weekend workload records will not be generated.
- You can select Total or Daily for Workload.
- Work Type options include back-end development, front-end development, UI design, replacement leave, debugging, and public affairs. You can also customize the value. The procedure is as follows:
- Click
 . The Work Types dialog box is displayed.
 - Click Create.
- Enter Title.
Title must be unique.
- Click OK.
The work types that are successfully set can be edited and deleted.
If Mandatory is enabled, a red asterisk (*) is displayed before Work Type to indicate that the parameter is mandatory.
- Click
- Click OK.
The system automatically generates corresponding records based on the entered dates and days.
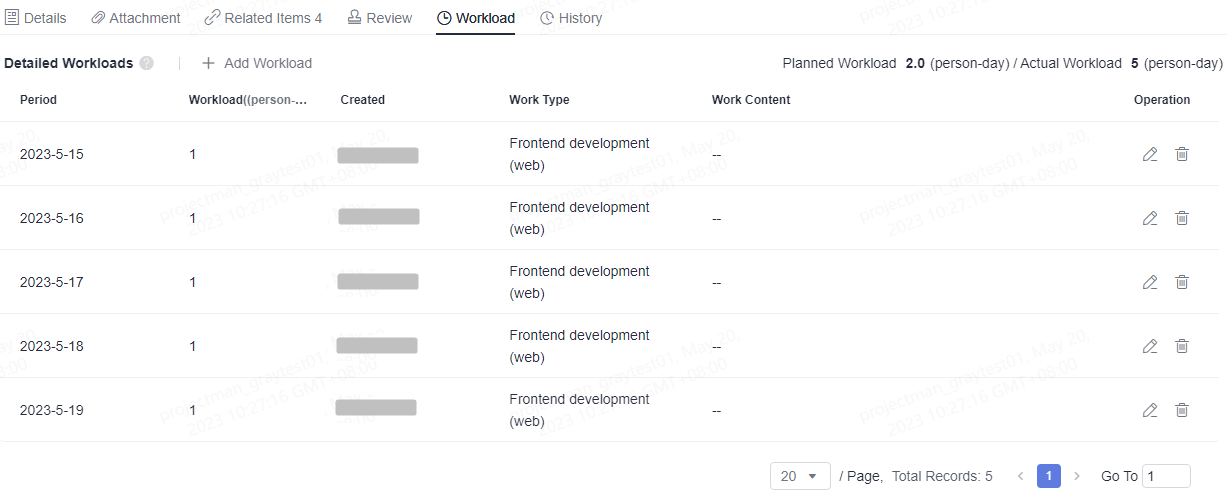
The workload can be edited and deleted.
Viewing History
History displays all operation logs of users, including creation, status transition, review initiation, work item association, and workload adding.
- In the work item list, click a title to go to the details page.
- Click the History tab.
- Click
 or
or  to view historical records in ascending or descending order of operation time.
 - You can set search criteria to query historical records that meet the search criteria.
- Click
The operations of uploading attachments and adding comments are not displayed in the history.
Feedback
Was this page helpful?
Provide feedbackThank you very much for your feedback. We will continue working to improve the documentation.See the reply and handling status in My Cloud VOC.
For any further questions, feel free to contact us through the chatbot.
Chatbot


