
Livestreaming
MetaStudio allows creating a live room with a virtual avatar.
Procedure:
- Adding a Product
- Adding an Interaction Rule Library
- Creating a Live Room
- Viewing a Livestreaming Task
Precautions
Access the MetaStudio console from the Chrome browser.
Video
Watch this video to learn how to livestream with your MetaStudio virtual avatar.
Adding a Product
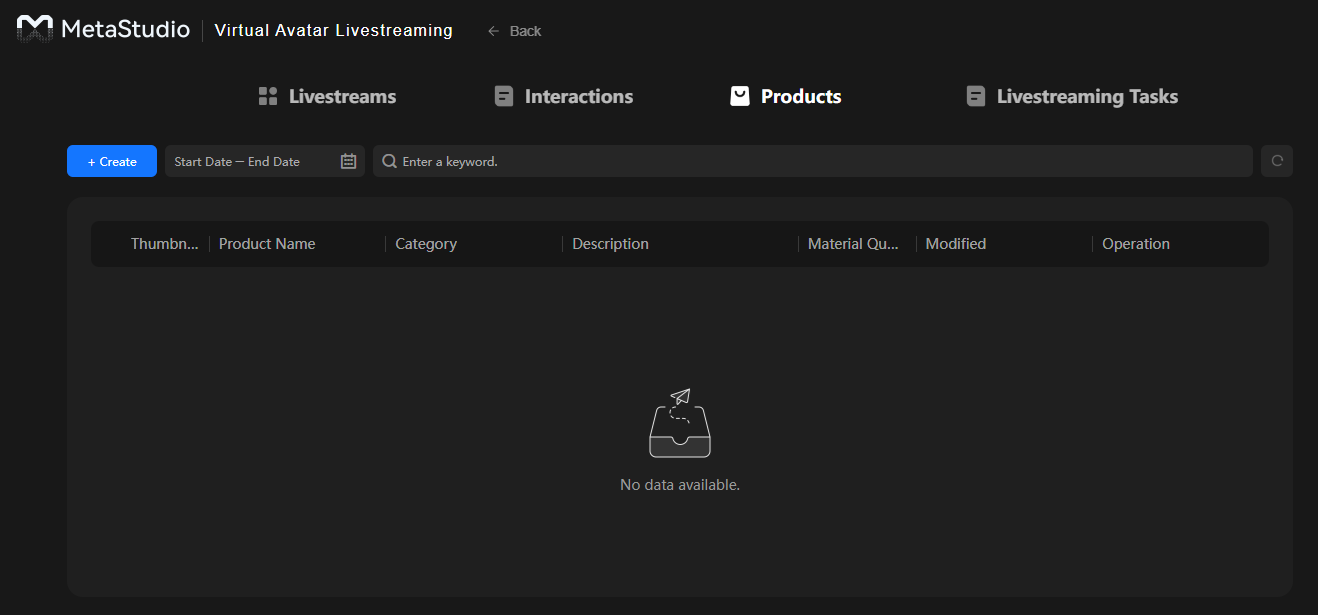
In the Products area of the Virtual Avatar Livestreaming page, you can add products. Products are automatically displayed as materials for livestreaming in the Products area of the live room.
- Log in to the MetaStudio console and go to the Overview page.
- Click Go to MetaStudio Console to go to the MetaStudio console.
- Click the Livestreaming card to go to the virtual avatar livestreaming page.
- On the page displayed, click Products, as shown in Figure 1.
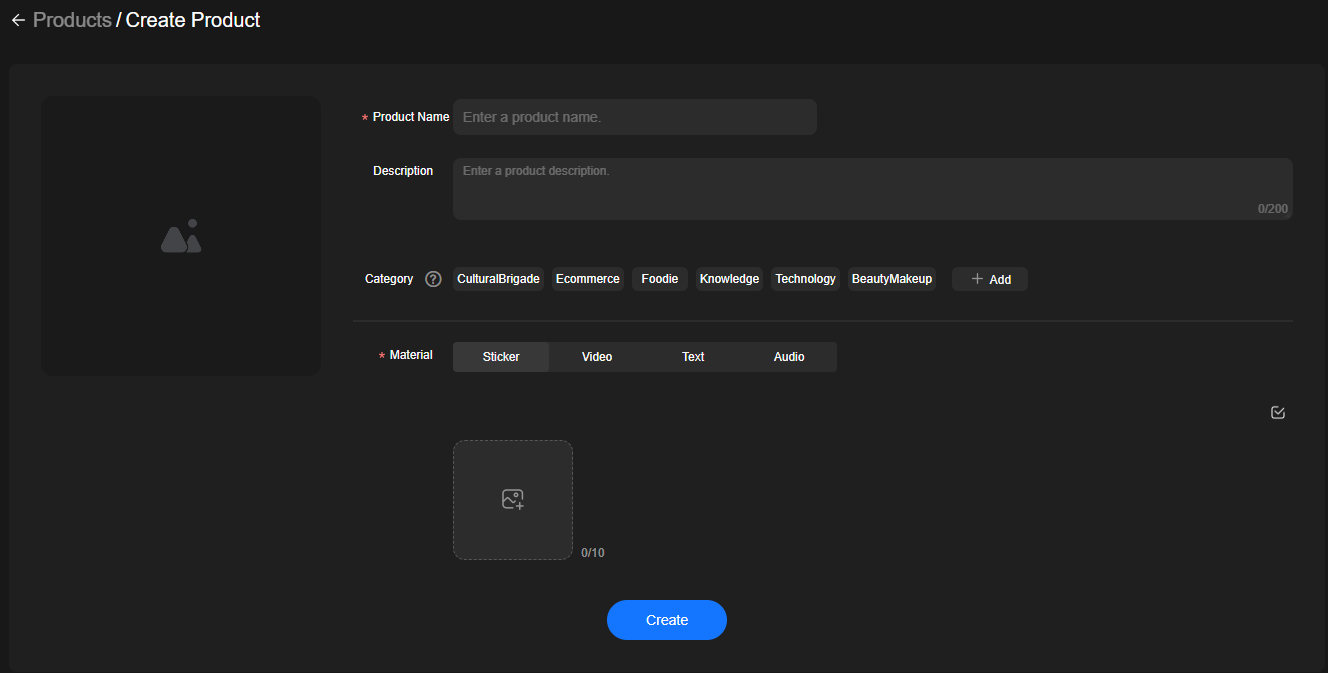
- Click Create to go to the Create Product page shown in Figure 2.
Table 1 describes the required parameters.
Table 1 Parameters for creating a product Parameter
Description
Product Name
Product name.
Description
Product description.
Category
Product category. The selected category will become the product tag, which facilitates product search.
You can select more than one category or add new categories.
Material
Materials integrated into a product.
Options:
- Overlay: Select a local image.
- Video: Select a local video file.
- Text: Enter text.
- Audio: Select a local audio file.
- Click Create. The message Created successfully appears.
The newly created product is displayed in the product list on the Products page.
You can perform the following operations on a product:
- Click View in the Operation column of a product. On the Product Details page displayed, click Edit to edit the product information.
- Click Edit in the Operation column of a product. On the page displayed, edit the product information and click Save.
- Click Delete in the Operation column of a product to delete the product.
Adding an Interaction Rule Library
Under the Interactions tab of the Virtual Avatar Livestreaming page, you can add an interaction rule library and interaction rules. The added interaction rule library can be directly imported to and used in the live room.
- Log in to the MetaStudio console and go to the Overview page.
- Click Go to MetaStudio Console to go to the MetaStudio console.
- Click the Livestreaming card to go to the virtual avatar livestreaming page.
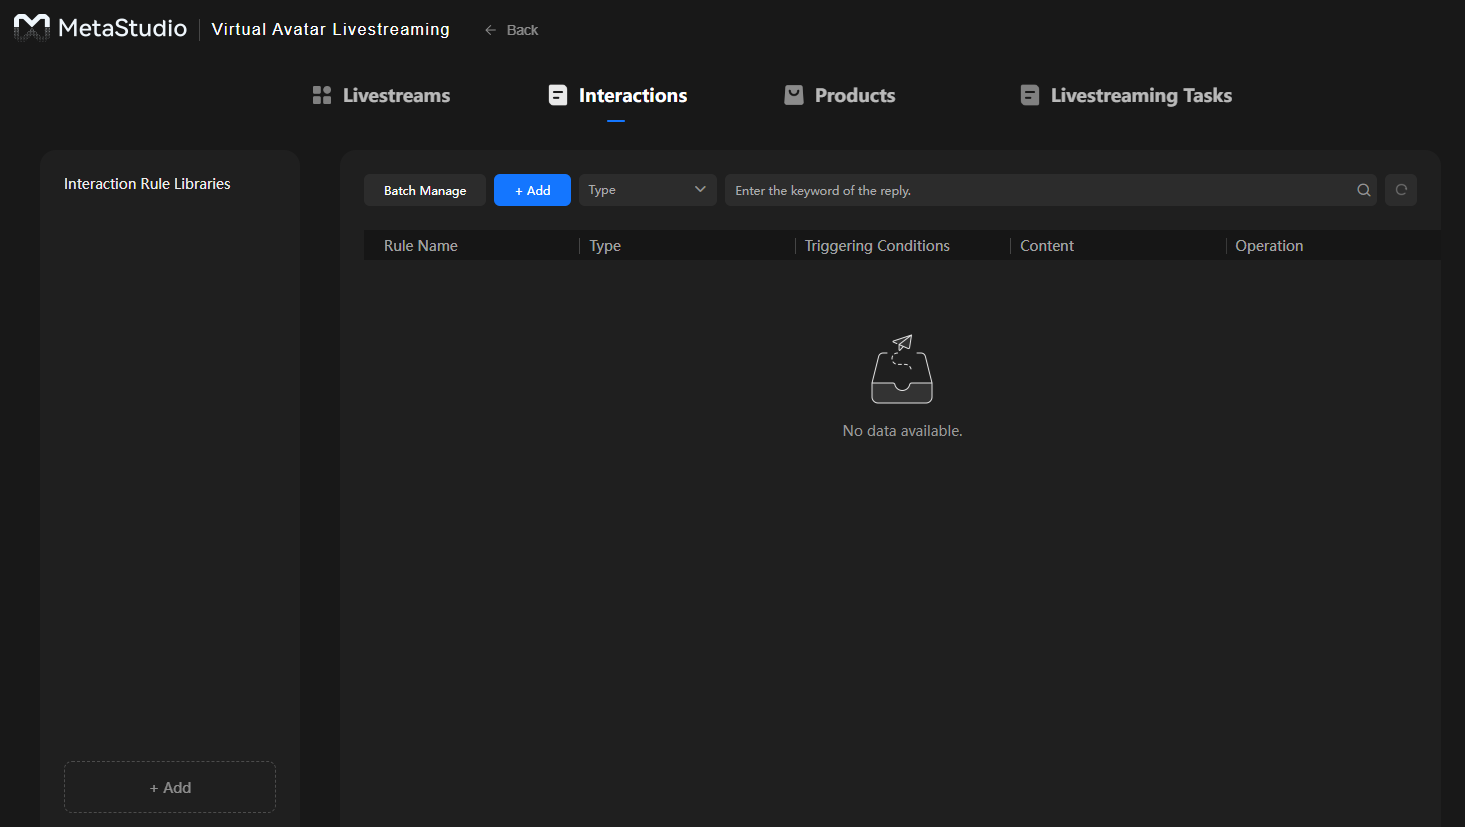
- Click Interactions, as shown in Figure 3.
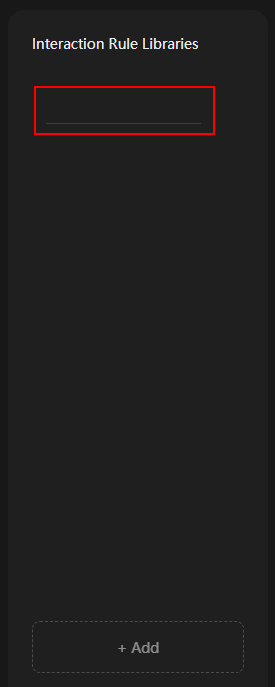
- In the Interaction Rule Libraries area on the left, click Add in the lower part. A horizontal line will be displayed, as shown in Figure 4.
Enter an interaction rule library name.
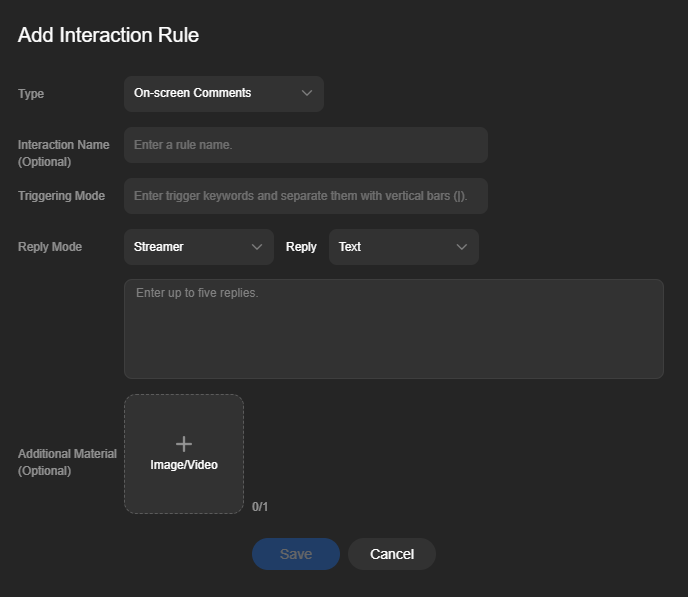
- Select an interaction rule library on the left and click Add on the right. The Add Interaction Rule dialog box is displayed, as shown in Figure 5.
You can add an interaction rule to the interaction rule library. See Table 2.
Table 2 Parameters for adding an interaction rule Parameter
Description
Type
Interaction type. Select On-screen Comments.
Interaction Name (Optional)
Interaction name. Example: Welcome to the live room.
Triggering Mode
Enter trigger keywords as required.
Reply Mode
Select Text for Reply and enter the text. When the triggering condition is met, the virtual avatar reads the text.
Additional Material (Optional)
Upload an image or video from the local PC. When a reply related to the uploaded material is read in the live room, the image or video uploaded here will be displayed in the live video.
You do not need to configure this parameter.
- Click Save. An interaction rule has been added.
You can add more interaction rules to the interaction rule library or add more interaction rule libraries as needed.
Creating a Live Room
- Log in to the MetaStudio console and go to the Overview page.
- Click Go to MetaStudio Console to go to the MetaStudio console.
- Click the Livestreaming card to go to the virtual avatar livestreaming page, as shown in Figure 6.
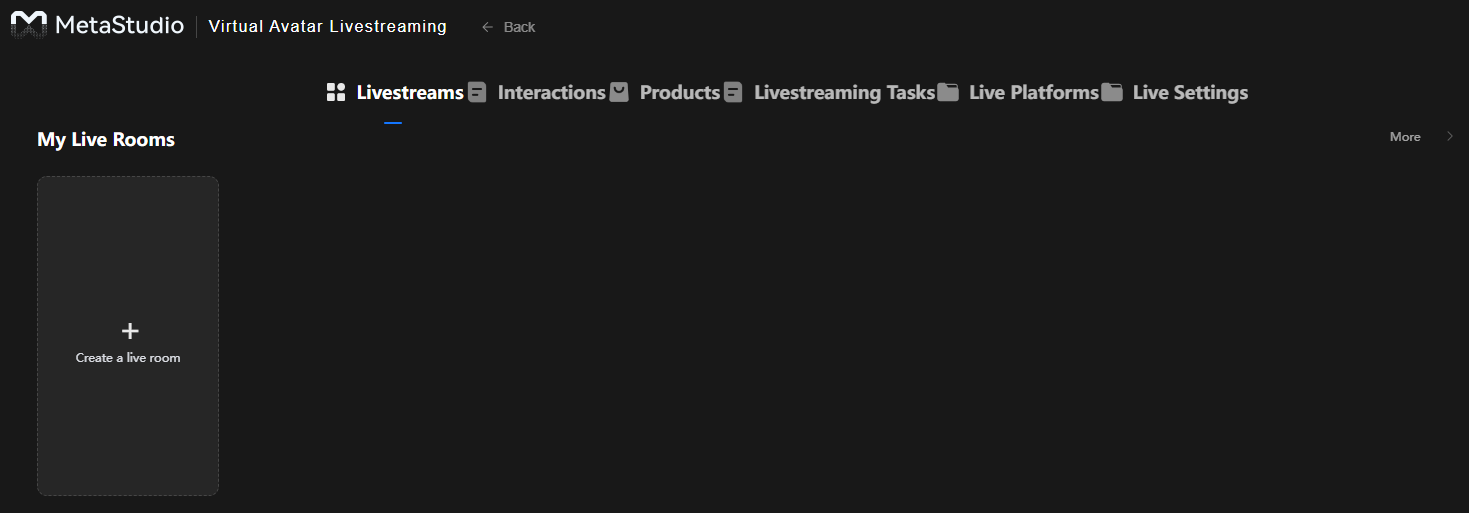
- Under the Livestreams tab, click the Create a live room area.
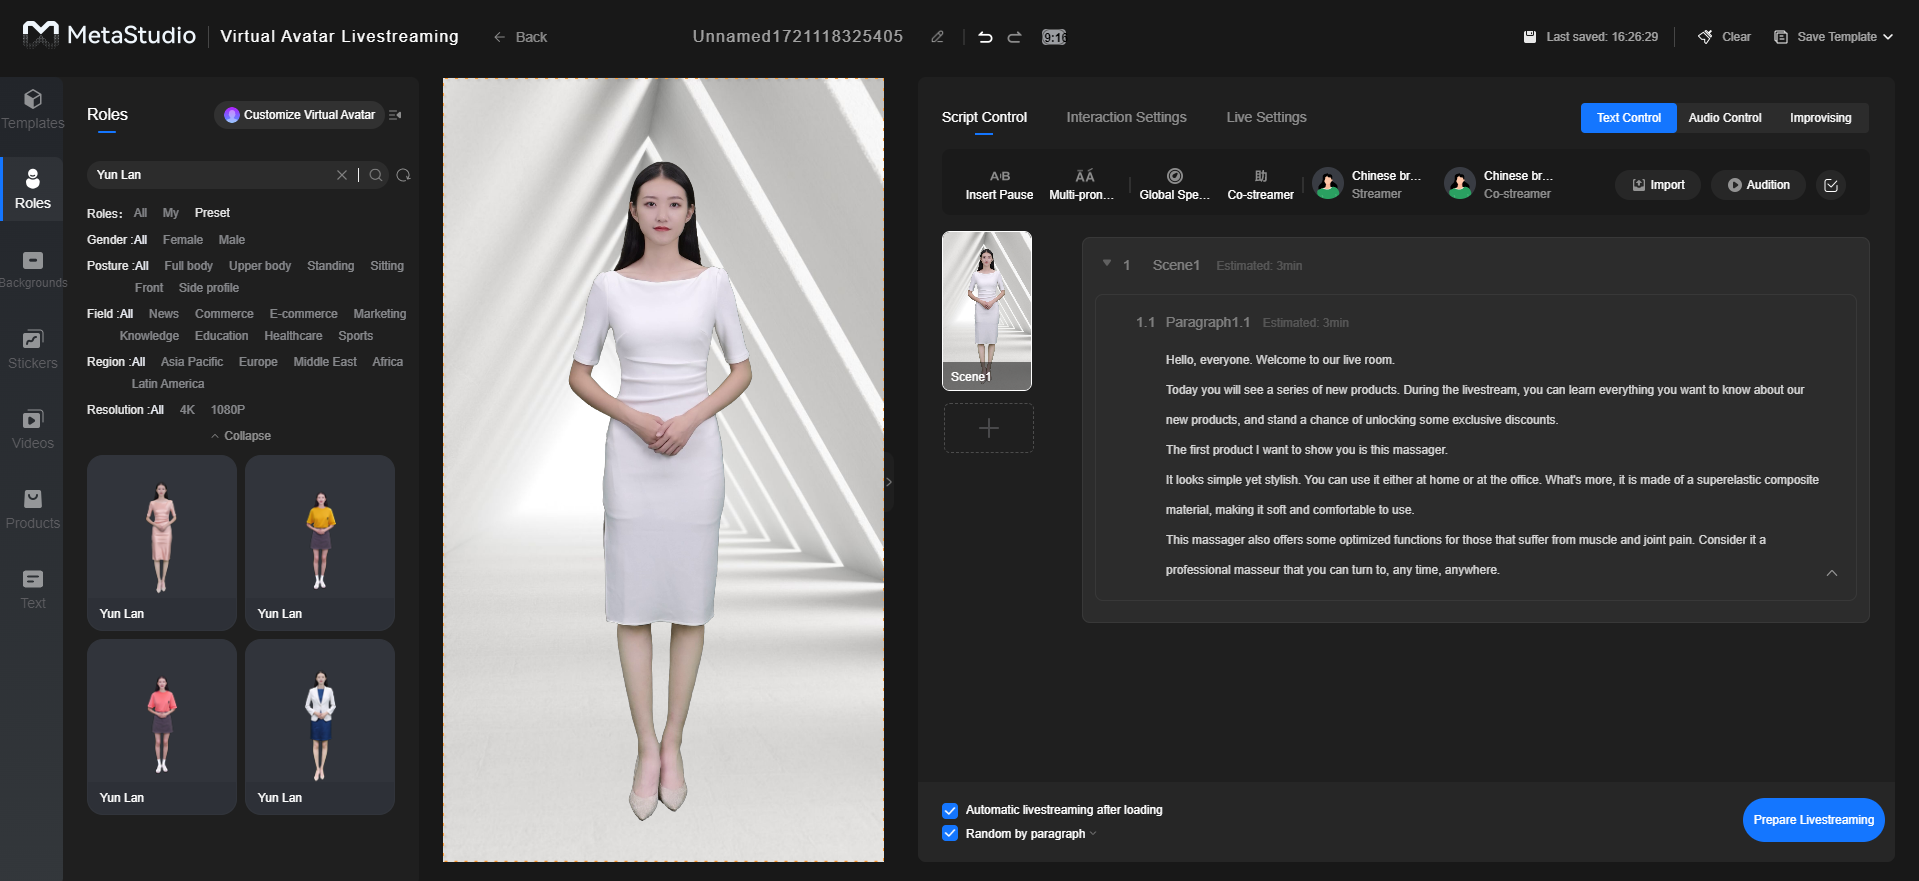
Figure 7 shows the page details.
- In the live video preview window, set the role, background, image overlay, and video by referring to Common Configuration for Livestreaming.
Products added in Adding a Product are automatically displayed in the Products area and can be directly used.
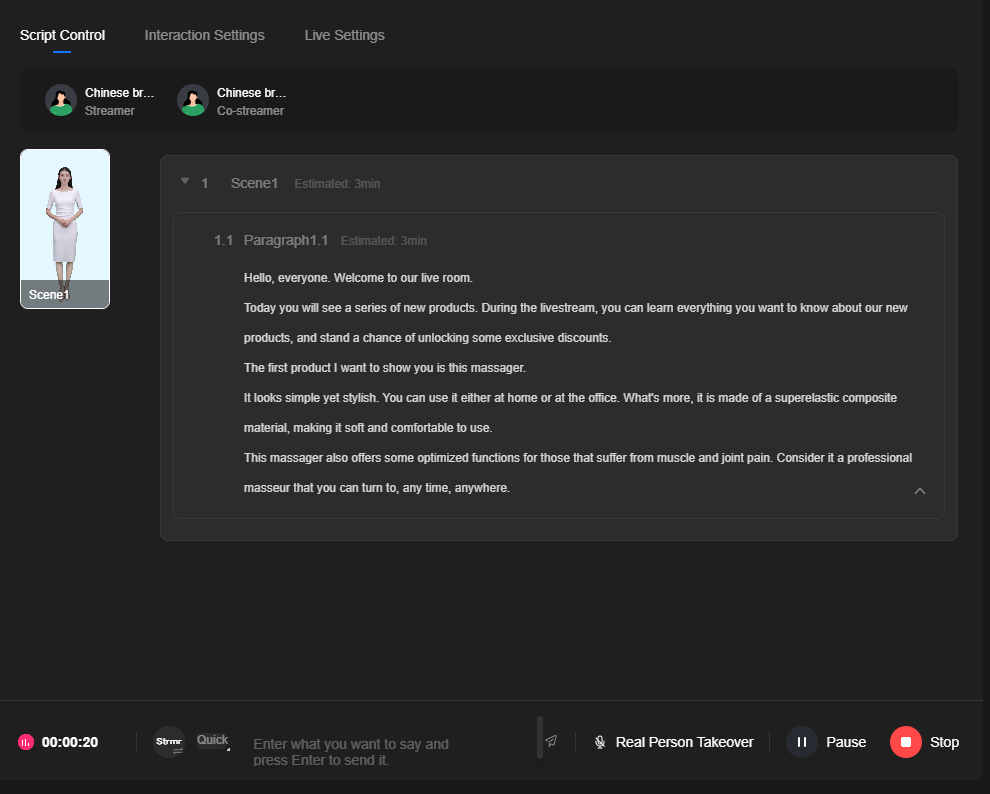
- After the live video is created, you need to create a script.
You can use the preset script, as shown in Figure 8. You can also customize the script and click
 to add a paragraph.
- If you need to create multiple scenes, click the + icon under Scene 1 on the right of the livestream preview window to add a scene. Then set the layout and script of the new scene based on the previous scene.
Figure 9 Live room page

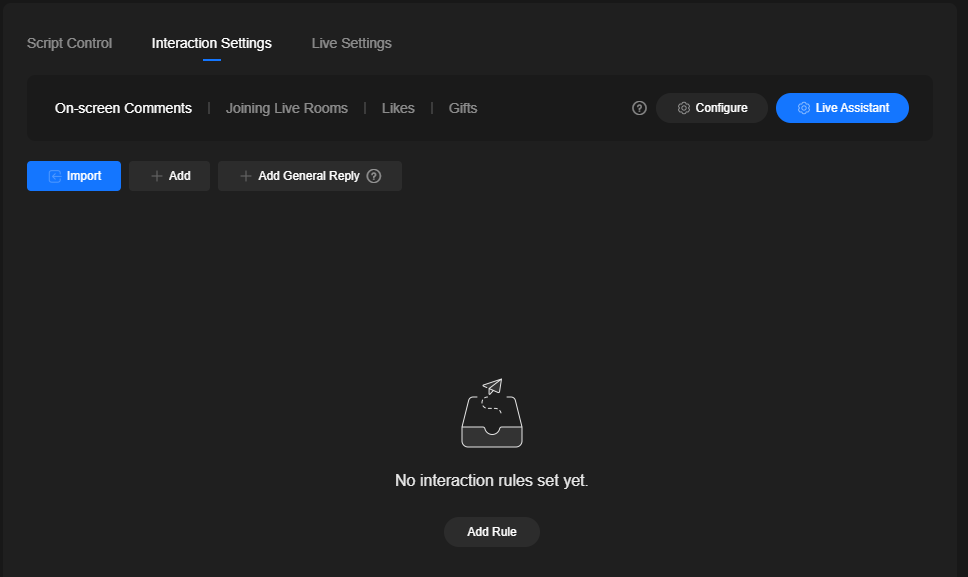
- After setting the layout and script of all scenes, click the Interaction Settings tab, as shown in Figure 10.
- Click Import. The Import Interactions dialog box is displayed.
Select one or more interaction rule libraries and interaction rules.
- Click OK.
The interaction rule list in the interaction rule library has been imported.
- Click the Live Settings tab, as shown in Figure 11.
Retain the default settings. You can modify the settings by referring to Livestreams.
- Click
 in the upper right corner of the page to save the settings.
 - In the lower right corner of the livestream creation page, select pay-per-use or yearly/monthly for Livestream Billing Mode.
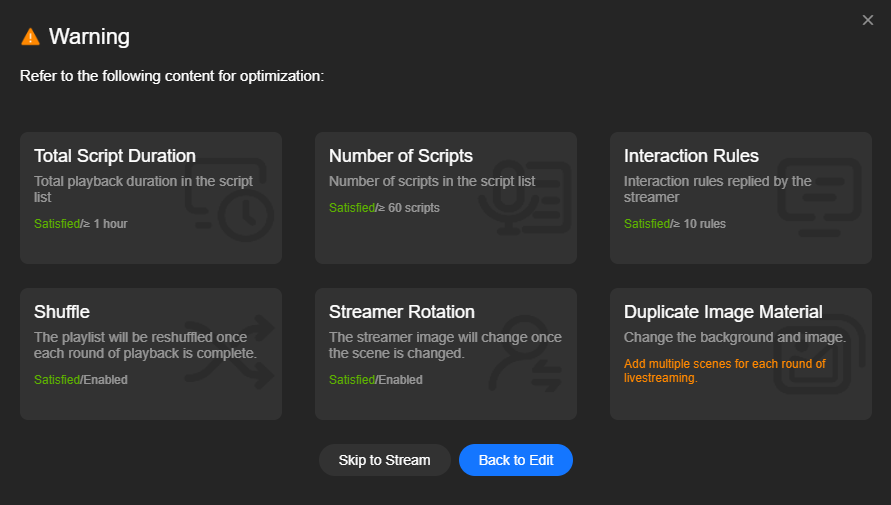
- Click Prepare Livestreaming in the lower right corner of the page. The Warning dialog box is displayed, as shown in Figure 12.
- You can start livestreaming after the risks are eliminated, or select Skip to Stream.
- You can view the livestream loading progress in the preview window.
Figure 13 shows an ongoing livestream. Table 3 describes the operations in the lower right corner of the page.
Table 3 About the GUI GUI Element
Description
00:01:20
Livestream timing. For example, 00:01:20 indicates that the livestream has lasted one minute and 20 seconds.

Switches the voice of reading interaction content. The streamer's voice is used by default. You can switch to the co-streamer's voice.

Click this icon to select and send the preset interaction content for the streamer to read.
Entering interaction content and pressing Enter to send the content
After the interaction content is entered and sent, the streamer or co-streamer reads the newly sent content. Then they continue reading the original content.
Real Person Takeover
Click Real Person Takeover. In this case, the virtual streamer stops voicing and only acts as programmed, and a real person voices for the virtual streamer.
After the real person stops speaking, click Cancel Real Person Takeover to let the virtual streamer continue reading the original content.
Pause
Click Pause to pause the livestream.
Click Continue to resume the livestream.
Stop
Click Stop to stop the livestream.
Closing the window will not stop the livestream. To do that, click Stop at the bottom. You can also set the livestream to automatically end by specifying Playback Times or Max Duration. It will end whichever comes soonest.


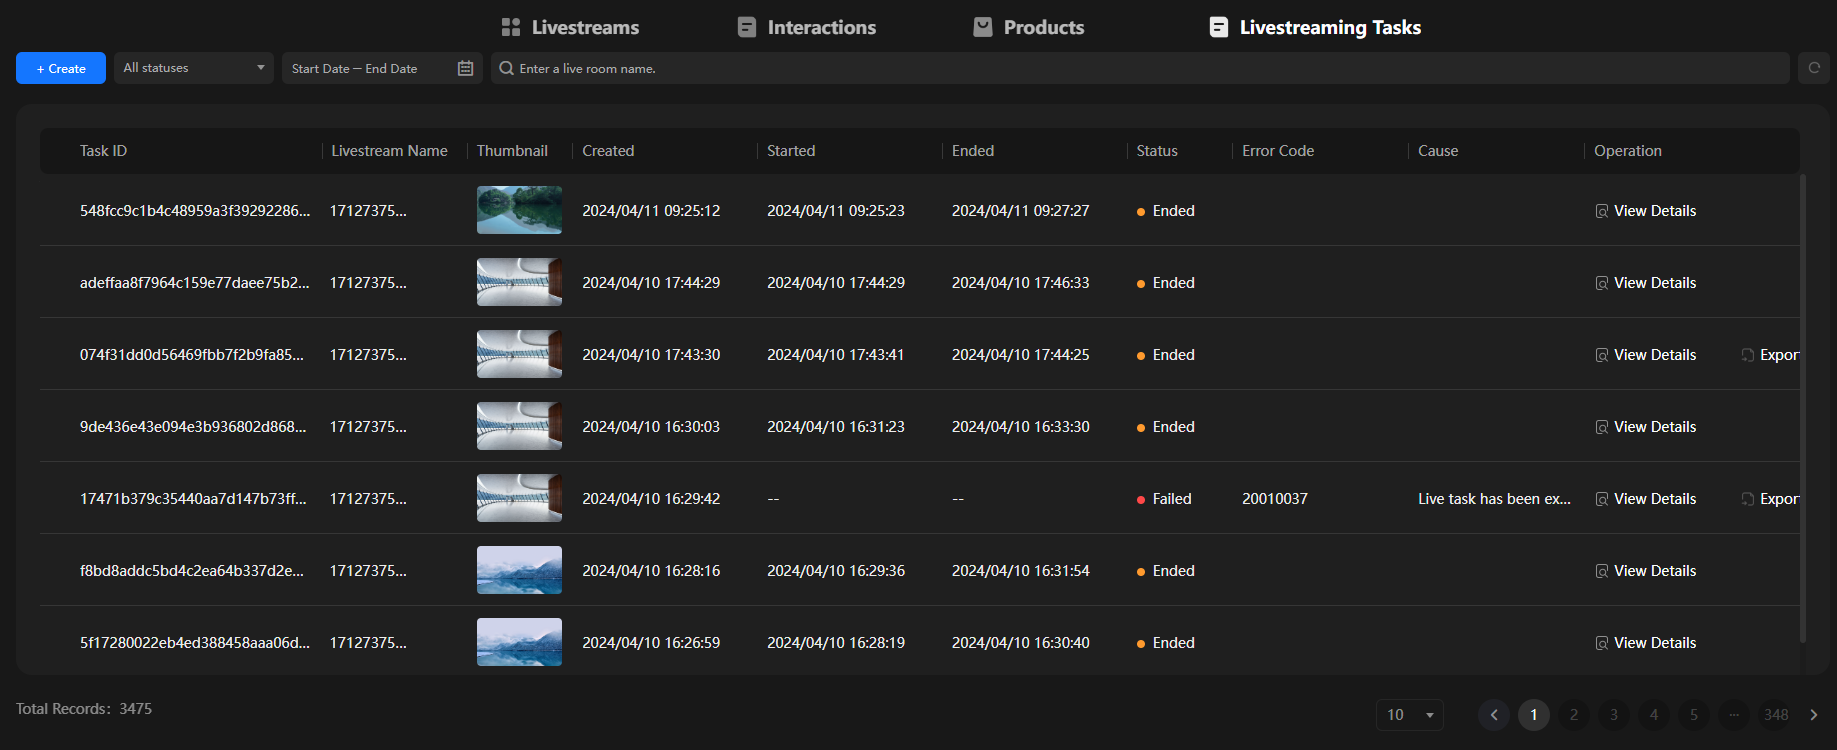
Viewing a Livestreaming Task
The live rooms that you created are displayed in the list on the Livestreaming Tasks tab of the Virtual Avatar Livestreaming page. You can access a live room, modify the livestream content, and restart the livestream.
- Log in to the MetaStudio console and go to the Overview page.
- Click Go to MetaStudio Console to go to the MetaStudio console.
- Click the Livestreaming card to go to the virtual avatar livestreaming page.
- Choose the Livestreaming Tasks tab, as shown in Figure 14.
Feedback
Was this page helpful?
Provide feedbackThank you very much for your feedback. We will continue working to improve the documentation.See the reply and handling status in My Cloud VOC.
For any further questions, feel free to contact us through the chatbot.
Chatbot


