
Livestreams
You can use a virtual avatar to create a live room.
Procedure:
- Creating a Live Room
- Setting the Livestream Script
- Setting the Interaction
- Live Settings
- Starting the Livestream
Preparations
- If the preset virtual avatar image does not meet the requirements, customize a virtual avatar image in advance by referring to Image Modeling.
- Access the MetaStudio console from the Chrome browser.
Constraints
- The preset virtual avatar images on the MetaStudio console are valid for three years (till the middle of 2027). The notice of taking a preset image offline will be released on the live network three months in advance.
- For details, see constraints on virtual avatar livestreaming.
Video
Watch this video to learn how to livestream with your MetaStudio virtual avatar.
Creating a Live Room
- Log in to the MetaStudio console and go to the Overview page.
- Click Go to MetaStudio Console to go to the MetaStudio console.
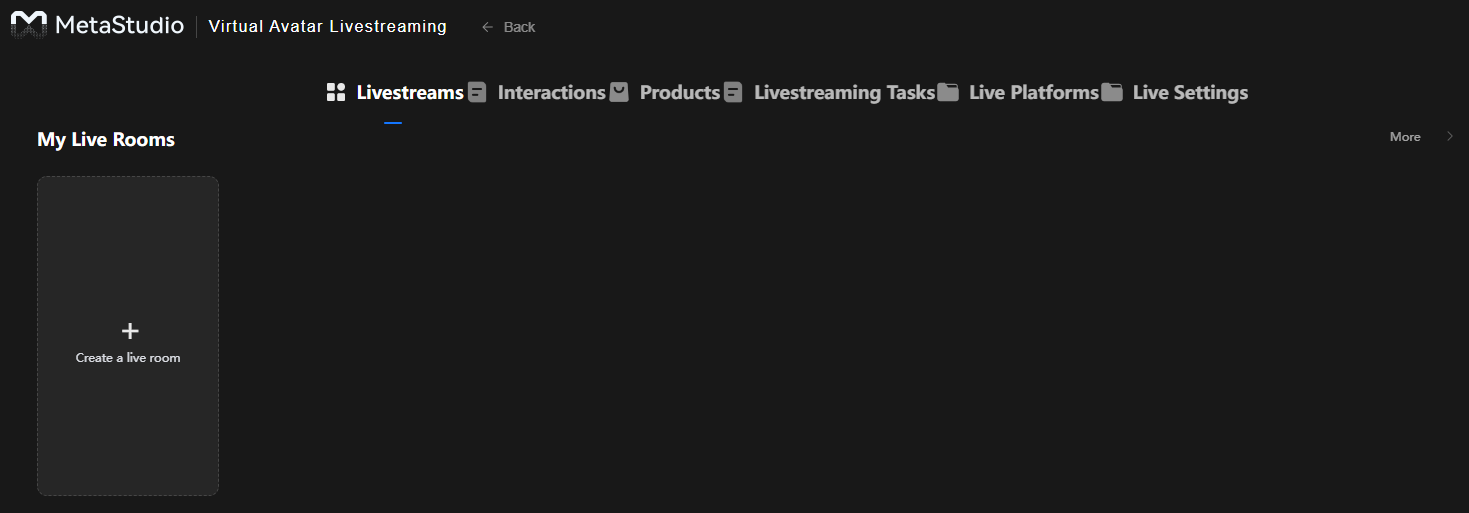
- Click the Livestreaming card to go to the virtual avatar livestreaming page, as shown in Figure 1.
- On the Livestreams tab, click the Create a live room area.
See About the GUI.
- Configure live video elements by referring to Configuring Livestreaming Materials.
- In the material area on the left, there are preset video materials. You can also customize a role, import background images, image overlays, and video overlays from your local device, create a product, and set the format of the text to display.
- You can adjust the images, videos, and virtual avatar overlaid on the video preview area, for example, Bring Forward (
 ), Send Backward (
 ), Bring to Front (
 ), Send to Back (
 ), Copy (
 ), Apply Everywhere (
 ), and Delete (
 ). You can also set the size of the overlays and drag them to change their positions.
Setting the Livestream Script
- Method 1: Text control
The virtual avatar speaks as instructed by the input text. You can add text in either of the following ways:
- Enter text in the paragraph box of each scene. You can click
 to add paragraphs.
 - Click Import in the upper right corner to import a TXT file of at least 200 characters from the PC. If there are multiple paragraphs, you can use line breaks. The input text will be automatically parsed.
Note: Text should contain at least 200 characters in each scene, and no more than 2,000 characters in each paragraph.Figure 2 Text control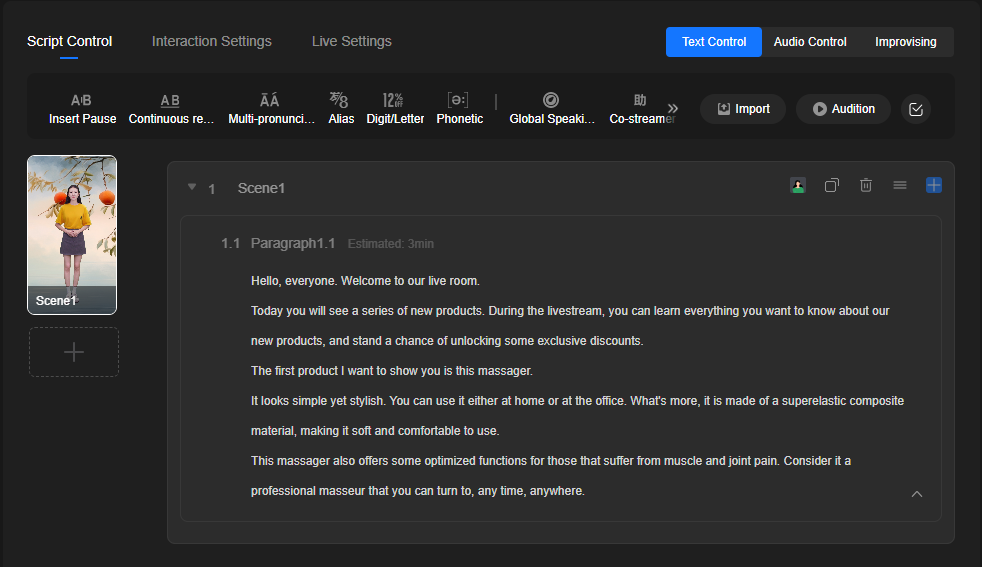
Table 1 describes the operations of text control. The support for operations in Table 1 varies with voice models. If the icon of an operation in Table 1 is grayed out on the page, the voice model in use does not support this operation. You need to re-select a voice model that supports the required operation.
Table 1 Operations Operation
Description
Insert Pause
Move the cursor to the right of the text to be paused and click Insert Pause. In the dialog box displayed, select Changes in Breathing or set the pause length.
Continuous Reading
Select the text to be read continuously and click Continuous reading.
Multi-pronunciation Word
Select the text and set the correct pronunciations of multi-pronunciation words.
The multi-pronunciation word set here applies only to the current video script. To apply it to all tasks under your account, refer to Special Words.
Alias
Select the text to be read in a different way and click Alias. Then set the reading method for the selected text.
The alias set here applies only to the current video script. To apply it to all tasks under your account, refer to Special Words.
Digit/Letter
For example, the number 1024 can be read as follows:
- Digit: One zero two four
- Value: One thousand and twenty-four
- Date: October twenty-fourth
- Phone number: One zero two four
For example, the word API can be read as follows:
- Letter: A P I (read one by one)
- Word: api
Phonetic
Select an English word and enter its appropriate phonetic. You can also click Phonetic Search. Then enter a word to search for its correct pronunciation in the dictionary and copy the desired phonetic.
Global Speaking Speed
Sets the global speaking speed, which ranges from 0.5x to 2x. When the speed is set to 0.5x, the voice is played at 0.5x speed. When the speed is set to 2x, the voice is played at 2x speed.
Co-streamer
Select a piece of text for it to be read by the co-streamer.
Streamer
Global voice of the streamer, which is applicable to all scenes in the live room. If there is a specific voice for a scene, this voice will be prioritized.
There is a default voice. You can also select other voices as needed.
If you want to use a preset voice marked with Third-party, perform operations in Purchasing a DupDub Voice Package.
Co-streamer
Global voice of the co-streamer, which is applicable to all scenes in the live room. The co-streamer's voice cannot be set separately for a single scene.
Figure 3 shows an ongoing livestream. If you want to interact, click
 to switch to the co-streamer's voice. Enter and send the interaction content. The streamer pauses the reading and the co-streamer reads the sent interaction content.
Import
Text files can be imported from the PC and parsed to generate paragraphs.
A file to be imported must:
- be a TXT file of at least 200 characters
- be automatically parsed to generate paragraphs based on the line breaks.
Audition
Click Audition to listen to the current live room script.
By default, the global voice of the streamer is used. If there is a specific voice for a scene, this voice will be prioritized. Co-streamer's content that is separately marked will be read by the co-streamer.
You can also click
 in a specific paragraph area to listen to the content of that paragraph.
Scene
You can perform the following operations on a scene:
 : changing the scene name, which defaults to Scene 1
 : setting the prioritized voice of the current scene
 : copying a scene to add a same one
 : deleting a scene
 : adjusting the position of a scene
 : adding a blank paragraph to the current scene
Paragraph
You can perform the following operations on a paragraph:
 : changing the paragraph name, which defaults to Paragraph 1.1
 : listening to the reading of the current paragraph
 : copying a paragraph to add a same one
 : deleting a paragraph
 : adjusting the position of a paragraph in the scene
 : adding a blank paragraph
If you need to create multiple scenes, click the + icon under Scene 1 on the right of the livestream preview window to add a scene. Then set the layout and script of the new scene based on the previous scene.Figure 4 Live room page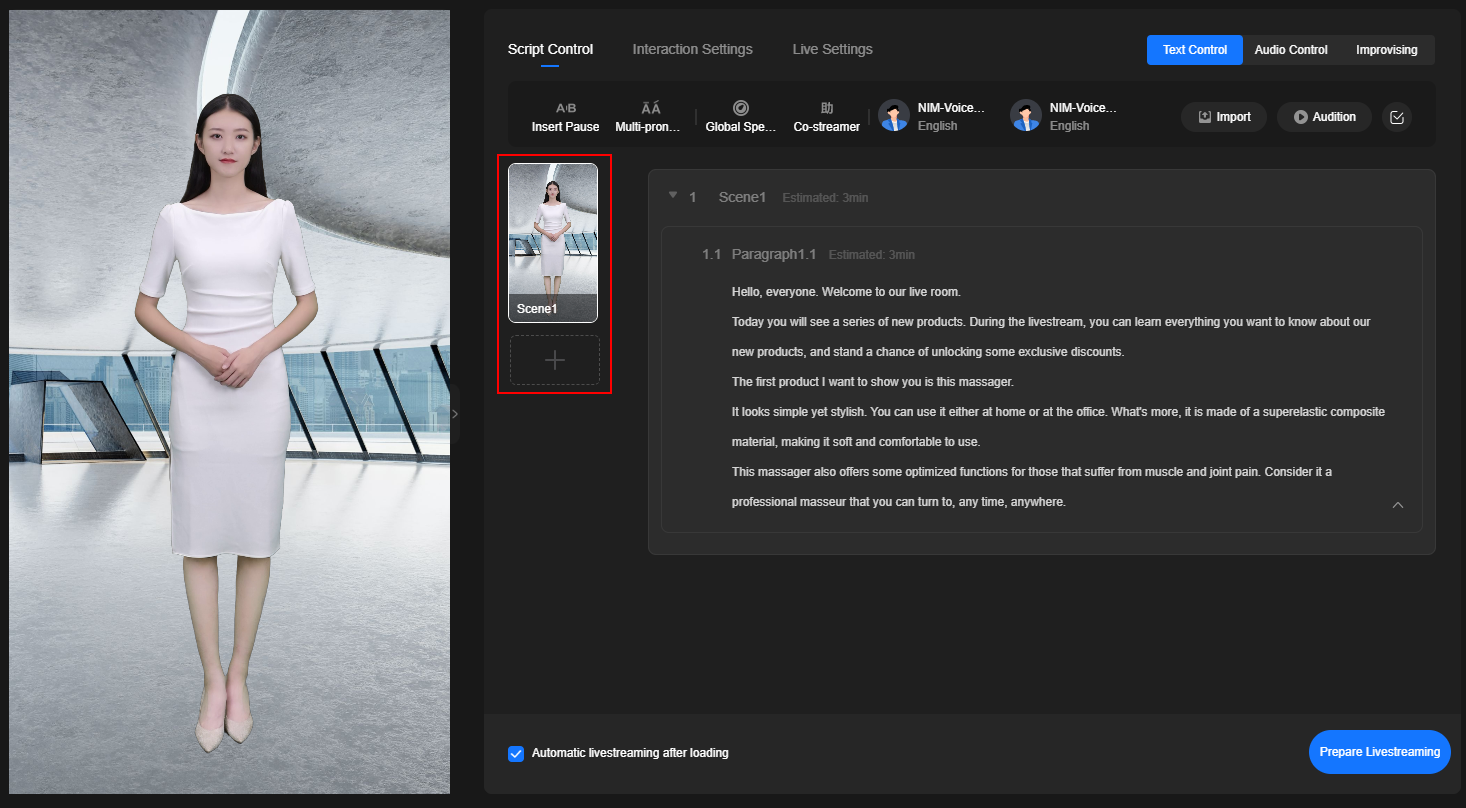
- Enter text in the paragraph box of each scene. You can click
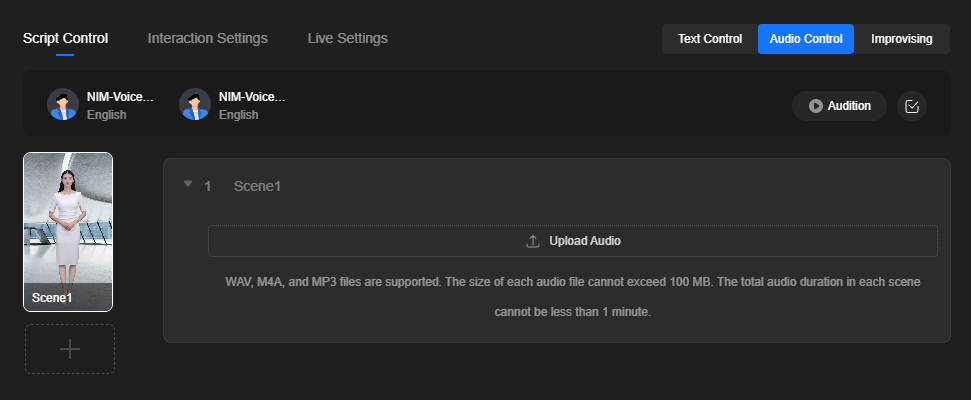
- Method 2: Audio control
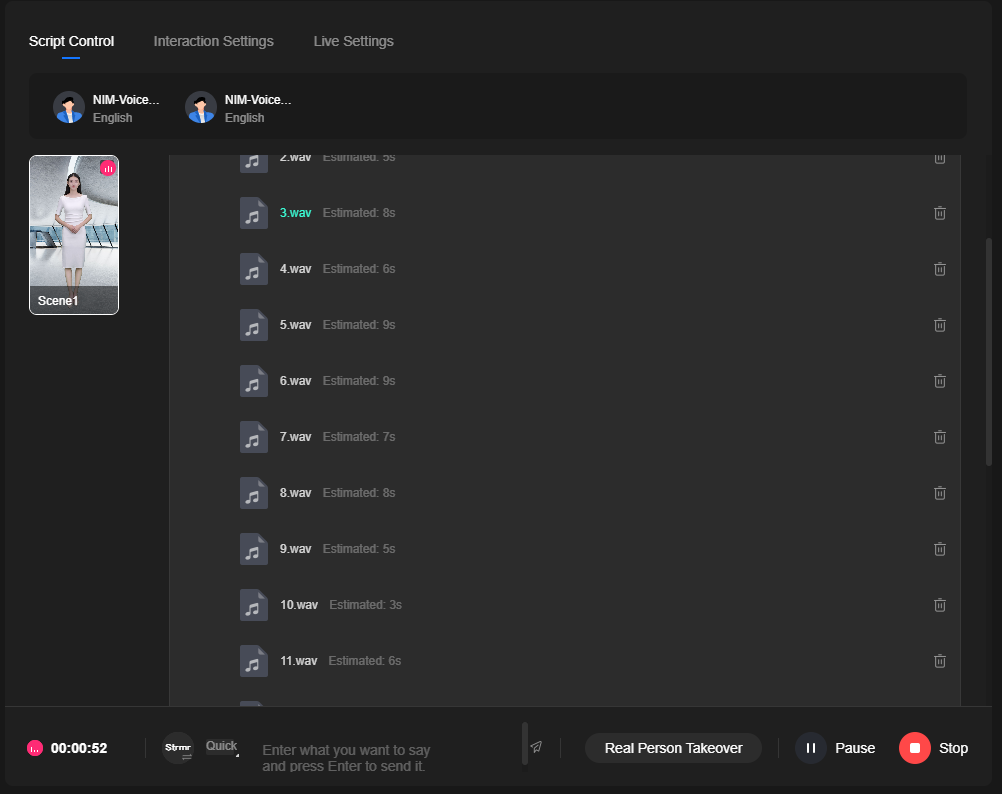
- Click Upload Audio to upload a recorded audio file from the PC, as shown in Figure 5.
WAV, M4A, and MP3 files are supported. The size of each audio file cannot exceed 100 MB. The total audio duration in each scene cannot be less than 1 minute.
After a livestream starts, the uploaded audio is played in its original voice. You can also set the voices of the streamer and co-streamer to read interaction content.
- After the audio file is uploaded, click Audition to listen to the audio file.
After the livestream starts, you can click
 shown in Figure 6 to switch to the global voice of the streamer or the co-streamer's voice. The sent interaction content will be read with the voice you choose.
- Click Upload Audio to upload a recorded audio file from the PC, as shown in Figure 5.
- Method 3: Improvising
A livestream starts without script, as shown in Figure 7. After the livestream starts, the virtual streamer remains silent, and will not speak until interaction content is sent or the livestream is taken over by a real person.


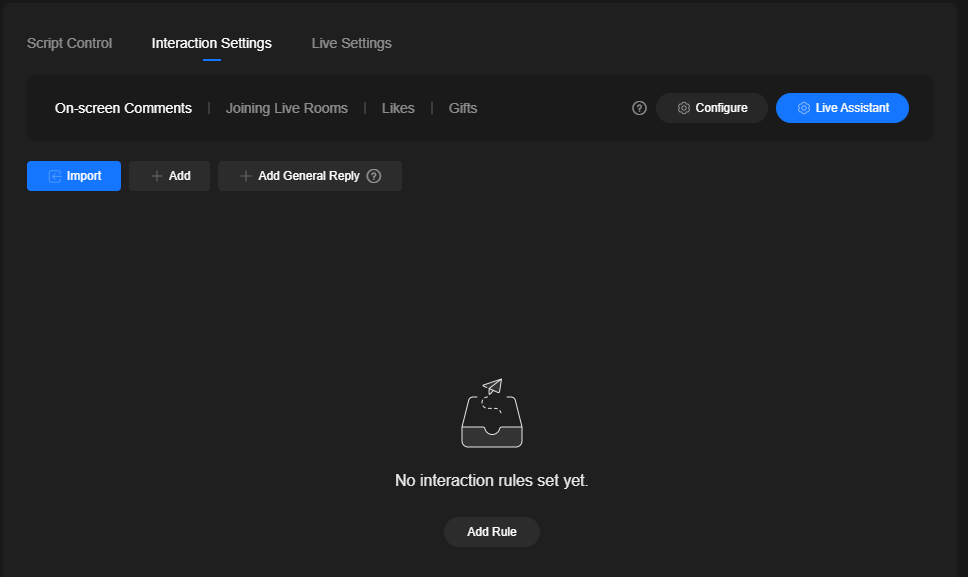
Setting the Interaction
After setting the layout and scripts for all scenes, you can proceed with interaction settings, including On-screen Comments, Joining Live Rooms, Likes, and Gifts.
You can set an interaction rule library by referring to Interactions and then import it here. Alternatively, set the interaction rules here. A maximum of 100 interaction rules of all types can be added.
The operation for adding interaction rules is similar for these four types. The following uses the operation for on-screen comments as an example.
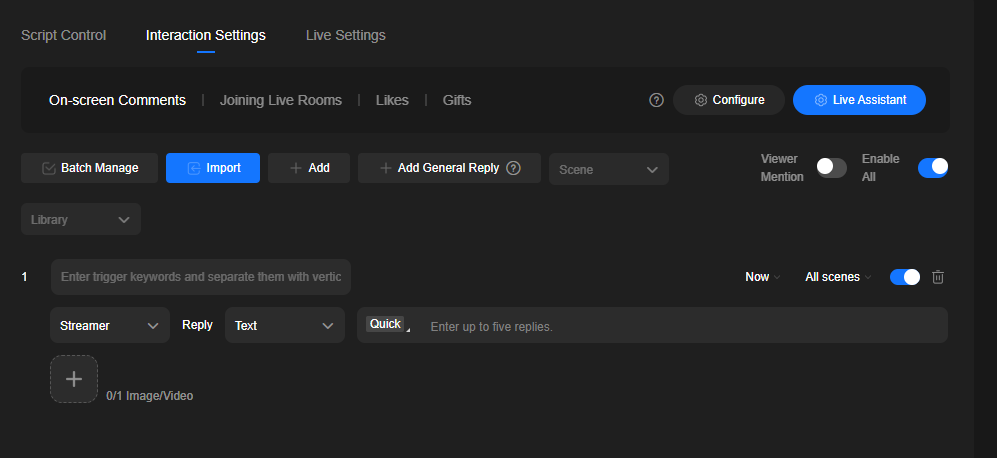
- On the live video production page, click the Interaction Settings tab on the right, as shown in Figure 8.
- Click Add Rule in Figure 8 to go to the page shown in Figure 9.
You can set the rule in the lower part of the page.
- Set the on-screen comment keywords that trigger replies by the streamer. If there are multiple keywords, separate them with vertical bars (|), for example, link|model|discount. When a keyword is identified in a comment, the preset reply of this keyword will be automatically read.
- Select Streamer or Co-streamer to reply to the user's question. The reply can be set in one of the following ways:
- Text: Set the reply as text. A maximum of five replies can be added. After a livestream starts, the replies are matched in sequence based on the number of triggering times. Only one reply will be read each time.
Example: For details about the link, model, and discount of the product, see the description in the upper part of the page.
- Audio: Upload an audio file in MP4, WAV, or M4A format from the PC. When the rule is triggered, the audio file is used for reply.
- Text: Set the reply as text. A maximum of five replies can be added. After a livestream starts, the replies are matched in sequence based on the number of triggering times. Only one reply will be read each time.
- Images or videos can be displayed in the live video to make a reply more informative.
The method of adding and setting images is the same as that of adding and setting videos. The following uses the operation of images as an example.
- Click
 , select an image or video from the local PC, and add it to the + area.
After adding the image, you can see the thumbnail of the image, as shown in
 .
. - Move the pointer to the area. The area changes to
 .
. - Click Preview. The image is added to the livestream preview window. You can drag the image or adjust the image size.
- Click
- Click Add to add more rules for replying to on-screen comments by repeating 2.
- After all rules for replying to on-screen comments are added, you can click Add General Reply to add a general reply. The setting method is the same as that in 2.
Only one general reply can be set. The general reply is triggered when a user question does not trigger any of the preset reply rules.
- You can perform the following operations on a rule:
- Batch Manage: You can batch set the application scenarios of selected rules or delete selected rules.
- Viewer Mention: After this function is enabled, you can see a text message "Replying to [name]: [content]" on the live video.
- Enable All: You can enable all rules.
 : setting the application scenario of a single rule
 : enabling or disabling the current rule
 : deleting a rule
Live Settings
- On the live video production page, click the Live Settings tab on the right, as shown in Figure 10.
See Table 2.
Table 2 Live settings Area
Parameter
Description
Playback Startup
Playback Startup Mode
Select a livestream startup mode as needed and perform operations as prompted.
There are two livestream startup modes:
- Obtain the ingest URL from the live platform. The method for obtaining the ingest URL varies with platforms. On the MetaStudio console, you only need to enter the ingest URL to push the livestream to a platform.
With RTMP stream push, the live video feed is transmitted from the Huawei Cloud server to the server of the live platform, so you can close the console page even during the livestream.
- If the ingest URL is not available, you can start livestreaming through window capture.
Note:
- With RTMP stream push, closing the console page does not end the livestreaming task, and the ongoing livestream will incur fees continuously. To end the livestream, you need to either click End or call the API to deliver a command.
- You need to understand the regulations and policies of the live platform. Some platforms may restrict livestreaming with virtual content.
Output
Livestreaming Image
Select the definition of the livestreaming image.
Options:
- Smooth
- HD
- UHD
Default value: HD
Playback Times
Set the number of times that a livestream should be played in a cyclical manner, or select Infinite loop.
The livestream ends after it is played for the configured times. However, if Max Duration is set on the Livestream Settings page and differs from Playback Times, the livestream will end whichever comes soonest.
By default, the livestream is played once.
Live Window
Size of the live window. The window can be adjusted to vertical orientation. You can start a livestream on the current page or in the new window.
- Options for the new window:
- Portrait
- Full screen (recommended): The captured frame is larger and needs to be rotated in the third-party live studio.
The default value is Portrait.
- When the window is used for livestreaming, the options are as follows:
- Default: The layout of the window is retained.
- Rotate: Expand the preview area to obtain a larger display (recommended).
- Rotate and expand by default: The preview area is rotated and expanded by default to offer a larger display.
More
Event Callback Address
Fields of scene and paragraph events can be returned during a livestream. This parameter is applicable to API calling or secondary development.
Live Room ID
You do not need to set it. It is automatically displayed after the current live room is saved.
- Obtain the ingest URL from the live platform. The method for obtaining the ingest URL varies with platforms. On the MetaStudio console, you only need to enter the ingest URL to push the livestream to a platform.
- Click
 in the upper right corner to save the livestream settings.
If livestream script saving fails, rectify the fault by referring to What If Livestream Script Saving Failed?

Starting the Livestream
- In the lower right corner of the livestream creation page, select pay-per-use or yearly/monthly for Livestream Billing Mode.
- Automatic livestreaming after loading is selected by default. Click Prepare Livestreaming in the lower right corner of the page. The livestream starts automatically after the loading is complete.
If Automatic livestreaming after loading is deselected, a livestream will be started only after you click Start Streaming.
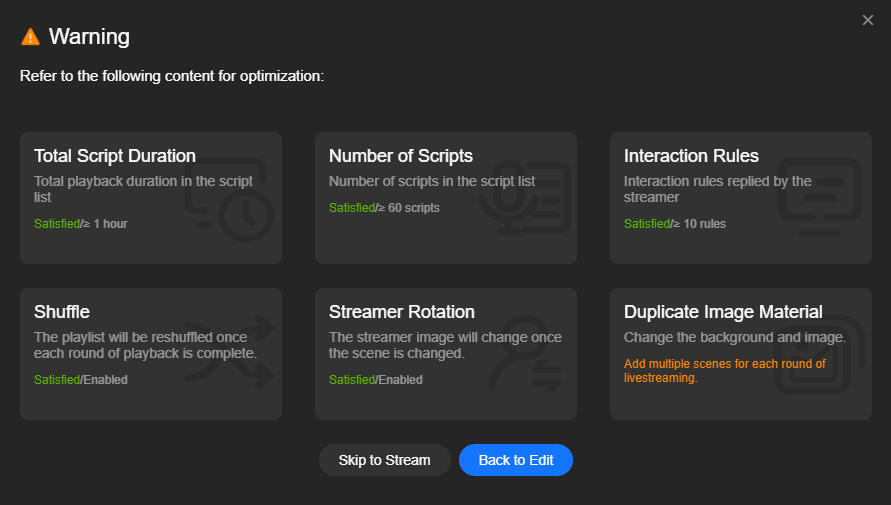
- For text control and audio control, the Warning dialog box will be displayed, as shown in Figure 11.
- You can start livestreaming after the risks are eliminated, or select Skip to Stream.
- You can view the livestream loading progress in the preview window.
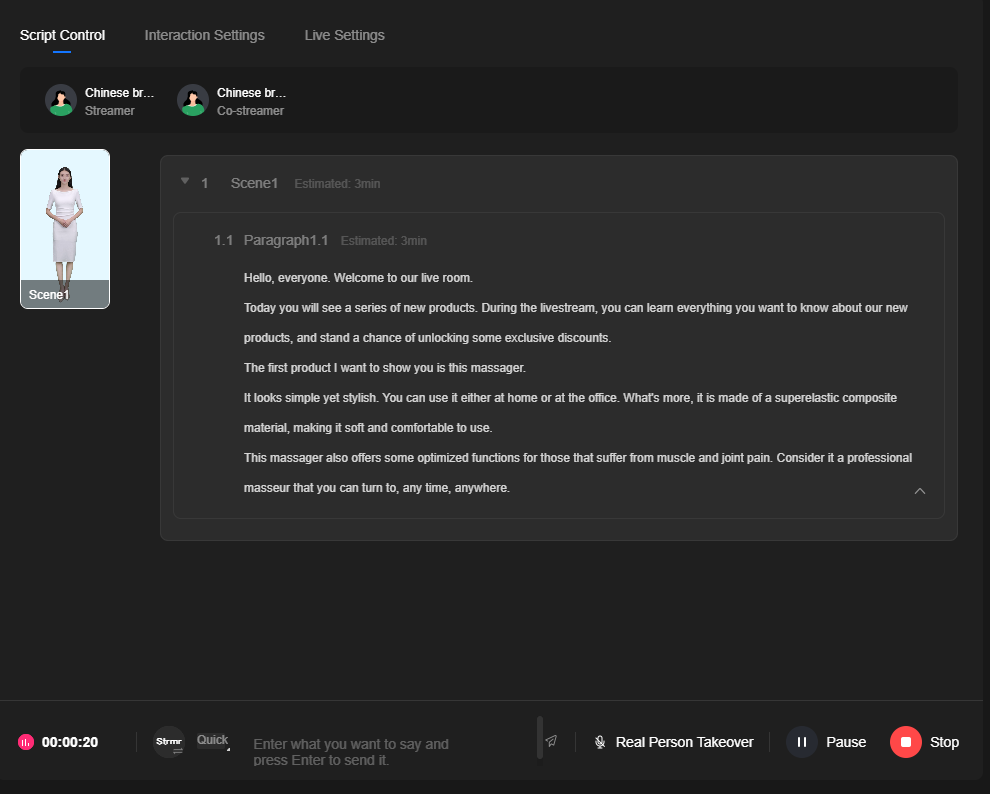
Figure 12 shows an ongoing livestream. Table 3 describes the operations in the lower right corner of the page.
Table 3 About the GUI GUI Element
Description
00:01:20
Livestream timing. For example, 00:01:20 indicates that the livestream has lasted one minute and 20 seconds.

Switches the voice of reading interaction content. The streamer's voice is used by default. You can switch to the co-streamer's voice.

Click this icon to select and send the preset interaction content for the streamer to read.
Entering interaction content and pressing Enter to send the content
After the interaction content is entered and sent, the streamer or co-streamer reads the newly sent content. Then they continue reading the original content.
Real Person Takeover
Click Real Person Takeover. In this case, the virtual streamer stops voicing and only acts as programmed, and a real person voices for the virtual streamer.
After the real person stops speaking, click Cancel Real Person Takeover to let the virtual streamer continue reading the original content.
Pause
Click Pause to pause the livestream.
Click Continue to resume the livestream.
Stop
Click Stop to stop the livestream.
Closing the window will not stop the livestream. To do that, click Stop at the bottom. You can also set the livestream to automatically end by specifying Playback Times or Max Duration. It will end whichever comes soonest.
Livestream Interruption Troubleshooting
To handle livestream interruptions in time, you are advised to enable Notify on Livestream Interruption (see Livestream Settings). When a livestream is interrupted, you can receive internal messages, SMS messages, and emails to know the causes and solutions in detail.
See Table 4.
|
Cause |
Solution |
|---|---|
|
Network and other issues |
|
|
Livestream duration about to reach Max Duration |
You can set Max Duration by referring to Livestream Settings. A warning notification will be sent before the livestream reaches the Max Duration limit. You need to increase the value of Max Duration before the current limit is reached to avoid livestream interruptions. |
|
Insufficient tenant resources |
A warning notification will be sent before your livestream resources are used up. In this case, you must enable pay-per-use billing or purchase yearly/monthly resources to avoid livestream interruptions. |
Feedback
Was this page helpful?
Provide feedbackThank you very much for your feedback. We will continue working to improve the documentation.See the reply and handling status in My Cloud VOC.
For any further questions, feel free to contact us through the chatbot.
Chatbot


