
Configuring Livestreaming Materials
On the Virtual Avatar Livestreaming page, you can add livestreaming materials such as roles, backgrounds, overlays, videos, products, and text. This section describes the operation procedure of each material type.
Roles
Figure 1 shows the Roles area.
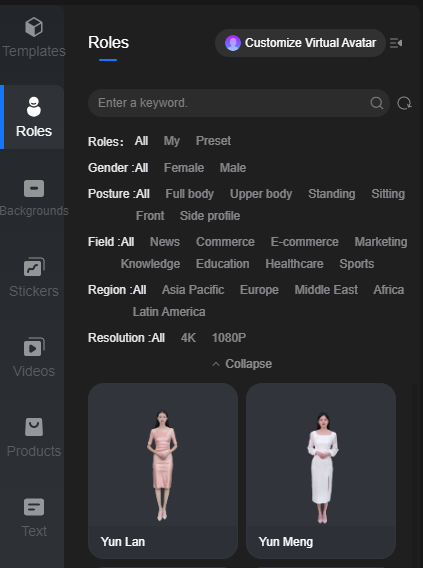
Table 1 describes the Roles area.
|
GUI Element |
Description |
|---|---|
|
Customizing virtual avatars |
Click Customize Virtual Avatar to go to the avatar creation page. See Creating a Virtual Avatar Customization Task. |
|
|
By default, two columns of virtual avatars are displayed in the Roles area. After you click |
|
|
Keyword search box. You can enter a virtual avatar name for precise search. Example: yun lan |
|
|
Icon of refreshing. If there are keywords, the virtual avatar display is refreshed based on the keywords. If no, the default display will be used. |
|
Filter criteria |
You can filter and display virtual avatars by role, gender, posture, field, region, and resolution. |
|
List of virtual avatars |
By default, all virtual avatars are displayed. Click a virtual avatar image. The image will be automatically applied to all scenes in the livestream. In the live video preview area, you can perform the following operations on the virtual avatar: Bring Forward ( |
|
|
If you move the pointer over an avatar, |


Backgrounds
Figure 2 shows the Backgrounds area. An uploaded background image cannot be modified. You can modify it only on the local PC and then upload the new one to the console.

Table 2 describes the Backgrounds area.
|
GUI Element |
Description |
|---|---|
|
Importing locally |
Click Import Locally to upload a PNG, JPG, or JPEG image with a resolution level of 4K or below. You can also drag an image from the PC to the image list area for upload. |
|
|
By default, two columns of images are displayed in the Backgrounds area. After you click |
|
|
You can enter an image name in the search box for an exact search. Example: Technology |
|
Filter criteria |
Images can be filtered and displayed by background, style, and layout. |
|
Image list |
By default, all images are displayed. Select a scene and click an image to replace the background of the scene. |
|
|
If you move the pointer over an image, |


Overlays
Figure 3 shows the Overlays area.
- An uploaded image overlay cannot be modified. You can modify it only on your local device and then upload the new one to the console.
- If a GIF is overlaid, you can preview the animation.
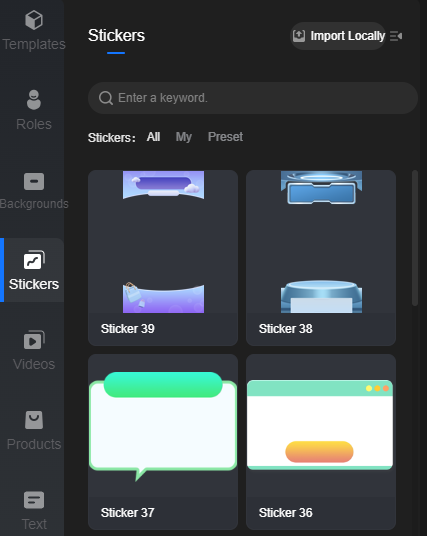
Table 3 describes the Overlays area.
|
GUI Element |
Description |
|---|---|
|
Importing locally |
Click Import Locally to upload a PNG, JPG, JPEG, or BMP image. You can also drag an image from the PC to the image list area for upload. |
|
|
By default, two columns of images are displayed in the Overlays area. After you click |
|
|
You can enter an image name in the search box for an exact search. Example: tips |
|
Filter criteria |
Images can be filtered and displayed by My or Preset. |
|
Image list |
By default, all images are displayed. |
|
Viewing an image overlay |
If you move the pointer over an image, |
|
Overlaying an image |
If you move the pointer over an image, In the live video preview area, you can perform the following operations on image overlays: Bring Forward ( |


Videos
Figure 4 shows the Videos area.
Note:
- An uploaded video overlay cannot be modified. You can modify it only on your local device and then upload the new one to the console.
- The aspect ratio of a video overlay is locked. You can adjust its width and height only on your local device and then import the new one.
- Transparent videos can be overlaid only in video production, but not on a live video.
An uploaded MOV video file with alpha channel (that is, a transparent video) will be transcoded into a WebM video file and stored in the MetaStudio asset library. The livestreaming service allows importing a transparent MOV video file, but the imported MOV video file will be transcoded into a WebM one. WebM videos cannot be overlaid on a live video.
Table 4 describes the Videos area.
|
GUI Element |
Description |
|---|---|
|
Importing locally |
Click Import Locally to upload an MOV, MP4, M4V, MKV, FLV, 3GP, WMV, or AVI video file from the PC. You can also drag a video from the PC to the video list area for upload. |
|
|
By default, two columns of videos are displayed in the Videos area. After you click |
|
|
Keyword search box. You can enter a video name for precise search. Example: marketing video |
|
Filter criteria |
Videos can be filtered and displayed by My or Preset. |
|
Video list |
By default, all videos are displayed. |
|
Watching a video |
If you move the pointer over a video, |
|
Overlaying a video |
If you move the pointer over a video, An inserted video is played mutedly. In the live video preview area, you can perform the following operations on video overlays: Bring Forward ( |


Products
Figure 5 shows the Products area.
Table 5 describes the Products area.
|
GUI Element |
Description |
|---|---|
|
Creating a product |
Click Add. In the Create Product dialog box displayed, specify product information by referring to Products. You can also add products by referring to Products. |
|
|
Clicking |
|
Product list |
By default, all products are displayed. |
|
Inserting materials |
Click Insert Material in the product. The existing image overlays, videos, text, and audios of the product are displayed in the lower part. You need to select a material and click the + icon to add the material to the live video of the current scene. You can edit a product by:
In the live video preview area, you can perform the following operations on different overlays: Bring Forward ( |


Text
Figure 6 shows the Text area.
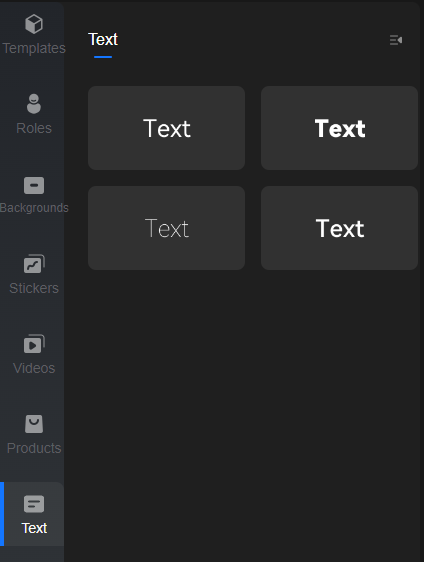
Table 6 describes the Text area.
|
GUI Element |
Description |
|---|---|
|
|
By default, two columns of text are displayed in the Text area. After you click |
|
Text list |
Supported text fonts: HarmonyOS normal, HarmonyOS bold, HarmonyOS light, and HarmonyOS medium black. |
|
Inserting text |
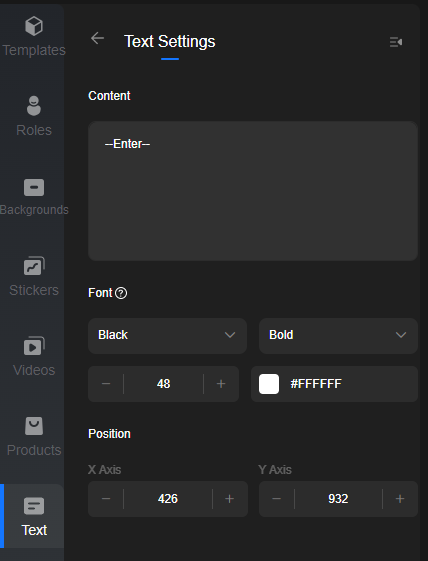
If you move the pointer over a piece of text, In the Text Settings area, set Content and Font, as shown in Figure 7. In the live video preview area, you can perform the following operations on text overlays: Bring Forward ( |


Feedback
Was this page helpful?
Provide feedbackThank you very much for your feedback. We will continue working to improve the documentation.See the reply and handling status in My Cloud VOC.
For any further questions, feel free to contact us through the chatbot.
Chatbot


