
Creating a Virtual Avatar Customization Task
You can view the preset virtual avatars provided by MetaStudio on the Video Production page or Page of Creating a Live Room. You can also refer to this section to customize a virtual avatar.
Notes
Only enterprise users can customize virtual avatars on MetaStudio.
Preparations
Before creating a virtual avatar customization task, you need to prepare the following items by referring to Procedure:
- Shoot a green-screen video of 5 to 6 minutes by referring to Shooting a Video of a Human.
Note: If you choose Retain for Video Background when creating a virtual avatar, you need to prepare a video of location shooting.
Video
Watch this video to learn how to create your virtual avatar on the MetaStudio console.
Procedure
- Log in to the MetaStudio console and go to the Overview page.
- Click Go to MetaStudio Console to go to the MetaStudio console.
- Click the Image Modeling card to go to the virtual avatar creation page.
- You can upload data of a customized virtual avatar on the left of the page.
- You can see the virtual avatar customization process on the right of the page. The training video shoot guide is in the lower part. The guide contains three parts: before, during, and after video shoot. You can follow the guide to shoot and generate a complete video available for training your virtual avatar.
Figure 1 Customizing your virtual avatar
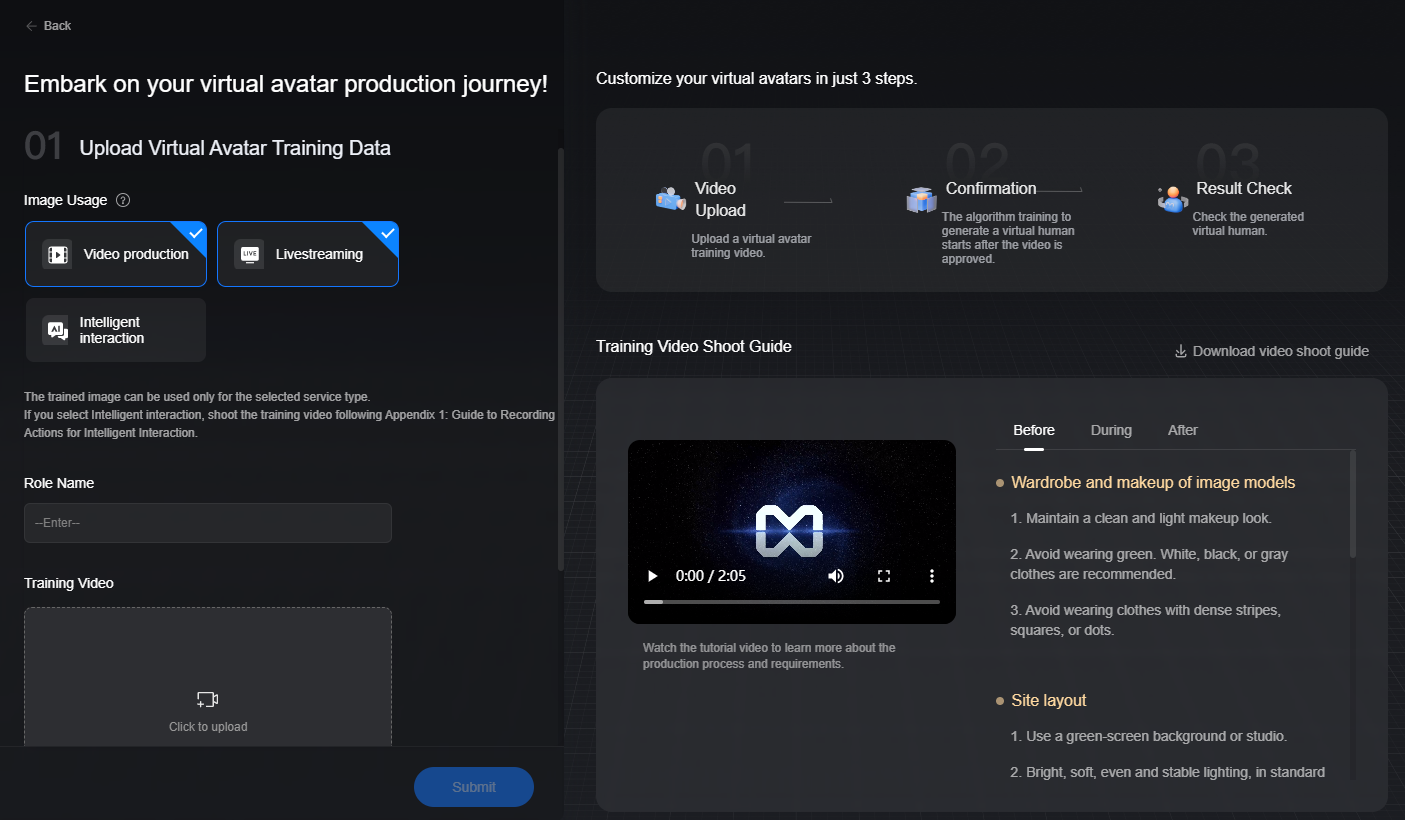
- Upload data for virtual avatar training.
For details, see Table 1.
Table 1 GUI operations Area
Parameter
Description
Upload Virtual Avatar Training Data
Role Name
Enter the role name of the virtual avatar.
Example: Sara
After the virtual avatar training is complete, to change the role name, you can choose Assets > My Models > Virtual Humans, find the card of the trained avatar, click
 in the lower right corner, and select Rename from the drop-down list.
Training Video
Upload a video of a human from your local device for training to generate a virtual avatar.
Supported video: MP4/MOV, 4K, 5–6 minutes, ≥ 1080p, 16:9 (landscape) or 9:16 (portrait, recommended), with the person in the video standing upright
The virtual avatar generated after training is the same as its human counterpart.
Video Background
Specifies whether the background of a virtual avatar video can be changed.
Options:
- Remove: You can change the background when creating a virtual avatar video.
- Retain: The preset background cannot be changed.
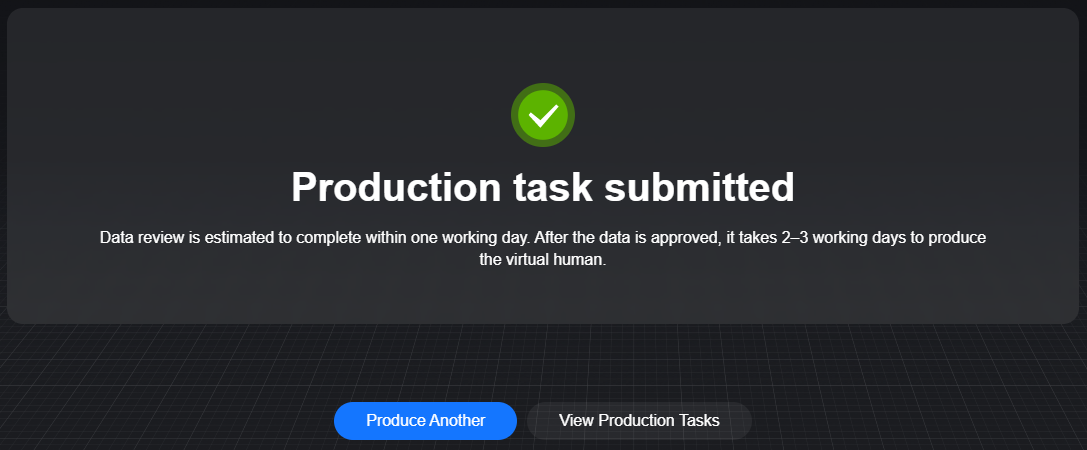
- Click Submit.
After the data is uploaded, the message Production task submitted appears, as shown in Figure 2.
Model review and modeling take about seven working days.
To rectify the H.265 video upload failure, see What If H.265 Training Video Submission Fails on Some Browsers?
- You can click View Production Tasks to view the virtual avatar customization task list.
- Click View Details in the row of the task to go to the Customization Task Details page.
View the review progress of the virtual avatar customization task. If the status is Reviewing, the status will not change to Waiting for algorithm training until the service administrator approves the task.
If a model training task fails the review, see What If a Virtual Avatar Production Task Fails the Review?
- If the virtual avatar customization task is rejected, you need to view the rejection cause, record another video as instructed, and upload the new video.
Procedure:
- In the navigation pane on the left, choose Task Center.
- View the virtual avatar customization task list on the Virtual Avatars tab and find the rejected task.
The status is Unapproved.
- Click View Causes on the right of the task. In the dialog box displayed, view the rejection cause.
Record another video as instructed or provide a qualified video.
- Click Re-upload on the right of the task to upload the new video.
The virtual avatar customization task review starts again.
FAQs
- FAQs Related to MetaStudio Virtual Avatars
- Can I Re-Generate My MetaStudio Avatar Image/Voice Without Using Additional Resources?
- How Do I Request Retraining for a Standard Virtual Avatar Model?
- Can I Use MetaStudio Voice and Image Models on Other Platforms?
- What Is the Relationship Between Voice/Image Models and Audio/Video Content?
Feedback
Was this page helpful?
Provide feedbackThank you very much for your feedback. We will continue working to improve the documentation.See the reply and handling status in My Cloud VOC.
For any further questions, feel free to contact us through the chatbot.
Chatbot


