Fixing a Bug for Quick Release Through a Change-triggered Pipeline
Overview
CodeArts Pipeline provides the microservice model for enterprises. Each microservice is independently developed, verified, deployed, and rolled out, accelerating requirement release. This model also lets enterprises organize teams by function, optimize management models, and improve operation efficiency.
Using this model, you can create change-triggered pipelines to associate them with change resources and release changes for quick project delivery.
Constraints
Change-triggered pipelines can only be triggered by changes. A microservice can only have one change-triggered pipeline.
Procedure
The following describes how to use a change-triggered pipeline to fix a bug for quick release.
|
Step |
Description |
|---|---|
|
Manage a specific service function. |
|
|
Associate a change with bug fixing work items. |
|
|
Release a change in a microservice. |
|
|
Release the updated code. |
Preparations
- You have enabled and authorized CodeArts Pipeline.
- You have created a project. The following uses a Scrum project name Project_Test as an example. You have created a work item in the project. The following uses a bug work item named BUGFIX as an example.
- You have created a code repository. The following uses a repository named Repo_Test (created using the Java Maven Demo template) as an example.
- You have created a CodeArts Repo HTTPS service endpoint. The following uses an endpoint named HttpsEndpoint01 as an example.
Step 1: Create a Microservice
- Log in to the Huawei Cloud console.
- Click
 in the upper left corner of the page and choose from the service list.
 - Click Access Service.
- Click Homepage from the top navigation pane. Search for the project created in Preparations and access the project.
- In the navigation pane on the left, choose CICD > Pipeline.
- Click the Microservices tab.
- Click Create Microservice. On the displayed page, configure parameters.
Table 2 Microservice parameters Parameter
Description
Project
Keep the default value, which is the project of the microservice.
Microservice Name
Enter Microservice01.
Code Source
Code source associated with the microservice. Select Repo.
Repository
Select the repository Repo_Test created in Preparations.
Default Branch
Select master.
Language
Development language for the microservice. Select Java.
Description
Optional. Describe the microservice with a maximum of 1,024 characters.
- Click OK.
Step 2: Create a Change
- Click the created microservice name. The Overview page is displayed.
- Click the Changes tab.
- Click Create Change. On the displayed page, configure parameters.
Table 3 Change parameters Parameter
Description
Change Subject
Enter fix-a-bug.
Repository
Keep the default value, which is the same as that of the microservice.
Branch
The development branch for the change. After the change is successfully released through the pipeline, the branch will be automatically merged to the default branch of the microservice. Select Pull new from default and enter the branch name bugfix.
Associated Work Item
Select the work item BUGFIX created in Preparations.
- Click OK.
After the change is created, the system creates a feature branch based on the microservice default branch. You can commit code to this feature branch. For details about how to commit code to a branch, see Editing and Creating a Merge Request.
Step 3: Create a Change-triggered Pipeline
- In the microservice list, click a microservice name. The Overview page is displayed.
- Switch to the Pipelines tab.
- Click Create Pipeline. On the displayed page, configure parameters.
Table 4 Pipeline parameters Parameter
Description
Name
Enter Pipeline-Test.
Project
Keep the default value, which is the project of the pipeline.
Pipeline Source
Keep the default value, which is the same as that of the microservice.
Repository
Keep the default value, which is the same as that of the microservice.
Default Branch
Keep the default value, which is the same as that of the microservice.
Repo Endpoint
This is mandatory if you enabled Change-based Trigger. Select the authorization endpoint HttpsEndpoint01 created in Preparations.
Alias
Repository alias. If you set an alias, system parameters will be generated. It is not set in this example.
Change-based Trigger
Enable it to set current pipeline to a change-triggered one. It is enabled in this example.
Description
(Optional.) Describe the pipeline with a maximum of 1,024 characters.
- Click Next and select the Maven-Build template. Stages and jobs will be generated. You can retain the default settings.
- Click Save.
Step 4: Execute a Change-triggered Pipeline
After the code is updated, you can execute the change-triggered pipeline.
- On the change list page, click a change name.
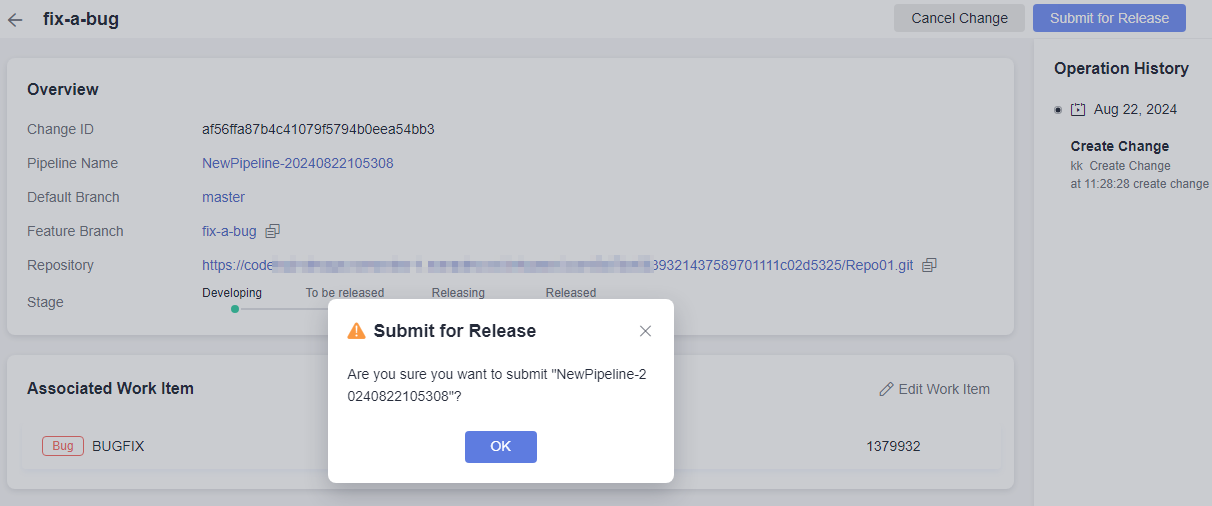
- Click Submit for Release in the upper right corner. In the displayed dialog box, confirm the release.
Figure 1 Submitting for release

- Click OK. The release list page is displayed.
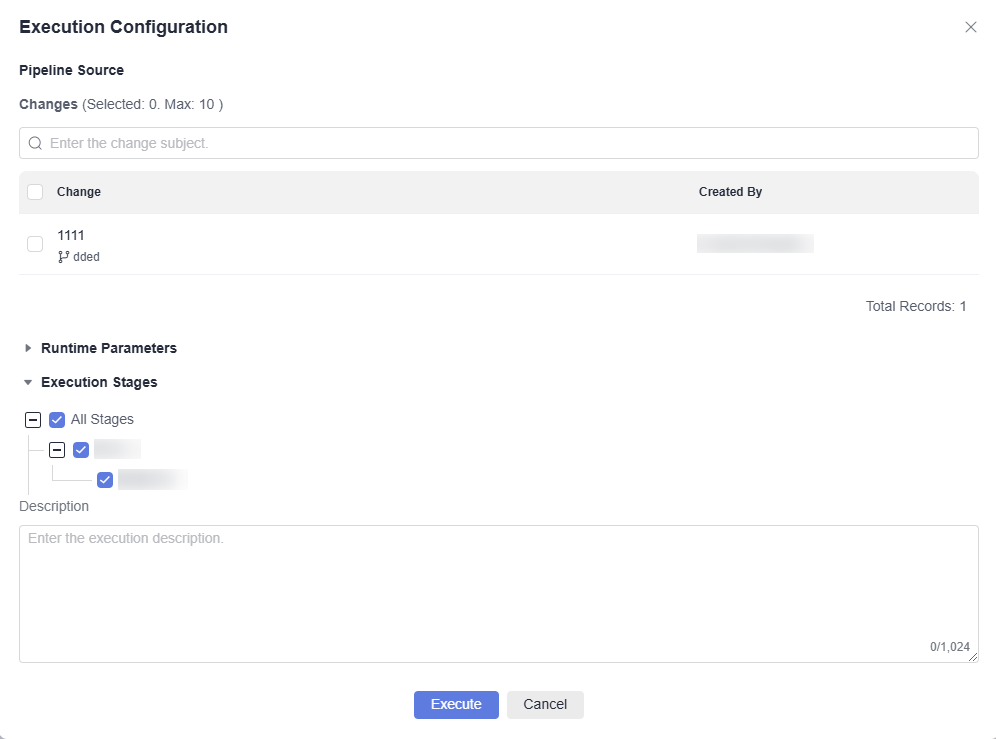
- Click Execute in the upper right corner. In the displayed window, select the submitted change, and retain the default settings.
Figure 2 Execution configuration

- Click Execute.
During pipeline running, the MergeReleaseBranch and MergeDefaultBranch stages are automatically generated. The newly pulled feature branch is merged to the integration branch.
After the code check and build jobs are successfully executed, the pipeline proceeds to the MergeDefaultBranch stage with a confirmation dialog box displayed.
- Click Continue. After the MergeDefaultBranch stage is executed, the system:
- Updates the change status to Released.
- Updates the status of the BUGFIX work item to Closed.
- Merges the code on the release branch to the default branch.
A change release has been completed.
If the pipeline fails to be executed, rectify the fault based on the error message. For details, see FAQ.
Feedback
Was this page helpful?
Provide feedbackThank you very much for your feedback. We will continue working to improve the documentation.See the reply and handling status in My Cloud VOC.
For any further questions, feel free to contact us through the chatbot.
Chatbot


