
Using MySQL CLI to Connect to an Instance Through a Private Network
If your applications are deployed on an ECS that is in the same region and VPC as your DB instance, you are advised to use a floating IP address to connect to the DB instance through the ECS.
This section uses a Linux ECS as an example to describe how to connect a Linux ECS to a DB instance with SSL enabled through a floating IP address. SSL encrypts connections to the DB instance, making in-transit data more secure.
If you want to connect to a DB instance with SSL disabled, see Buying an RDS for MySQL Instance and Connecting to It Using a MySQL Client.
Step 1: Buy an ECS
- Log in to the management console and check whether there is an ECS available.
- If there is a Linux ECS, go to 3.

If the ECS image is CentOS, CentOS 7.4 64bit must be used.
- If there is a Windows ECS, see Buying an RDS for MySQL Instance and Connecting to It Using MySQL-Front.
- If no ECS is available, go to 2.
Figure 1 ECS
- If there is a Linux ECS, go to 3.
- Buy an ECS and select Linux (for example, CentOS 7.4 64bit) as its OS.
To download a MySQL client to the ECS, bind an EIP to the ECS. The ECS must be in the same region, VPC, and security group as the RDS for MySQL DB instance for mutual communications.
For details about how to purchase a Linux ECS, see Purchasing a Custom ECS in Elastic Cloud Server User Guide.
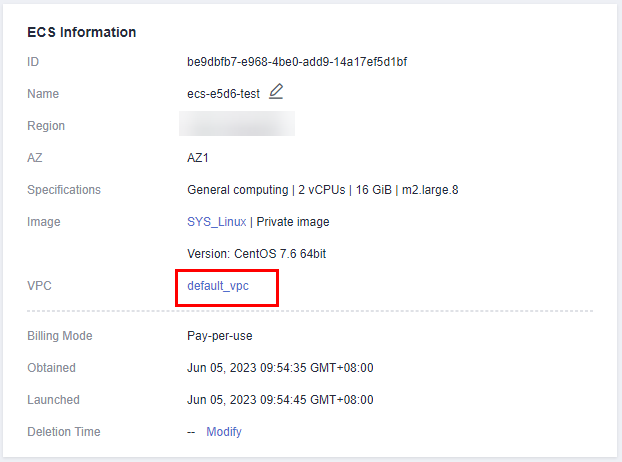
- On the ECS Information page, view the region and VPC of the ECS.
Figure 2 ECS information
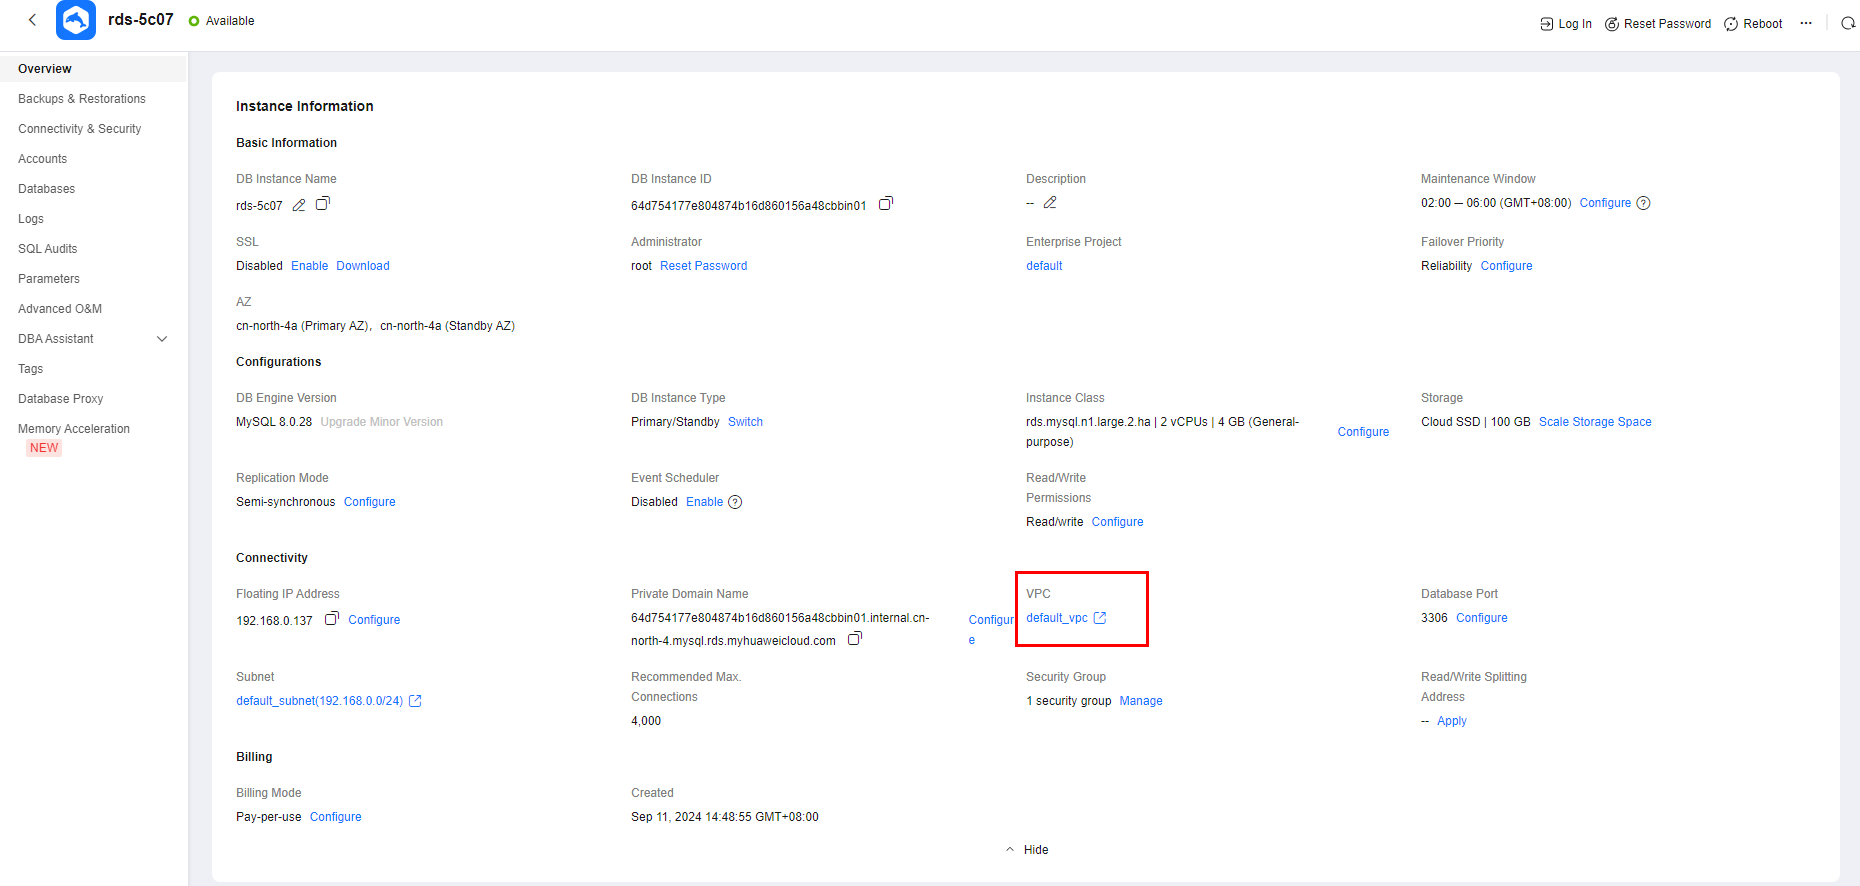
- On the Overview page of the RDS for MySQL instance, view the region and VPC of the DB instance.
Figure 3 Overview
- Check whether the ECS and RDS for MySQL instance are in the same region and VPC.
- If yes, go to Step 2: Test Connectivity and Install a MySQL Client.
- If they are not in the same region, purchase another ECS or DB instance. The ECS and DB instance in different regions cannot communicate with each other. To reduce network latency, deploy your DB instance in the region nearest to your workloads.
- If the ECS and DB instance are in different VPCs, change the VPC of the ECS to that of the DB instance. For details, see Changing a VPC.
Step 2: Test Connectivity and Install a MySQL Client
- Log in to the ECS. For details, see Logging In to a Linux ECS Using VNC in the Elastic Cloud Server User Guide.
- On the Instances page of the RDS console, click the DB instance name to go to the Summary page.
- Choose Connectivity & Security from the navigation pane. In the Connection Information area, obtain the floating IP address (or private domain name) and database port of the DB instance.
Figure 4 Connection information

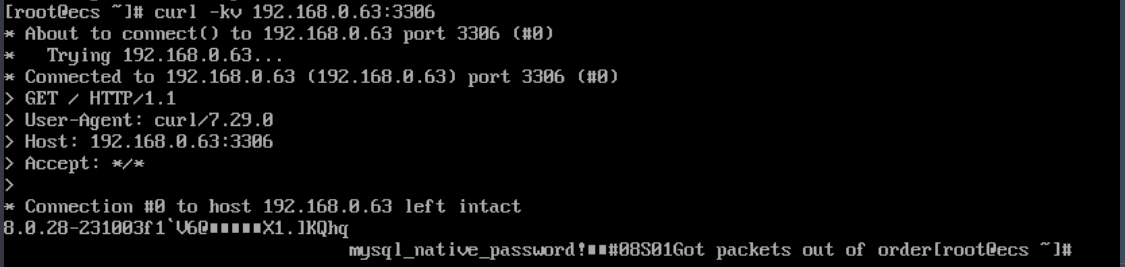
- After logging in to the ECS, check whether the floating IP address and database port obtained in 3 can be connected.
curl -kv Floating_IP_address:Port
Example:
curl -kv 192.168.0.4:3306
- If yes, network connectivity is normal. Go to 5.
Figure 5 Normal network connectivity
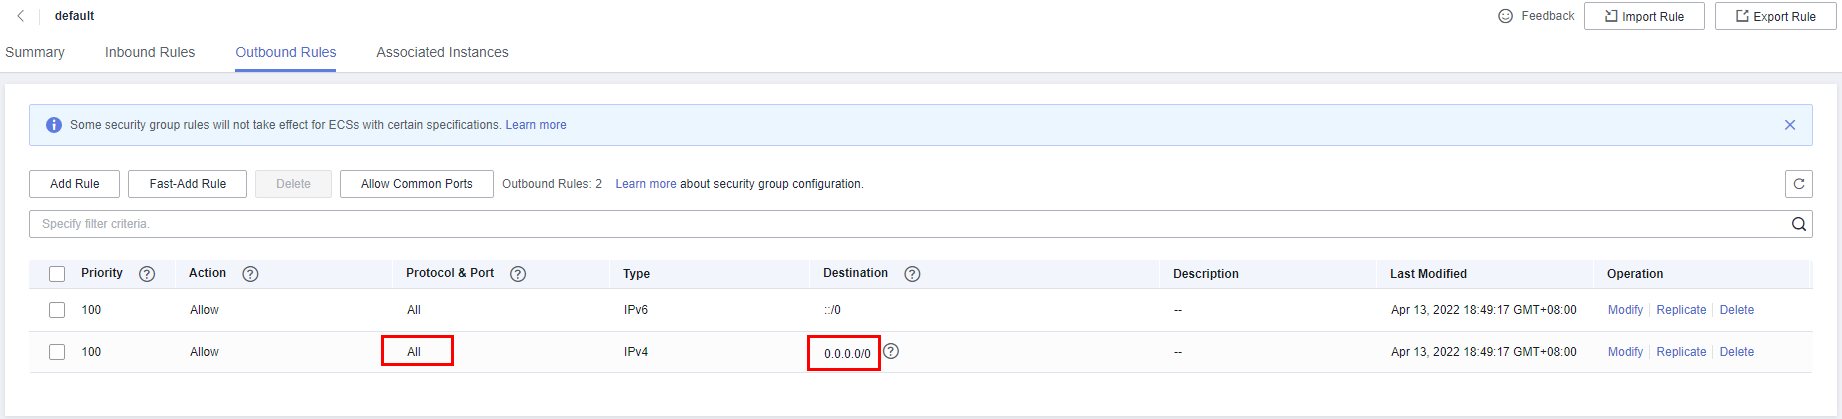
- If no, check the security group rules.
- If in the security group of the ECS, there is no outbound rule with Destination set to 0.0.0.0/0 and Protocol & Port set to All, add an outbound rule for the floating IP address and port of the DB instance.
Figure 6 ECS security group
- If in the security group of the DB instance, there is no inbound rule allowing the access from the private IP address and port of the ECS, add an inbound rule for the private IP address and port of the ECS. For details, see Configuring a Security Group Rule.
- If in the security group of the ECS, there is no outbound rule with Destination set to 0.0.0.0/0 and Protocol & Port set to All, add an outbound rule for the floating IP address and port of the DB instance.
- If yes, network connectivity is normal. Go to 5.
- Import a MySQL client installation package to the ECS using Method 1 or Method 2 and install the client.
- Download a MySQL client installation package for Linux using the ECS. To do so, you need to bind an EIP to the ECS.
- MySQL 8.0:
wget https://dev.mysql.com/get/mysql-community-client-8.0.28-1.el6.x86_64.rpm
- MySQL 5.7:
wget https://dev.mysql.com/get/mysql-community-client-5.7.38-1.el6.x86_64.rpm

A MySQL client running a version later than that of the DB instance is recommended.
- MySQL 8.0:
- Run the following command to install the MySQL client:
- MySQL 8.0:
rpm -ivh --nodeps mysql-community-client-8.0.28-1.el6.x86_64.rpm
Figure 7 Installing a client
- MySQL 5.7:
rpm -ivh --nodeps mysql-community-client-5.7.38-1.el6.x86_64.rpm
- If any conflicts occur during the installation, add the replacefiles parameter to the command and install the client again.
rpm -ivh --replacefiles mysql-community-client-installation_package_version-1.el6.x86_64.rpm
- If a message is displayed prompting you to install a dependent package during the installation, add the nodeps parameter to the command and install the client again.
rpm -ivh --nodeps mysql-community-client-installation_package_version-1.el6.x86_64.rpm
- MySQL 8.0:
- Download a MySQL client installation package for Linux using a browser and upload the package to the ECS.
You can use any terminal connection tool, such as WinSCP and PuTTY, to upload the installation package to the ECS.
- MySQL 8.0:
Click here to download an installation package. mysql-community-client-8.0.28-1.el6.x86_64.rpm is used as an example.
Figure 8 Downloading a MySQL 8.0 installation package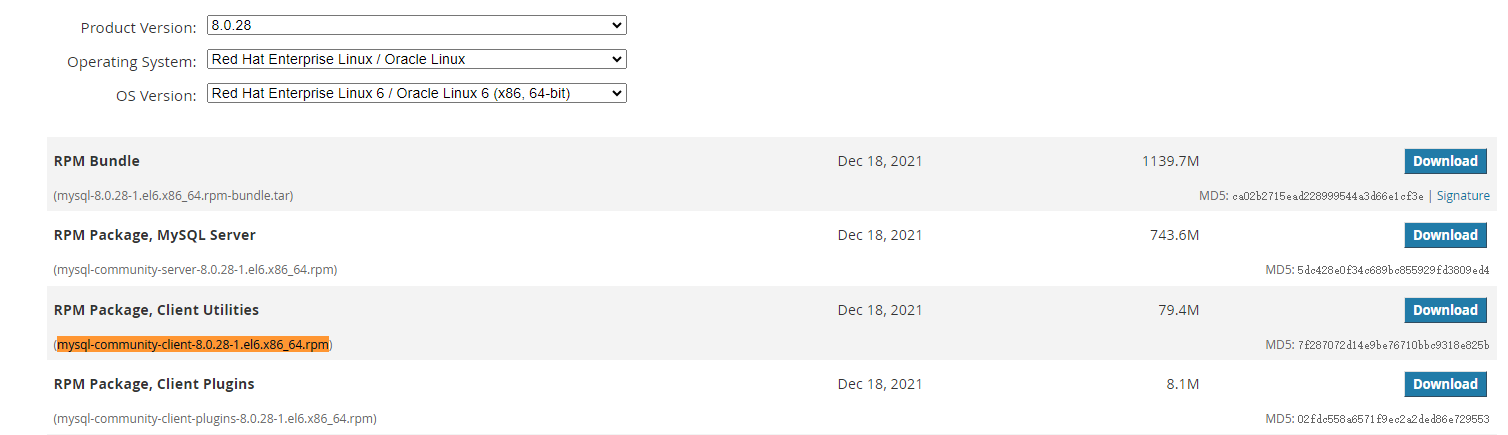
- MySQL 5.7:
Click here to download an installation package. mysql-community-client-5.7.38-1.el6.x86_64.rpm is used as an example.
Figure 9 Downloading a MySQL 5.7 installation package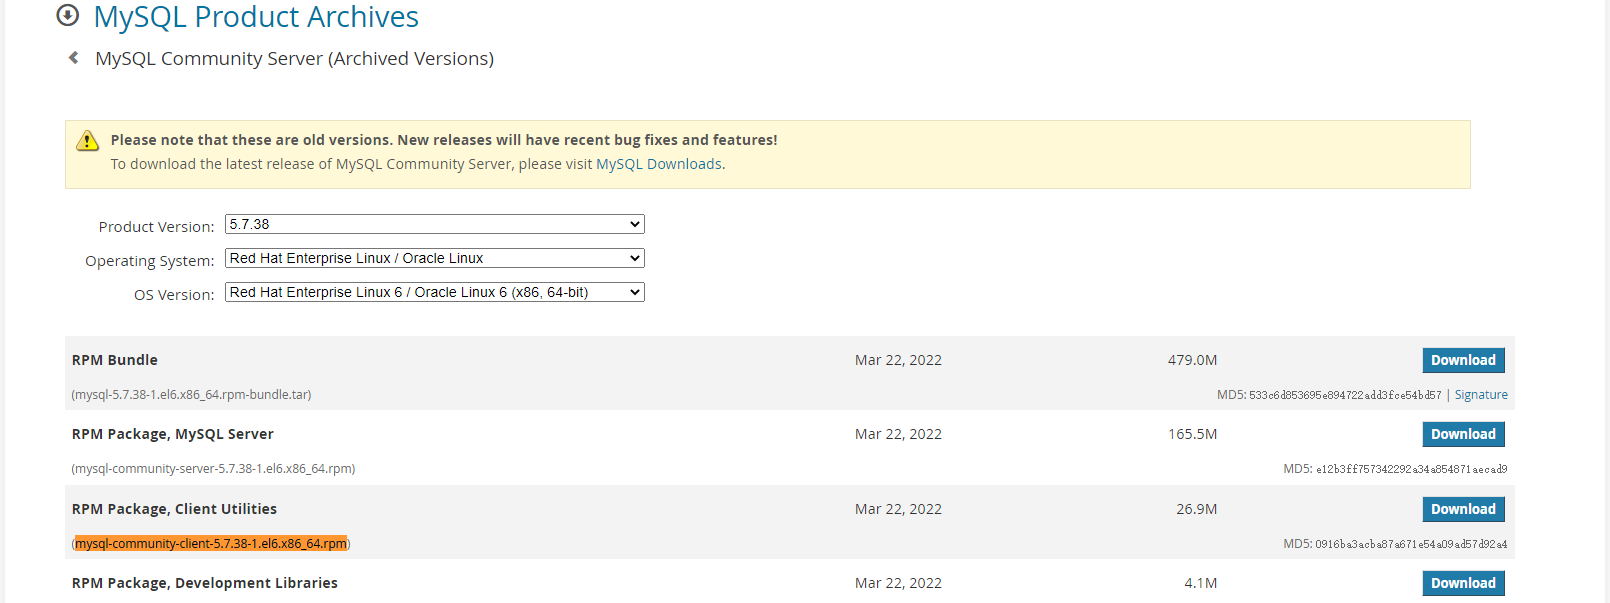
A MySQL client running a version later than that of the DB instance is recommended.
- MySQL 8.0:
- Run the following command to install the MySQL client:
- MySQL 8.0:
rpm -ivh --nodeps mysql-community-client-8.0.28-1.el6.x86_64.rpm
Figure 10 Installing a client
- MySQL 5.7:
rpm -ivh --nodeps mysql-community-client-5.7.38-1.el6.x86_64.rpm
- If any conflicts occur during the installation, add the replacefiles parameter to the command and install the client again.
rpm -ivh --replacefiles mysql-community-client-installation_package_version-1.el6.x86_64.rpm
- If a message is displayed prompting you to install a dependent package during the installation, add the nodeps parameter to the command and install the client again.
rpm -ivh --nodeps mysql-community-client-installation_package_version-1.el6.x86_64.rpm
- MySQL 8.0:
Step 3: Connect to the DB Instance Using a CLI
On the Instances page of the RDS console, click the instance name to go to the Overview page. Under SSL, check whether SSL is enabled.
- If it is disabled (default), use a non-SSL connection.
- If it is enabled, use an SSL connection. SSL encrypts connections to the instance, making in-transit data more secure.
- Run the following command on the ECS to connect to the DB instance:
mysql -h <host> -P <port> -u <userName> -p
Example:
mysql -h 172.16.0.31 -P 3306 -u root -p
Table 1 Parameter description Parameter
Description
<host>
The floating IP address or private domain name of the DB instance, which can be obtained from 3.
NOTE:If your DB instance is connected through a private domain name, changing its floating IP address does not interrupt services.
<port>
The database port of the DB instance, which can be obtained from 3. The default value is 3306.
<userName>
The administrator account root.
- Enter the password of the database account if the following information is displayed:
Enter password:
Figure 11 Successful connection
- On the Instances page of the RDS console, click the DB instance name.
- Click Download under SSL to download Certificate Download.zip, and extract the root certificate ca.pem and bundle ca-bundle.pem from the package.
- Upload ca.pem to the ECS. It is recommended that the root certificate be stored in the same directory as the MySQL client installation package.
- You can use any terminal connection tool, such as WinSCP and PuTTY, to upload the root certificate.
- TLS v1.2 or later is recommended. Versions earlier than TLS v1.2 have security risks. You can change the value of loose_tls_version to set the protocol version. For details, see Modifying Parameters of an RDS for MySQL Instance.
- ca-bundle.pem contains both the new certificate provided as of April 2017 and the old certificate.
- Both ca.pem and ca-bundle.pem can be used for SSL connections because ca-bundle.pem contains ca.pem.
- RDS for MySQL DB instances do not support X.509-based authentication.
- Run the following command on the ECS to connect to the DB instance:
mysql -h <host> -P <port> -u <userName> -p --ssl-ca=<caName>
Example:
mysql -h 172.16.0.31 -P 3306 -u root -p --ssl-ca=ca.pem
Table 2 Parameter description Parameter
Description
<host>
The floating IP address or private domain name of the DB instance, which can be obtained from 3.
NOTE:If your DB instance is connected through a private domain name, changing its floating IP address does not interrupt services.
<port>
The database port of the DB instance, which can be obtained from 3. The default value is 3306.
<userName>
The administrator account root.
<caName>
The name of the CA certificate.
- Enter the password of the database account if the following information is displayed:
Enter password:
Figure 12 Successful connection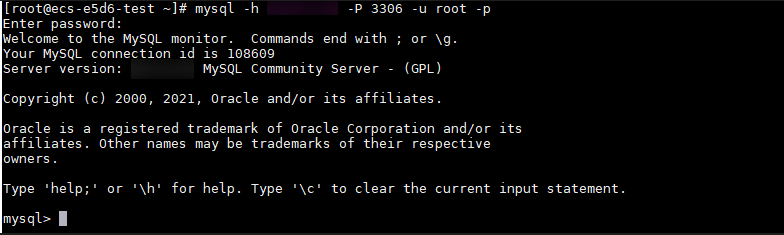
FAQ
Follow-up Operations
After logging in to the DB instance, you can create or migrate databases.
Feedback
Was this page helpful?
Provide feedbackThank you very much for your feedback. We will continue working to improve the documentation.See the reply and handling status in My Cloud VOC.
For any further questions, feel free to contact us through the chatbot.
Chatbot


