Creating an Audio Transcoding Task
You can select an audio transcoding template and create an audio transcoding task to transcode audio files stored in OBS buckets. The fee for audio transcoding is different from that for video transcoding. For details, see Pricing Details.
Prerequisites
- An input audio file has been uploaded to an OBS bucket. MPC is used in the same region as the OBS bucket. If the audio file has not been uploaded, upload it by referring to Uploading Media Files.
- MPC has been authorized to access the buckets that store the input file and output file. If MPC has not been authorized, authorize MPC by referring to Authorizing Access to Cloud Resources.
- If you want to receive the task status updates, configure the event notifications function. For details, see Configuring Event Notifications.
Restrictions
The supported audio codecs: AAC, AC3, EAC3, HE-AAC, MP2, MP3, PCM (s161e, s16be, s241e, s24be, DVD), and WMA If the encoding format of the input file is not one of the preceding formats, transcoding will fail.
Creating an Audio Transcoding Template
MPC has six built-in one-in one-out audio transcoding templates. If the presets do not meet your requirements, you can perform the following steps to customize a one-in one-out audio transcoding template.
- Log in to the MPC console.
- In the navigation pane, choose Global Settings > Custom Templates.
- Click Custom Templates.
- Set the basic information, including the template name and output format.
- The template name can be up to 128 characters long. Only letters, underscores (_), and digits are allowed.
- Select MP3 or ADTS as the output format.
- Set audio parameters. See Table 1.
Table 1 Audio parameters Parameter
Description
Audio Codec
Audio codec.
Possible values include AAC and HEAAC1. The default value is AAC.
Audio Channel
Possible values include Stereo, Mono, and 5.1 Channel. The default is Stereo.
Sampling Rate
Choose one from Auto, 22050, 32000, 44100, 48000, and 96000. The default value is Auto. The unit is Hz.
Auto indicates adaptive sampling.
Bitrate
Bitrate of an output audio.
The value is 0 or an integer ranging from 8 to 1,000.
Unit: kbit/s
- Click OK.
Procedure
- Log in to the MPC console.
- In the navigation pane, choose Media Processing > Transcoding.
- On the displayed page, click Create Task.
On the Create Task page, configure audio transcoding parameters.
- Configure basic parameters, as shown in Figure 1.
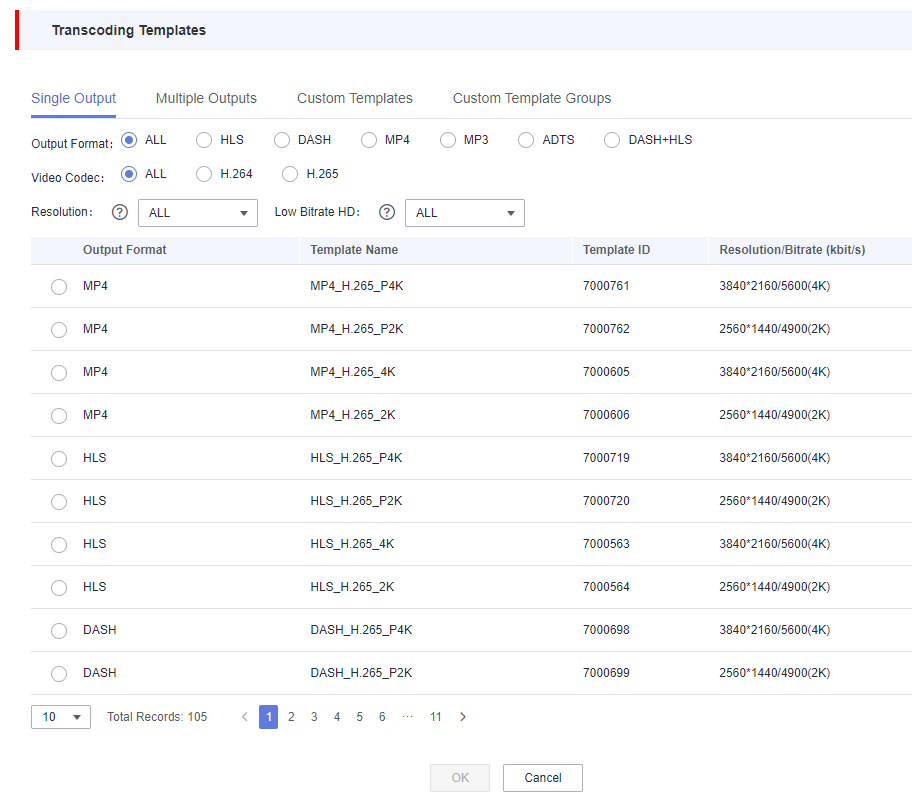
- Select a transcoding template that best fits your needs.
- If you select the preset One Output template, select MP3 or ADTS for Output Format.
- If you select Custom Templates, create an audio transcoding template.
Figure 2 Transcoding templates
- Click OK. The transcoding task starts running.
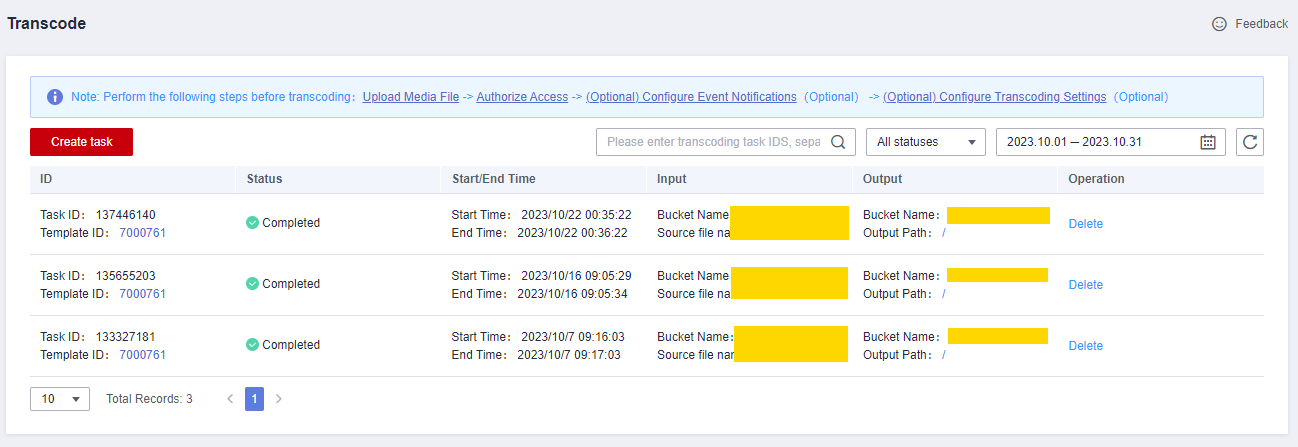
- View the task status in the task list.
You can view details about transcoding tasks of the past 60 days.
Figure 3 Transcoding task list
Feedback
Was this page helpful?
Provide feedbackThank you very much for your feedback. We will continue working to improve the documentation.See the reply and handling status in My Cloud VOC.
For any further questions, feel free to contact us through the chatbot.
Chatbot


