
Uploading Media Files
MPC does not store media files. You need to upload a video file to be transcoded to an OBS bucket before transcoding.
Notes
MPC can process only media files stored in OBS buckets in the same region. If you want to use MPC in the CN North-Beijing4 region, the OBS bucket for storing media files must be in the CN North-Beijing4 region.
Procedure
- Log in to the OBS console.
- Click Create Bucket in the upper right corner of the page.
The created bucket is used to store MPC media files.
- On the displayed page, enter the bucket name and select the storage class and bucket policy as needed.
- Click Create Now. If the input and output files are stored in the same bucket, create one bucket. Otherwise, create two buckets as the input and output buckets respectively.
Table 1 Storage classes Storage Class
Application Scenario
Standard
Stores frequently accessed (multiple times per month) data such as small and essential files that require low latency.
Infrequent Access
Stores infrequently accessed (once per month) data that requires low latency.
Archive
Stores rarely accessed (once per year) data.
Table 2 Bucket policies Bucket Policy
Description
Private
Only the bucket owner can read, write, and delete objects in the bucket.
Public Read
Any user can read objects in the bucket. Only the bucket owner can write and delete objects in the bucket.
Public Read and Write
Any user can read, write, and delete objects in the bucket.

- Select a region where you want MPC to do the transcoding. If you use MPC in CN North-Beijing 4, then you need to create a bucket in CN North-Beijing 4.
- If input files and output files are stored in different buckets, you are advised to set the storage class of the input bucket to Infrequent Access and that of the output bucket to Standard.
- Configure the input folder.
- Click the name of the bucket created in 3. The bucket details page is displayed.
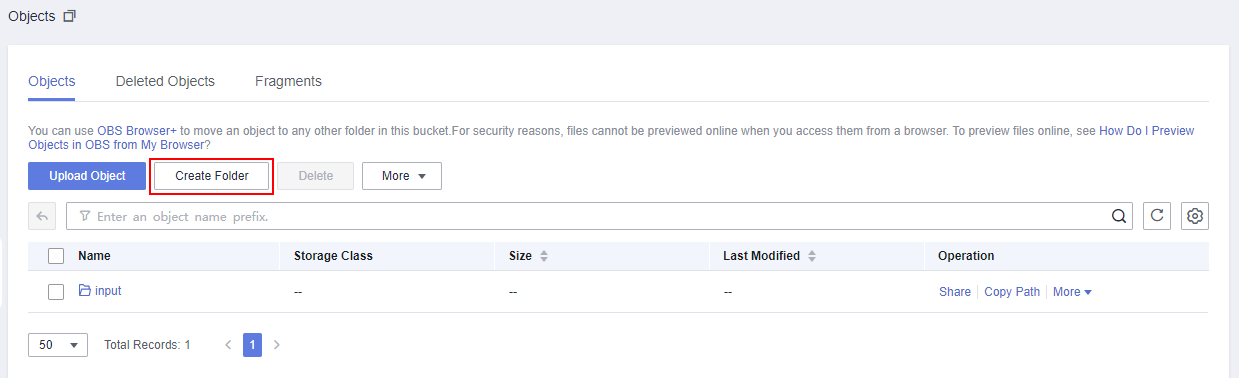
The Objects tab on the Objects page is displayed.
- Click Create Folder to configure the input folder of MPC. Figure 1 Creating folders
- Click the name of the bucket created in 3. The bucket details page is displayed.
- Configure the output folder. The procedure is similar to that in 5.
- Click the name of the output bucket created in 3. The bucket details page is displayed.
- On the Objects page, click Create Folder to create an output folder.
- Upload a media file.
- On the input bucket details page, click the name of the input folder.
- Click Upload Object and select a media file.
- Select the storage class and encryption mode of the file, and click Upload.
Follow-Up Operations
You need to authorize MPC to access the media files in the OBS bucket by referring to Authorizing Access to Cloud Resources.
Feedback
Was this page helpful?
Provide feedbackThank you very much for your feedback. We will continue working to improve the documentation.See the reply and handling status in My Cloud VOC.
For any further questions, feel free to contact us through the chatbot.
Chatbot


