Updated on 2025-08-25 GMT+08:00

About the GUI

Before starting livestreaming, you can familiarize yourself with the Virtual Avatar Livestreaming page and the page of creating a live room.

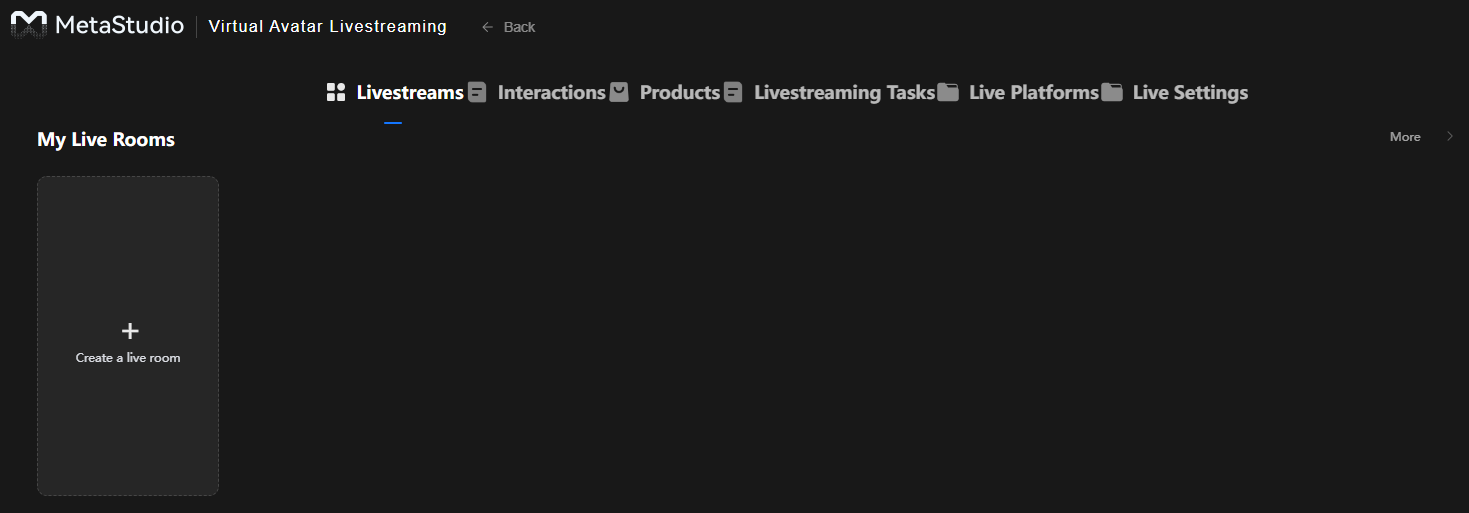
Home page of virtual avatar livestreaming

Figure 1 shows the home page of virtual avatar livestreaming. The description of each tab is as follows:

  • Livestreams: You can create a live room with a virtual avatar. See Livestreams.
  • Interactions: You can add an interaction rule library and interaction rules. The added interaction rule library can be directly imported to and used in the live room. See Interactions.
  • Products: You can add products. Products are automatically displayed on the Products tab of the live room, and can be used during livestreaming. See Products.
  • Livestreaming Tasks: shows the list of live rooms you have created. You can click this tab to enter a live room, modify the content in the live room, and start the streaming again. See Livestreaming Tasks.
  • Live Platforms: You can add a third-party live platform and interconnect it with a live room of MetaStudio. For details, see Interconnection with a Live Platform.
  • Live Settings (tenant-level): Parameters include Max Duration, Auto End After, and Notify on Livestream Interruption. For details, see Livestream Settings.
Figure 1 Virtual avatar livestreaming

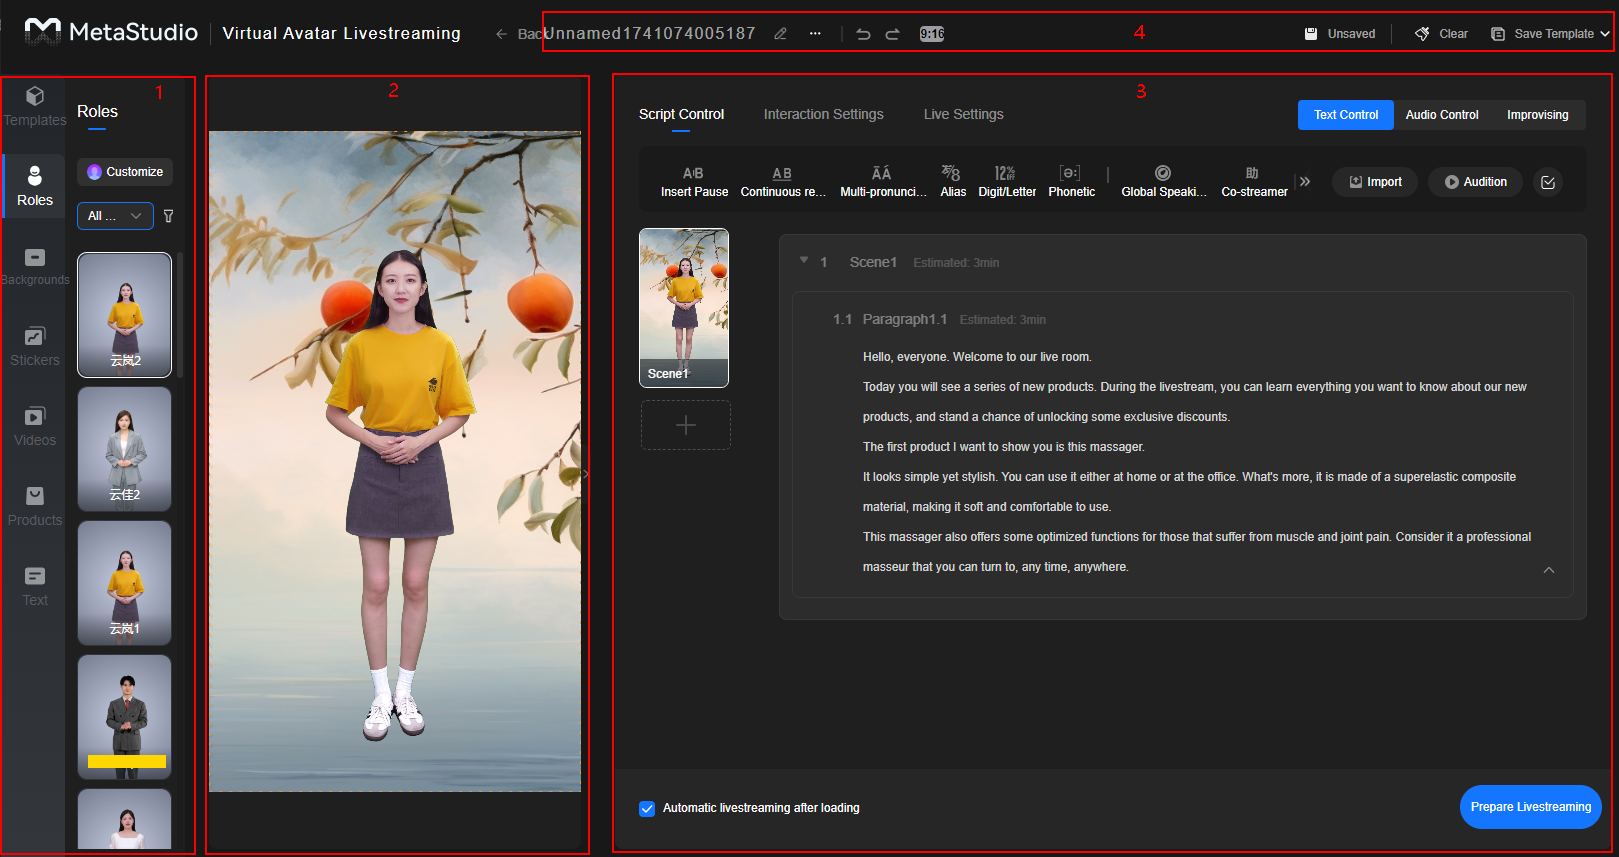
Page of Creating a Live Room

Figure 2 shows the page of creating a live room. Table 1 describes details of the page.

Figure 2 Creating a live room
Table 1 About the GUI

Area

Description

1

Material area. For details, see Configuring Livestreaming Materials.

  • Templates: livestreaming template. This tab is visible only to administrators.
  • Roles: virtual avatar image list. You can select the desired virtual avatar image or customize one.
  • Backgrounds: background image list. You can import images from the local PC or select a preset background image.
  • Overlays: image overlay list. You can import an image from a local device to overlay it on the video.
  • Videos: muted video list. An MOV, MP4, M4V, MKV, FLV, 3GP, WMV, or AVI video can be imported from the local PC and set as the background video.
  • Products: product list. You need to customize a product, which can contain image overlays, videos, text, and audios.
  • Text: text template list. You can select a text template and insert text to the live video.

2

Livestream preview window, which is used to preview the static live video.

3

A live script consists of multiple scenes, and each scene consists of multiple paragraphs.

  • You can add or copy a scene, and set the virtual avatar image, background, and voice for each scene.
  • You can add or copy a paragraph, or import a piece of script in TXT format. The input content will be automatically parsed.

Live script settings:

  • Script Control
    You can select any of the following methods:
    • Text Control: Enter text to control the speaking of virtual avatars.
    • Audio Control: Upload an audio to control the speaking of virtual avatars.
    • Improvising: Streaming starts without script. After the streaming starts, the virtual streamer remains silent, and will not speak until interaction content is input or the streaming is taken over by a real person.
  • Interaction Settings: You can choose On-screen Comments, Joining Live Rooms, Likes, or Gifts.
  • Live Settings: You can configure Playback Startup, Output, Risk Control, and More.

Elements in the lower part of the page:

  • Automatic livestreaming after loading: selected by default. Click Prepare Livestreaming. The livestream starts automatically after the loading is complete. If Automatic livestreaming after loading is deselected, a livestream will be started only after you click Start Streaming.
  • Livestream Billing Mode: You can select the billing mode of a livestream in the live room.
  • Prepare Livestreaming: Click it to load the resources needed for the livestream.

4

The ongoing livestream name (customizable) is on the left.

From left to right:

  • Unnamed{Number}: This is the live room name automatically generated after you enter the live room.
  • : Click it to change the live room name.
  • : Click it to interconnect MetaStudio with a third-party platform. For details, see Interconnection with a Live Platform.
  • : Click it to roll back your operation.
  • : Click it to restore your operation.
  • : Screen layout (9:16 by default). You can change it to 16:9.
  • : Icon of saving. The latest time of saving is automatically displayed on the right of the icon.
  • : Click it to clear all content of a live room.