About the GUI
Before starting livestreaming, you can familiarize yourself with the Virtual Avatar Livestreaming page and the page of creating a live room.
Home page of virtual avatar livestreaming
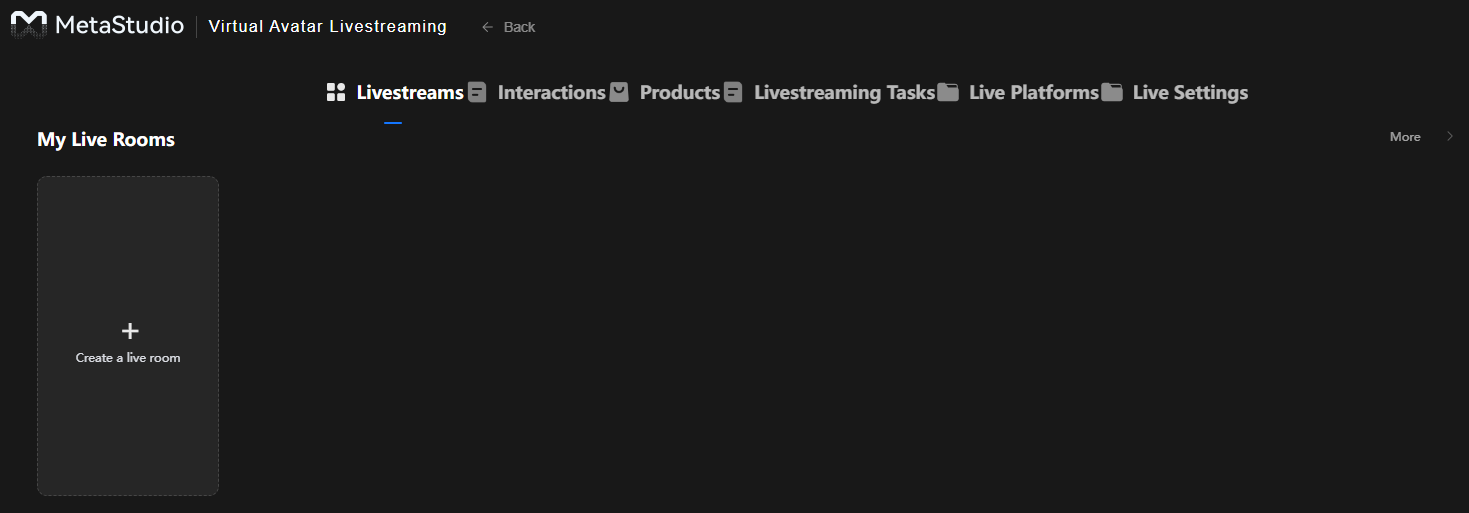
Figure 1 shows the home page of virtual avatar livestreaming. The description of each tab is as follows:
- Livestreams: You can create a live room with a virtual avatar. See Livestreams.
- Interactions: You can add an interaction rule library and interaction rules. The added interaction rule library can be directly imported to and used in the live room. See Interactions.
- Products: You can add products. Products are automatically displayed on the Products tab of the live room, and can be used during livestreaming. See Products.
- Livestreaming Tasks: shows the list of live rooms you have created. You can click this tab to enter a live room, modify the content in the live room, and start the streaming again. See Livestreaming Tasks.
- Live Platforms: You can add a third-party live platform and interconnect it with a live room of MetaStudio. For details, see Interconnection with a Live Platform.
- Live Settings (tenant-level): Parameters include Max Duration, Auto End After, and Notify on Livestream Interruption. For details, see Livestream Settings.
Page of Creating a Live Room
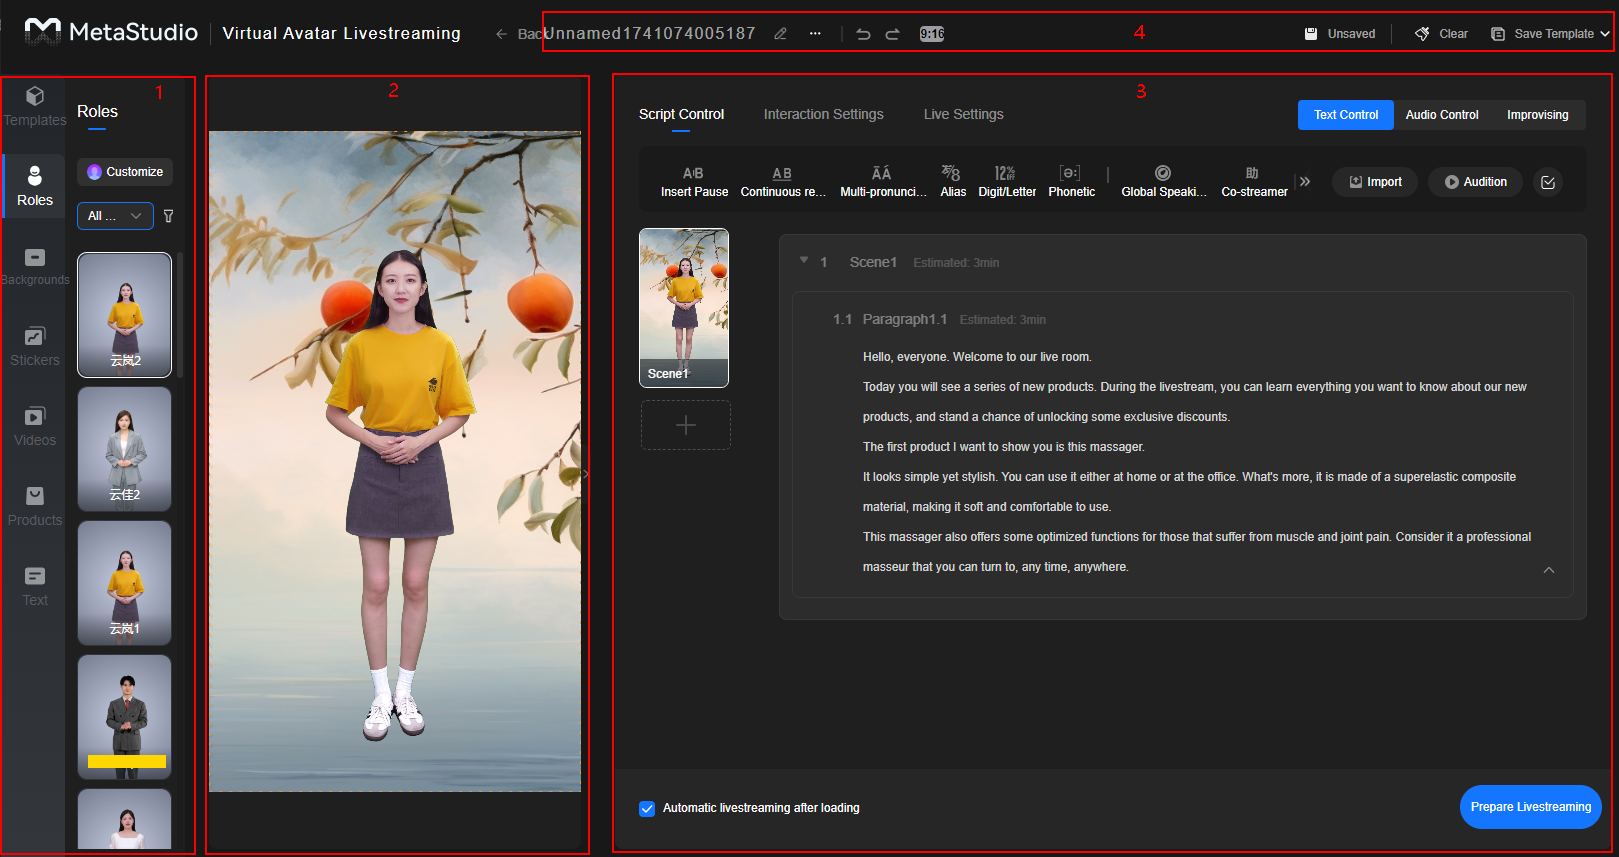
Figure 2 shows the page of creating a live room. Table 1 describes details of the page.
|
Area |
Description |
|---|---|
|
1 |
Material area. For details, see Configuring Livestreaming Materials.
|
|
2 |
Livestream preview window, which is used to preview the static live video. |
|
3 |
A live script consists of multiple scenes, and each scene consists of multiple paragraphs.
Live script settings:
Elements in the lower part of the page:
|
|
4 |
The ongoing livestream name (customizable) is on the left. From left to right:
|
Feedback
Was this page helpful?
Provide feedbackThank you very much for your feedback. We will continue working to improve the documentation.See the reply and handling status in My Cloud VOC.
For any further questions, feel free to contact us through the chatbot.
Chatbot


