Creating Advanced Pages
Standard pages are primarily used for creating tables and forms in backend management systems. Advanced pages are complex application frontend pages that contain images, charts, videos, and maps. When developing websites or e-commerce platforms, you can quickly set them up by dragging and laying out widgets and configuring related properties.
Creating an Advanced Page
- Log in to the application designer by referring to Logging In to the Application Designer.
- In the navigation pane, choose Page.
- (Optional) Click
 next to Advanced Page to add a folder.
By default, advanced pages are stored in the root folder. Before creating an advanced page, you can create a folder for storing the advanced page. You can drag the advanced page to a specified folder.
- Move the cursor to an existing advanced page folder and click
 . The page for adding an advanced page is displayed.
If no advanced page folder is created, click
 next to Advanced Page to add an advanced page.
 - Set basic information about the advanced page and click Add.
Figure 1 Creating an advanced page
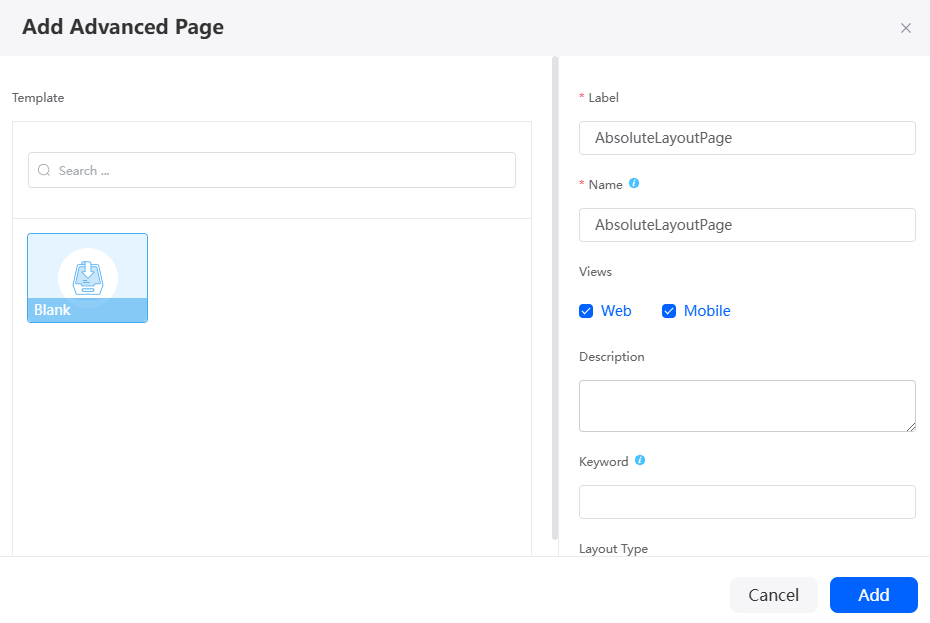
Table 1 Parameters for creating an advanced page Parameter
Description
Label
Label of the advanced page, which is displayed on the page and can be modified after being created.
Value: 1–255 characters.
Name
Name of the advanced page. The name is the unique identifier of the advanced page in the system and cannot be changed after being created. The naming requirements are as follows:
- Value: 1–100 characters.
- Start with a letter and can contain only letters, digits, and underscores (_). Do not end with an underscore (_).
View
The platform provides two types of advanced pages: Web and Mobile. You can customize and develop these pages on the PC and mobile devices. Once developed, both versions share the same URL. The platform automatically detects the user's device and displays the appropriate version of the page when the URL is accessed.
By default, both Web and Mobile are selected.
The View parameter is displayed only when you create an advanced page in an application for the first time. If an advanced page already exists in the application, this parameter is not displayed.
Description
Description of the advanced page.
Value: 1–255 characters.
Keywords
You can customize some keywords for advanced page search.
Layout Type
Options:
- Absolute: Each widget can be dragged to any position on the page. The widget width and height can be customized. This layout is usually used for large screen page development.
- Liquid: Widgets dragged to the page are arranged from top to bottom and from left to right. The widget height adapts to the content size, and the width can be configured by percentage. This layout is suitable for development of common web applications, such as e-commerce websites and administration websites.
- Develop an advanced page.
The following describes how to quickly develop an advanced page with absolute layout.
Figure 2 Advanced page with the absolute layout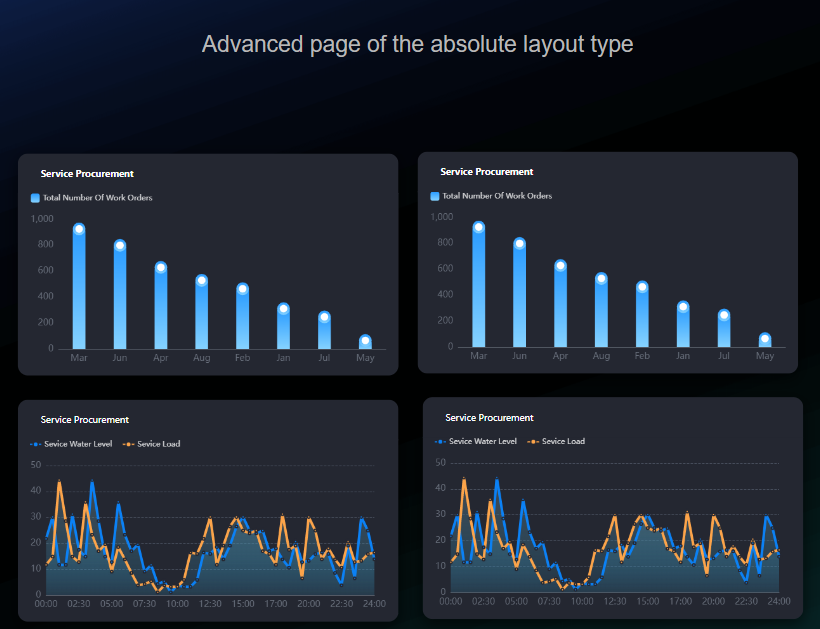
The preceding figure includes the following widgets: text, bar chart, and area multi line chart.
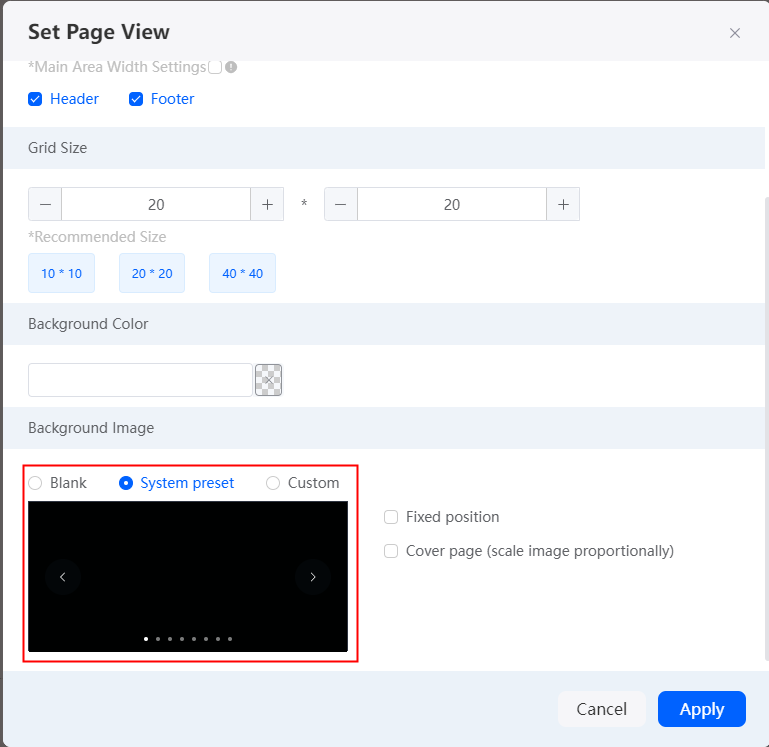
- Click
 in the upper right of the advanced page to set the background image.
Figure 3 Setting the background image
- Search for the widgets (one text editor, one basic bar chart, and one multi-area line chart) on the page. Drag them to the desired positions and adjust their sizes as needed.
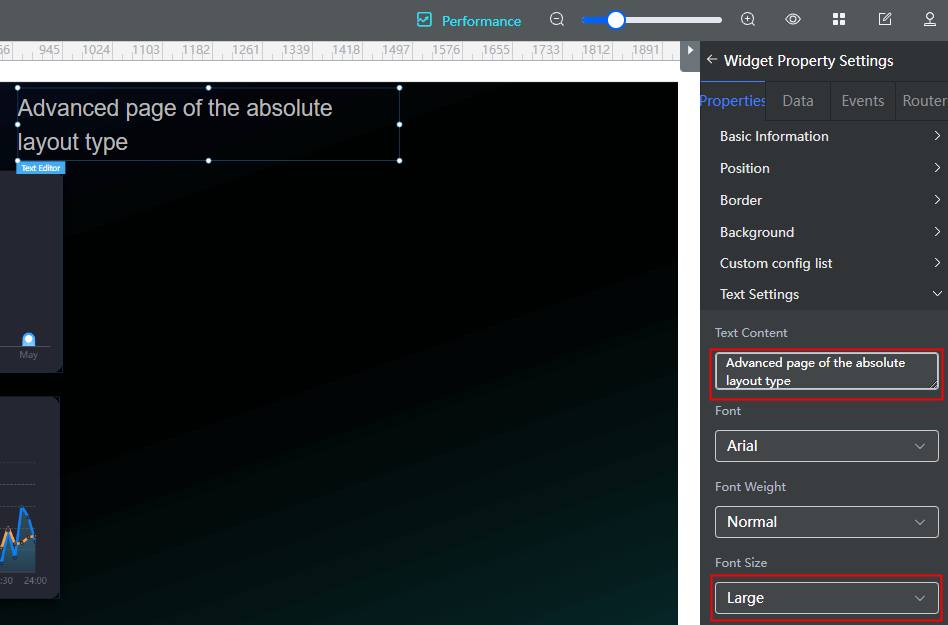
- Set the text widget content to Advanced page of the absolute layout and set the font size to Large.
Figure 4 Editing the text widget
- Set the size of each widget using properties.
In this example, the width and height of the widgets are set to 600 px and 350 px, respectively.
Figure 5 Setting widget size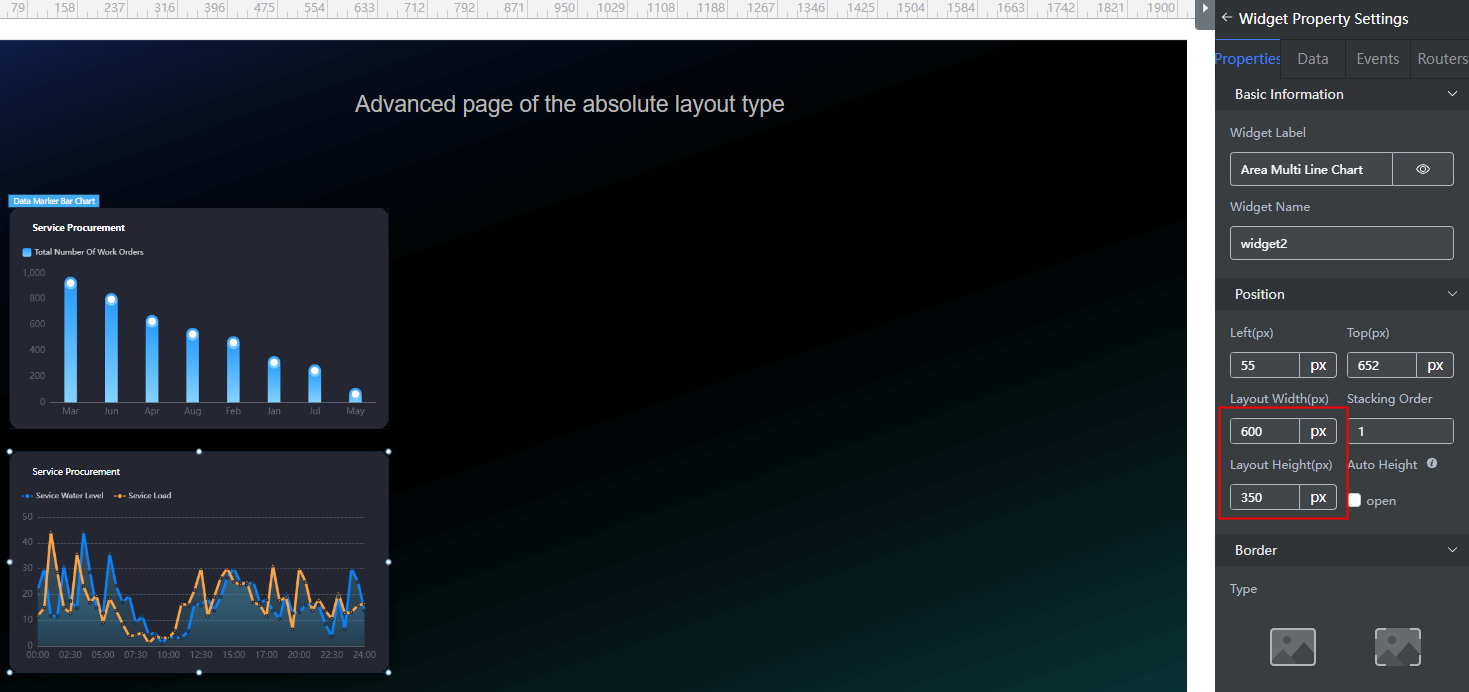
- Copy a widget.
Copy each widget on the left, and drag the copy to the right to align with the original one using the scales.
Figure 6 Copying a widget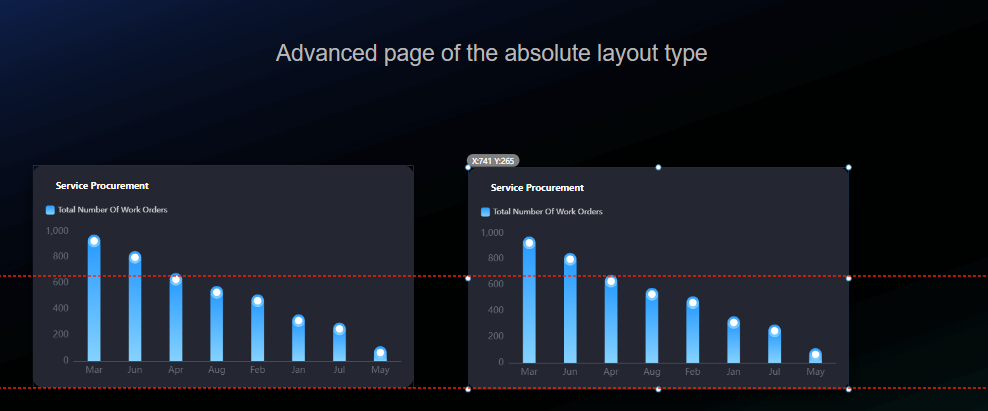
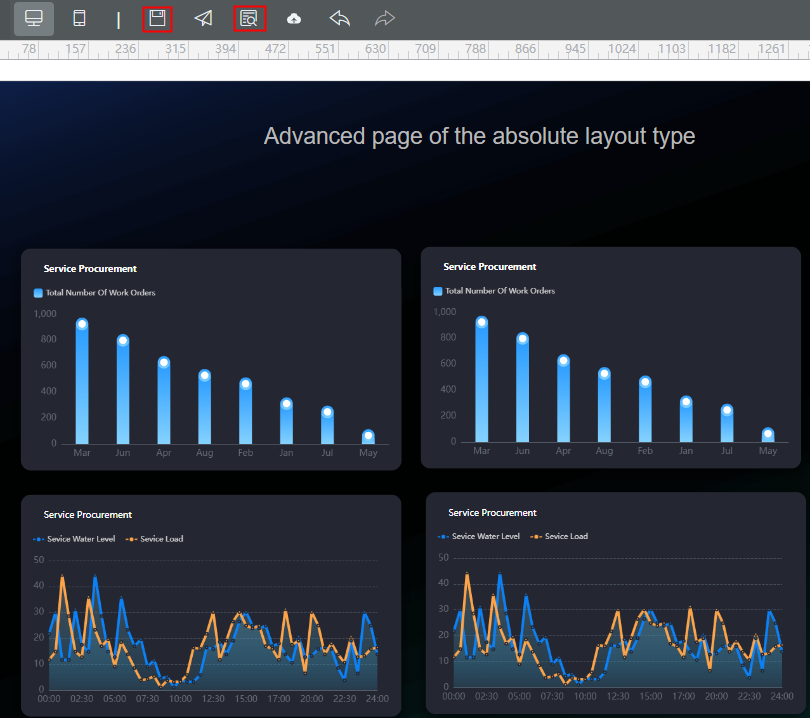
- Click
 in the upper part of the page to save the page.
 - Click
 to preview the advanced page.
Figure 7 Previewing the advanced page
- Click
Related Documents
- Customizing Widget Properties on Pages
- Configuring Chinese and English Language Properties for Widgets
- Creating Multi-Device Compatible Advanced Pages
- Referencing Third-Party Libraries to Develop Advanced Pages
- Using Petal Charts to Display Order Data on Advanced Pages
- Implementing Image Display and URL Redirection with the Banner Widget on Advanced Pages
Feedback
Was this page helpful?
Provide feedbackThank you very much for your feedback. We will continue working to improve the documentation.See the reply and handling status in My Cloud VOC.
For any further questions, feel free to contact us through the chatbot.
Chatbot


