
Audio/Video Management
After uploading audio/video files, you can use functions such as transcoding, categorization, CDN pre-loading, CDN refresh, storage class change, audio extraction, and one-click information export on the Audio and Video Management page.
The management functions vary depending on audio and video files. See Table 1.
| Function | Video (√: Supported; ×: Not Supported) | Audio (√: Supported; ×: Not Supported) |
|---|---|---|
| √ | √ | |
| √ | √ | |
| Transcoding and Transcoding Cancellation | √ | × |
| √ | √ | |
| √ | √ | |
| √ | √ | |
| √ | √ | |
| √ | √ | |
| √ | × | |
| √ | √ | |
| √ | √ | |
| √ | √ | |
| √ | √ | |
| √ | √ |
Viewing Media Asset Information
You can click Details on the right of the audio/video file to view the following information:
- Basic Information
Media asset name, ID, thumbnail, subtitle, duration, size, upload time, last update time, category, tag, and description.
- Playback
Definitions, formats, video encoding formats, resolution levels, bitrates, sizes, and streaming URLs of the source file and transcoded file.
- Subtitle and Thumbnail Info
If you have added subtitles and a thumbnail for the uploaded file, you can view the format and address of the subtitles and thumbnail on this page.
Modifying Basic Information
Under the Basic Information tab, you can change the category, label, name, and description of the audio/video file.
- Click Details on the right of the audio/video file. Under the Basic Information tab, click Edit.
- Click Set Category to reset the category of the media asset.
- Specify Category, Name, and Description so that you can use advanced search to search for media files.
- Click Save. The updated description and category are displayed.
Uploading a Thumbnail
After an audio/video file is uploaded, the first frame is captured as the thumbnail by default. You can also upload a JPG or PNG image as the thumbnail. Before using a video frame as the thumbnail, use snapshot capturing to capture a video frame.
- Click Details on the right of the audio/video file. Under the Basic Information tab, click Edit. Figure 1 Media asset details

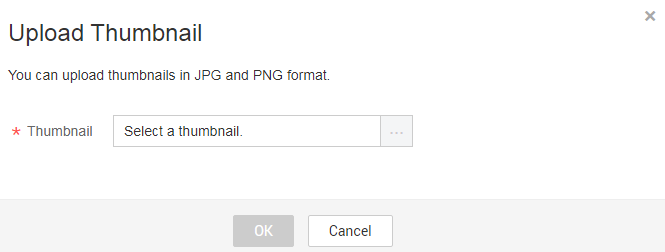
- Click the plus sign next to Thumbnail. In the Upload Thumbnail dialog box, select a local image file. Figure 2 Uploading a thumbnail
- Click OK. The modification will take effect in 3 to 5 minutes.
Subtitling

- External subtitles are not supported for HLS outputs that are saved to a different OBS bucket but in the same directory as input files.
- If the language you specify is not in the subtitle list in the HLS index file, the configuration will fail.
- Subtitling is not supported if you use the original_template_group.
- External subtitles are not supported when both HLS and DASH outputs are generated using a template group. For details about how to create a transcoding template group, see Creating a Transcoding Template Group.
- The native iOS browser Safari does not support parsing and playing of VTT subtitle files.
VOD supports subtitle files in VTT and SRT formats. You can upload multiple subtitle files. By default, one language maps to one subtitle file.
VOD supports the following two types of subtitles:
- Embedded subtitles
- Subtitle files are integrated into video files, so there are no longer separate subtitle files.
- For single-file videos (such as MP4 and MOV), you can upload SRT subtitle files encoded in UTF-8.
- Only non-HLS videos or large videos generated after transcoding support embedded subtitles.
- Only one subtitle file is supported.
- To generate embedded subtitles, you must upload subtitle files and then transcode videos to produce versions with embedded subtitles. If you add a subtitle file after transcoding, you must transcode the video again to generate a new version with embedded subtitles.
- When generating a video with embedded subtitles, the subtitle file in the default language is used first. By default, the most recently uploaded SRT subtitle file is used.
- Deleting subtitle files does not affect videos that have already been generated with embedded subtitles. However, newly generated videos will contain no subtitles.
- External subtitles
- Subtitles remain as separate files and are applied externally.
- For HLS videos generated after transcoding, you can upload SRT or VTT subtitle files. No re-transcoding is required to enable external subtitles.
- Only HLS videos generated after transcoding support external subtitles.
- Multiple external subtitles are supported. That is, you can add multiple subtitle files, with one file corresponding to a language. The player will include options for the default language and all other available subtitle languages, allowing users to select their preferred subtitle language during playback.
- You can set a default language for external subtitles. For HLS videos, changes to the default language take effect immediately.
- Deleting subtitle files does not affect transcoded videos that already have external subtitles. It only affects newly generated videos, that is, they will have no subtitles.
The procedure is as follows:
- Click Details on the right of the audio/video file. Under the Basic Information tab, click Edit.
- Click Upload Subtitle File to open the Upload Subtitle File dialog box, as shown in Figure 3.
Configure the parameters by referring to Table 2.
Table 2 Uploading a subtitle file Parameter
Description
Options
Select the subtitle upload mode.
Options:
- Local upload
- OBS
Subtitle Language
Enter the English code for the corresponding language. Only one language is supported at a time.
Local upload
Click Upload File and select a local subtitle file.
OBS upload
Enter the OBS bucket name and path of the subtitle file.
- Click OK. The subtitle file is uploaded.
You can click Set as Default Language on the right of the subtitle file to make the current subtitle file the default.
- Add subtitles in multiple languages by repeating 2 to 3.
This operation is required only for adding external subtitles.
- Click Save.
- Generate a video with embedded subtitles or external subtitles.
- Return to the Management > Audio and Video Management page, select the video, and click Transcode to generate a video with embedded subtitles or external subtitles.
- Click Details on the right of the audio/video file. The subtitle file URL is displayed under the Subtitle and Thumbnail Info tab.

Transcoding

If the source file is transcoded successfully but the output video is shorter than the original, this is related to the current transcoding mechanism.
- If the source contains a short abnormal segment, that segment is dropped. For example, if in a 10-minute video, the content becomes abnormal after minute 9, the transcoded video will be 9 minutes long, with the abnormal final minute removed.
- If the source contains a long abnormal segment, for example, more than 3 minutes, transcoding will fail.
- Supported input audio formats: MP4, TS, MOV, FLV, MPG, MXF, WMV, ADTS, AVI, MKV, MPEG, VOB, RM, and MTS
- Supported input video codecs: H.264, H.265, MPEG-2, MPEG-4, MJPEG, WMV1/2/3, and ProRes 422
- Supported input audio codecs: AAC, AC3, EAC3, HE-AAC, MP2, MP3, PCM (s16le, s16be, s24le, s24be, DVD), and WMA
- Select one or more audio/video files and click Transcode.
- In the dialog box displayed, select a preset template or a custom template configured in Transcoding Settings, and click OK.
- View the status of the audio/video file on the Audio and Video Management page. The status becomes Running.
- After the transcoding is complete, click Details on the right of the audio/video file to obtain the streaming URL under the Playback tab.
Pre-loading
Pre-loading allows you to proactively push videos to CDN PoPs. When users access a video for the first time, CDN can serve it from cache, reducing the pressure on the origin server.
- Select one or more audio/video files.
- Click Pre-load.
The time required to complete a pre-loading task depends on the number and size of files to be pre-loaded, and on network conditions.
CDN Cache Refreshing
CDN cache refreshing is the opposite of Pre-loading. It forces the resources cached on CDN PoPs to expire. When a user next requests a resource, CDN pulls the latest version from the origin server, returns it to the user, and caches it on CDN PoPs.
- Select one or more audio/video files.
- Click CDN Refresh to forcibly expire the resources cached on CDN PoPs.
The time when the CDN refresh is complete depends on the number and size of files submitted, network conditions, and other factors.
Categorization
Select one or more audio/video files and click More Actions > Set Category to categorize the selected audio/video files.
Changing the Storage Class
You can change the storage class of audio/video files in OBS on the Management > Audio and Video Management page. For details, see OBS Storage Classes.
The storage class of an uploaded audio/video file is Standard by default, and can be changed to Infrequent Access or Archive.
- Infrequent Access can be changed to Standard or downgraded to Archive.
- Archive can only be changed to Standard and cannot be directly changed to Infrequent Access.
- The storage class cannot be changed when a media asset has an ongoing task, such as snapshot capturing or transcoding.
The operations for changing the storage class of an audio/video are the same for all storage classes. The following describes how to change the storage class from Standard to Infrequent Access.
- Select one or more audio/video files and choose Modify the storage type > infrequently accessed storage.
- In the displayed dialog box, click Confirm.
- Refresh the Audio and Video Management page. The storage class of the audio/video files has been changed to Infrequent Access.
Restoring an Archived File
- Select one or more audio/video files of the Archive storage class and click Restore archived files.
The Restore archived files dialog box is displayed.
Figure 4 Restoring archived files
See Table 3.
Table 3 Parameters Parameter
Description
Restoration mode
The time it takes an audio/video file to change the storage class from Archive to Standard.
Options:
- Quick retrieval mode: The change takes about six minutes.
- Standard retrieval mode: The change takes about three to five hours.
Recovery mode
Mode of restoring an audio/video file to the Standard storage class.
Options:
- Temporarily: After an audio/video file is temporarily retrieved, a copy of the object in the Standard storage class is generated. In this case, you can access the audio/video file stored in OBS, but the temporarily restored file cannot be transcoded.
The copy has a validity period and will be automatically deleted after the validity period ends. The actual storage class of the audio/video file is Archive.
- Forever: An audio/video file is permanently retrieved and its storage class becomes Standard.
Copy Validity Period
Retention duration of the Standard object copy generated from the Archive audio/video file that is temporarily retrieved.
Unit: day. Value range: 1 to 30.
- Click Confirm. The archived file has been restored.
When the retrieval time arrives, refresh the Audio and Video Management page.
- For temporary retrieval, the storage class of the audio/video is Archive.
- For permanent retrieval, the storage class of the audio/video is Standard.
Audio Extraction
If you need the audio content of a video file, you can extract audio from the video file and then save the extracted audio file in MP3 format.
- Select one or more video files and click More Actions > Extract Audio.
- Refresh the audio/video management page. The status of the audio extraction task becomes Running.
- View the extracted audio file when Transcoding Status becomes Completed.
The extracted audio file and the source video file should have the same name. You can also check the audio file from its description.
Publishing
Select one or more audio/video files and choose More Actions > Publish to publish the files. The files are in the Published status.
Exporting Media Asset Information
Select one or more audio/video files and choose More Actions > Export to export information about the selected files. If you do not select any file, information about all audio/video files is exported by default. The exported information about a media asset includes the ID, name, status, tag, category, resolution, streaming URL, thumbnail, and subtitle URL.
Searching for Audio/Video Files
If there are a large number of files on the Audio and Video Management page, you can use the filter criteria box in the upper part of the page to search for audio/video files, as shown in Figure 5.

You can search for audio/video files by filter criteria (upload time, media asset status, transcoding status, name or description, media asset ID, tag, and category ID).
- More than one filter criterion can be used for search. If media asset ID is the filter criterion, other filter criteria are invalid.
- Deleted media assets are displayed only when you search with media asset ID.
- The media asset status can be Published or Unpublished. The transcoding status can be Queuing, Untranscoded, Completed, or Failed.
- The media asset ID is the unique ID for identifying the uploaded source video. Once uploaded, the media asset will have an ID, which is independent of the transcoding status.
- The category ID identifies a category name. You can query the category ID on the Global settings > Category page.
Playback
Using this function will incur downstream traffic or bandwidth fees.
- Preview on the console
You can preview transcoded video files in MP4, FLV, HLS, and DASH formats on the console. Source video file preview may fail, so transcode them before playing them.
On the Management > Audio and Video Management page, you can:
- Click the thumbnail of an audio/video file to preview it.
- Click Details on the right of a video. On the page displayed, choose the Playback tab and click
 in the Operation column to preview the video.
 H.265 and HLS-encrypted videos cannot be previewed.
Figure 6 Playback URL
- Playback using a player
Click Details on the right of a video. On the page displayed, choose the Playback tab. Click
 in the Operation column to copy the streaming URL and play the video using a player.When you transcode an audio/video file again,
- if transcoding parameters remain unchanged, the streaming URL remains unchanged.
- if transcoding parameters are modified and
- the output format is MP4, the previous URL becomes invalid.
- the output format is HLS or DASH, the primary index URL remains unchanged. The secondary index URL changes and the previous URL becomes invalid.
Deleting Audio/Video Files
To delete one or more audio/video files, select them in the media asset list and choose More Actions > Delete above the list. Once deleted, all related resources, including the source file, transcoded file, and snapshot file, will be deleted permanently. The operation cannot be undone. Exercise caution when performing this operation.
Feedback
Was this page helpful?
Provide feedbackThank you very much for your feedback. We will continue working to improve the documentation.See the reply and handling status in My Cloud VOC.
For any further questions, feel free to contact us through the chatbot.
Chatbot


