
Libraries
On Libraries, you can manage preset and custom libraries, such as adding libraries and viewing historical versions of libraries. For preset libraries, you can only view details, view historical versions, and download them. This section uses a custom library as an example.
Creating a Custom Library
This section uses Vue (a preset library) and MintUI (a custom library) as an example to describe how to upload a custom library and use it in a widget.
- Compress the files of the custom library into a ZIP package.
Download the widget library code from the MintUI official website. Add a metadata description file named packageinfo.json, list the JavaScript and CSS files contained in the library, and then compress the files into a ZIP package. You can click here to obtain the MintUI.zip package.
Figure 1 File structure of the MintUI library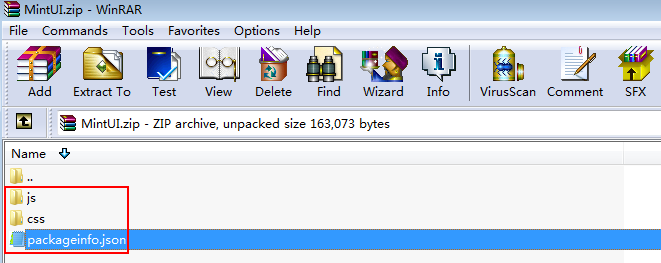
packageinfo.json contains the files to be imported. For example, if the js/index.js and css/index.css files need to be imported to the MintUI library, add the description of the two files to packageinfo.json. js and css define the file type, and name defines the file path and name.
{ "js": [ { "name": "js/index" } ], "css": [ { "name": "css/index" } ] } - Upload the custom library.
- Log in to Huawei Cloud Astro Canvas by referring to Logging In to Huawei Cloud Astro Canvas.
- Choose My Assets from the main menu.
- In the navigation pane, choose Libraries. On the displayed page, click New Library.
- Click +, select the library to be uploaded, and set basic information about the library.
Figure 2 Uploading a custom library
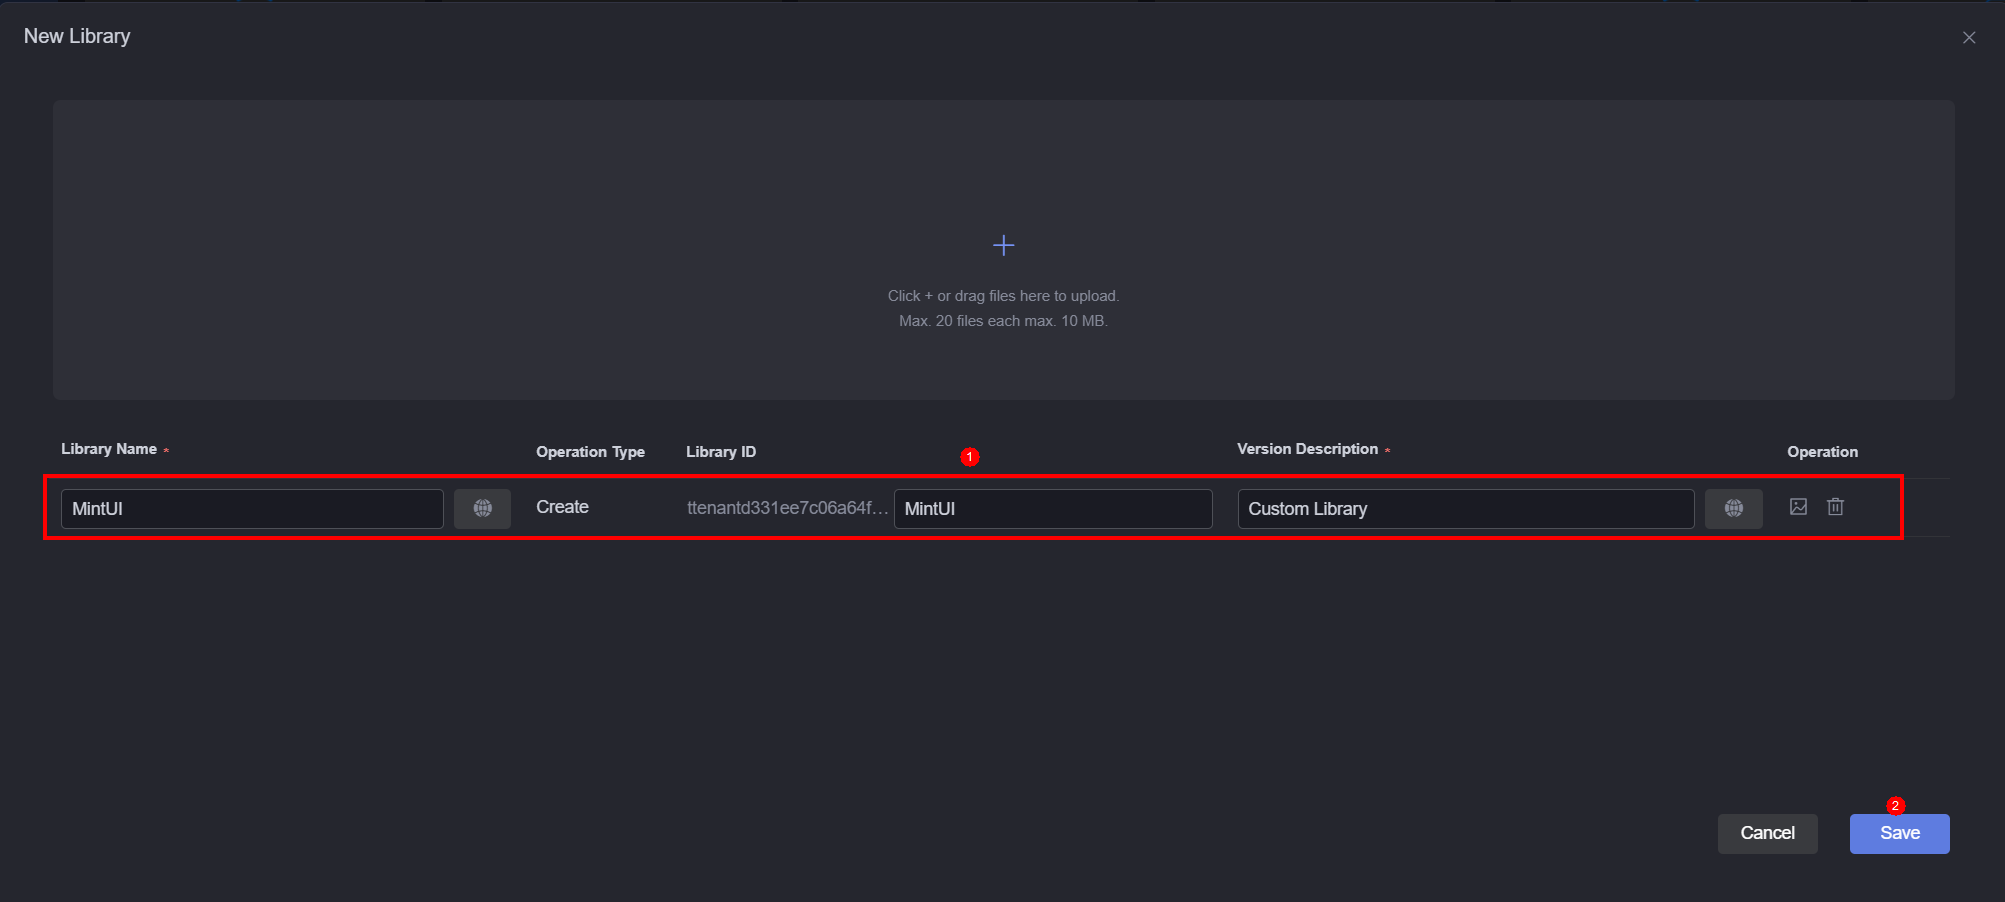
- Library name: Name of a library.
- Operation type: Type of the current operation, for example, add or update.
- Library ID: Only letters and digits are allowed. Start with a letter.
- Version description: Release description.
- Reference the library in a widget.
Take the custom widget widget_demo_mintui as an example. Reference a third-party library in this widget and click widget_demo_mintui.zip to obtain the widget package.
- Add the requires node to the packageinfo.json file in the widget package (widget_demo_mintui.zip) and specify the library ID and version of the dependency library.
name indicates the library ID, and version indicates the library version.
For example, add the requires node. Obtain the library file name and version from the library details page.
"requires": [{
      "name": "global_Vue",
      "version": "100.7"
    },
    {
      "name": "ttenant1***3596957a5bc_MintUI",
      "version": "1.0.0"
    }
  ]
When you specify library files in the requires node, specify them in sequence based on the dependency between the library files. For example, global_VueI18n depends on global_Vue and needs to be written after global_Vue.
- Write a DOM form in the widget_demo_mintui.ftl file of the widget package (widget_demo_mintui.zip).
<div id="widget_demo_mintui">
  <mt-field label="username" placeholder="Input username" v-model="username"></mt-field>
  <mt-field label="email" placeholder="Input email" type="email" v-model="email"></mt-field>
  <mt-field label="password" placeholder="Input password" type="password" v-model="password"></mt-field>
  <mt-button type="primary" @click="submit">Register</mt-button>
</div>
- Add a Vue instance to the render method in the widget_demo_mintui.js file of the widget package (widget_demo_mintui.zip).
Vue.use(MINT); var vm = new Vue({ el: $("#widget_demo_mintui", elem)[0], data:{ username: "", email: "", password: "" }, methods:{ submit: function(){ console.log(this.username + " registers"); } } }) - Compress the modified widget package.
- Add the requires node to the packageinfo.json file in the widget package (widget_demo_mintui.zip) and specify the library ID and version of the dependency library.
- Return to the Huawei Cloud Astro Canvas page, choose My Assets > Widgets, click Add Widget, and upload the widget package in 3.d to the widget library.
Figure 3 Uploading the widget_demo_mintui widget

- Widget name. The system automatically sets this parameter based on the widget package name.
- Operation type: Type of the current operation, for example, add or update.
- Widget ID: The prefix is not editable and is automatically populated when the widget package is uploaded.
- Folder name: Folder for storing the widget.
- Scenario: Application scenario of the widget package. The widget can be used in the development page of the selected scenario.
- Version description: Description of the widget.
- Drag the widget to the large screen page and preview the widget effect.
Go to the Huawei Cloud Astro Canvas page, choose All Widgets > Custom Widgets > Others, drag the widgetdemomintui widget to the canvas, adjust the widget size, and click
 to preview the effect.Figure 4 Dragging the custom widget to the canvas
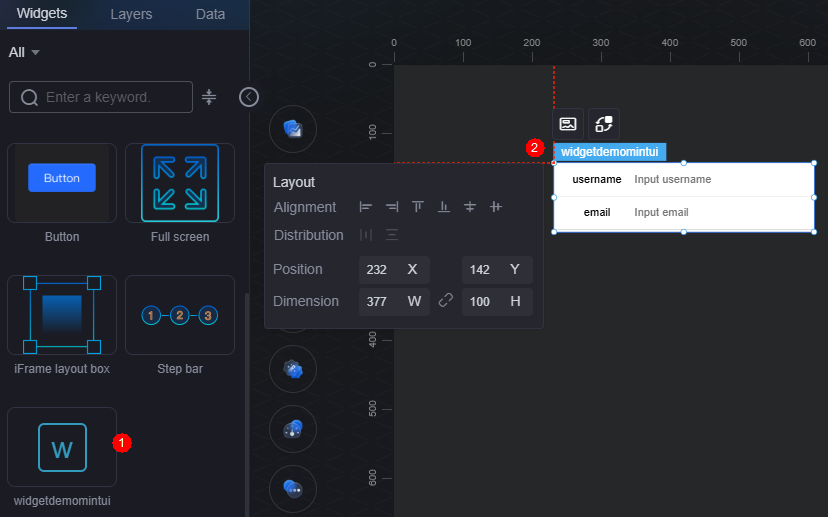
Copying a Custom Library to Other Workspaces
- Log in to Huawei Cloud Astro Canvas by referring to Logging In to Huawei Cloud Astro Canvas.
- Choose My Assets from the main menu.
- Choose Libraries from the navigation pane.
- Move the cursor to the target library and click
 .
. - In the displayed dialog box, select the target workspace and click Confirm.
By default, the library is copied to Libraries in the target workspace. If resource conflicts occur when you copy custom libraries to another workspace, the original content in the workspace is updated.
Checking Library Details
- Log in to Huawei Cloud Astro Canvas by referring to Logging In to Huawei Cloud Astro Canvas.
- Choose My Assets from the main menu.
- Choose Libraries from the navigation pane.
- Move the cursor to the target library and click
 .
. - The library details page displays the library name, developer, version, and update time.
Updating a Library
Before updating a widget, obtain the lock first. Otherwise, the update button is grayed out.
- Log in to Huawei Cloud Astro Canvas by referring to Logging In to Huawei Cloud Astro Canvas.
- Choose My Assets from the main menu.
- Choose Libraries from the navigation pane.
- Move the cursor to the target library and click
 to obtain the lock.
 - Move the cursor to the target library and click
 . The library update page is displayed.
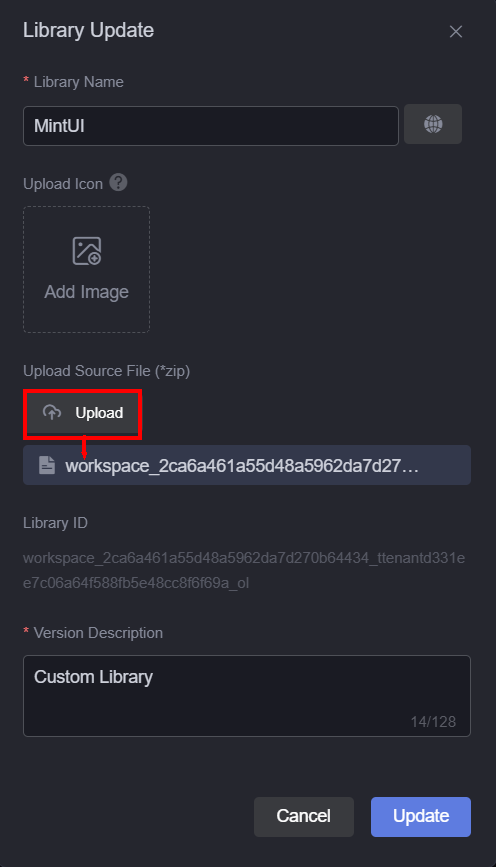
 - On the library update page, upload a library, set library parameters, and click Update.
Figure 5 Setting library information
- Click
 of the target library. The library of the new version is displayed.
 : Click this icon to download the library of the current version.
 : Click this icon to edit the library of this version.
Editing a Library
- Log in to Huawei Cloud Astro Canvas by referring to Logging In to Huawei Cloud Astro Canvas.
- Choose My Assets from the main menu.
- Choose Libraries from the navigation pane.
- Move the cursor to the target library and click .
- On the library editing page, click in the upper right corner to obtain the lock.
- Modify the library file online and click
 .
. - In the displayed dialog box, click Confirm.
- On the library update page, set library parameters and click Update.
- On the My Libraries page, click of the widget to view the library of the new version.
Figure 6 Checking the library of the new version
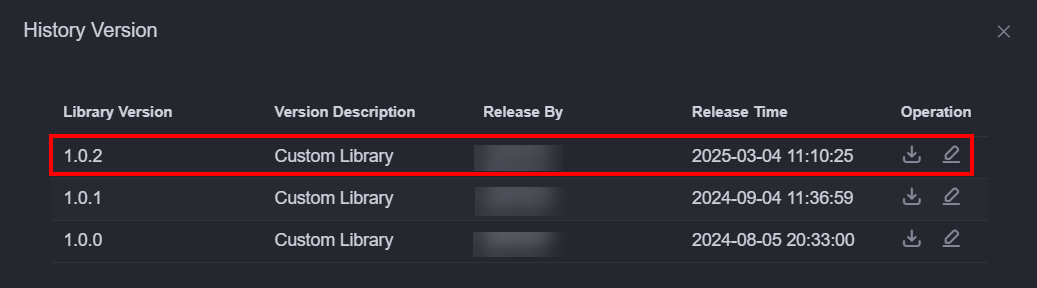
Checking Historical Versions
- Log in to Huawei Cloud Astro Canvas by referring to Logging In to Huawei Cloud Astro Canvas.
- Choose My Assets from the main menu.
- Choose Libraries from the navigation pane.
- Move the cursor to the target library and click to check the historical versions.
- In historical versions, you can click next to a version to download the library.
For custom libraries, you can edit them.
Figure 7 Checking historical versions of a library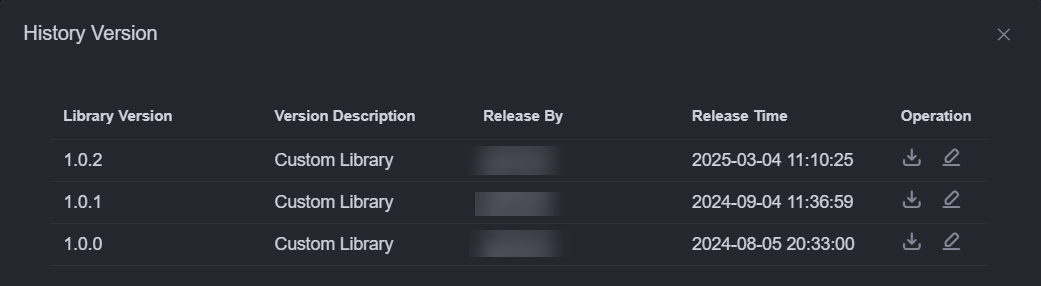
Downloading a Library
- Log in to Huawei Cloud Astro Canvas by referring to Logging In to Huawei Cloud Astro Canvas.
- Choose My Assets from the main menu.
- Choose Libraries from the navigation pane.
- Move the cursor to the target library and click .
By default, the library of the latest version is downloaded. To download the library of an earlier version, click
next to the target version.
Copying Custom Libraries to Another Workspace in Batches
- Log in to Huawei Cloud Astro Canvas by referring to Logging In to Huawei Cloud Astro Canvas.
- Choose My Assets from the main menu.
- Choose Libraries from the navigation pane.
- Select multiple libraries and click Copy to Workspace.
You can select multiple libraries by pressing Ctrl and click the target libraries, Ctrl+A, or Ctrl+Shift+Left-click and drag (box-select).
- In the displayed dialog box, select the target workspace and click Confirm.
Deleting Custom Libraries in Batches
- Log in to Huawei Cloud Astro Canvas by referring to Logging In to Huawei Cloud Astro Canvas.
- Choose My Assets from the main menu.
- Choose Libraries from the navigation pane.
- On the target custom library, click to obtain the lock.
- Select multiple locked libraries and click the delete button.
You can select multiple libraries by pressing Ctrl and click the target libraries, Ctrl+A, or Ctrl+Shift+Left-click and drag (box-select).
- In the displayed dialog box, click Confirm.
Feedback
Was this page helpful?
Provide feedbackThank you very much for your feedback. We will continue working to improve the documentation.See the reply and handling status in My Cloud VOC.
For any further questions, feel free to contact us through the chatbot.
Chatbot


