
Managing Processes
Editing a Process
After creating a process, you can change its content, like updating the logic or data structure.
- Log in to the no-code workbench by referring to Logging In to the No-Code Workbench.
- In All Apps, hover over the target application's … and choose Edit.
- Choose the target process on the left, then click
 next to its name on the right. Figure 1 Entry for process editing
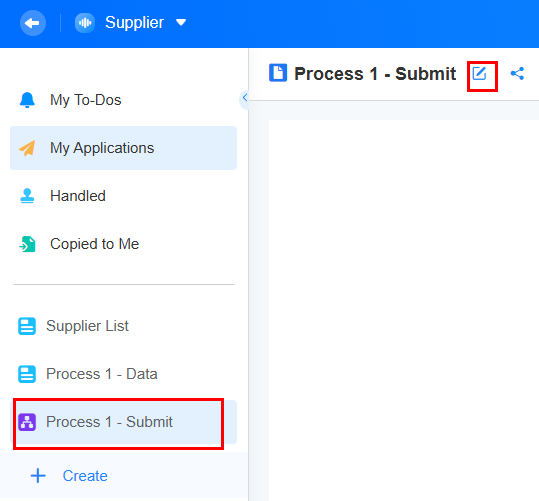
- See Creating a Process to edit the process.
Modifying the Process Name and Icon
You can change the process name. If the process's purpose changes, update the name to help users understand it better.
- Log in to the no-code workbench by referring to Logging In to the No-Code Workbench.
- In All Apps, hover over the target application's … and choose Edit.
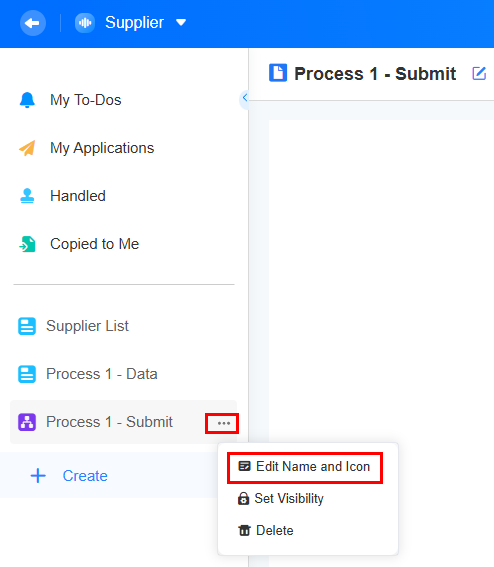
- Click ... of the target process and choose Edit Name and Icon. Figure 2 Modifying the name and icon
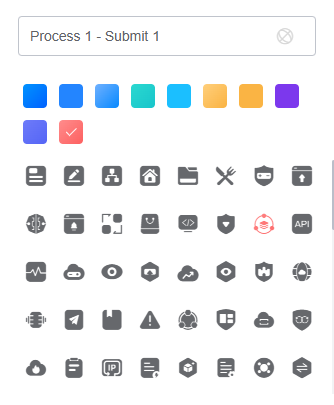
- Modify the process name and icon. Figure 3 Modifying the name and icon
After the modification is complete, return to the application editing page. The process name, icon, and icon background color have been changed.
Figure 4 Viewing the modified name and icon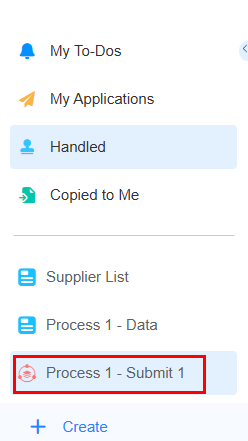
Setting Process Visibility
After a process is created, you can set its visibility permissions to specify which roles can view it. This enhances data security.
- Log in to the no-code workbench by referring to Logging In to the No-Code Workbench.
- In All Apps, hover over the target application's … and choose Edit.
- On the left of the displayed page, click ... on the right of a process name and choose Set Visibility. Figure 5 Choosing Set Visibility
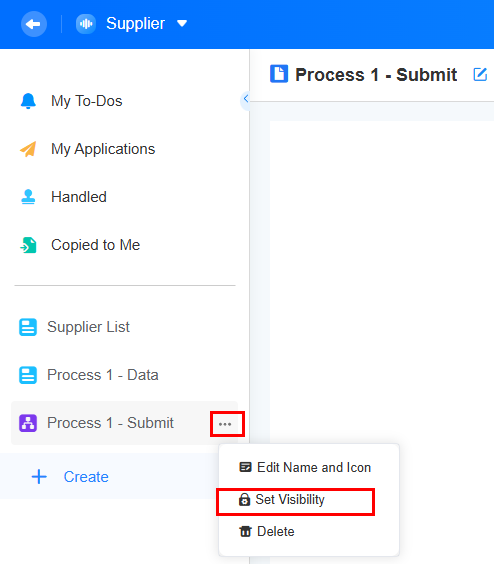
- Select roles that can view the process and click OK.
See Application Role Permission Overview to create roles and set more application permissions. For example, if the developer role is deselected, users whose role is developer cannot view "Process 1-Initiation".
Figure 6 Selecting roles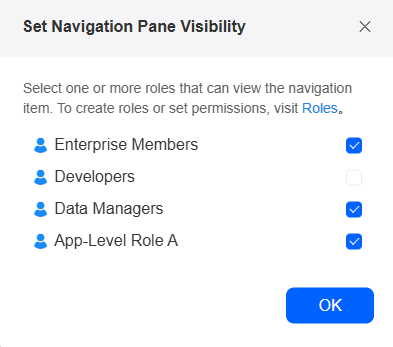
- Check if the process visibility is set.
- On the application development page, click
 in the upper left corner to return to the no-code workbench.
 - Choose All Apps > Mine, move the cursor to the target application's ..., and choose Share. Figure 7 Choosing Share

- Copy the application access link and send it to a user whose role is developer. After the user opens the link, "Process 1-Initiation" is not displayed. Figure 8 Copying the application link
 Figure 9 Process 1-Initiation not displayed
- On the application development page, click
Deleting a Process
A deleted process cannot be restored. Before performing this operation, ensure that the process is no longer needed.
- Log in to the no-code workbench by referring to Logging In to the No-Code Workbench.
- In All Apps, hover over the target application's … and choose Edit.
- On the left of the displayed page, click ... on the right of a process name and choose Delete. Figure 10 Deleting a process
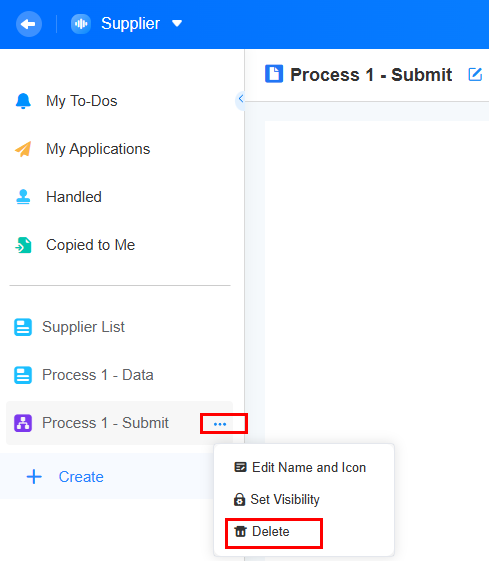
- In the displayed dialog box, select I confirm that the process is permanently deleted and confirm the deletion.
Enabling or Stopping a Process
Enable the process before initiating it to avoid submission errors.
- Log in to the no-code workbench by referring to Logging In to the No-Code Workbench.
- In All Apps, hover over the target application's … and choose Edit.
- In the list on the left, select a process and click
 on the right of the process name.
 - In the upper right corner of the page, click Running to stop or Closed to enable the process. Figure 11 Stopping a process
 Figure 12 Enabling a process
Sharing a Process
You can share a process with both internal and external users.
- Log in to the no-code workbench by referring to Logging In to the No-Code Workbench.
- In All Apps, click the target application. The application development page is displayed.
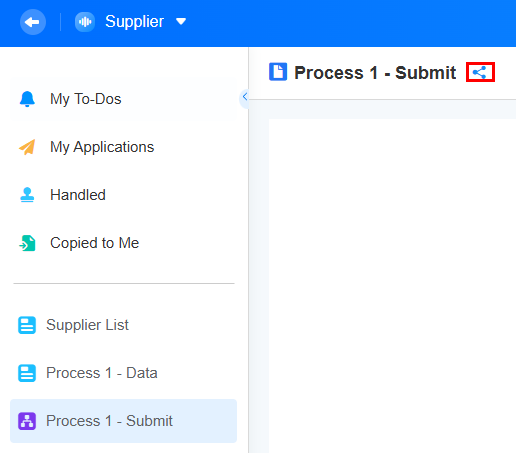
- On the application development page, click a process.
- Click the share icon. The process sharing page is displayed. Figure 13 Accessing the sharing page
- Set sharing rules as required. Figure 14 Setting process sharing rules

Table 1 Process sharing parameters Parameter
Description
Internal Sharing
Share the form with internal users. When this is enabled, internal users can log in to the system and fill in the form.
- Open: Fill in the information in a new window.
- Copy: Copy the link and share it with other users.
 : Common QR code (WeLink, WeChat, or WeCom). Generate a poster by clicking the button in the QR code. For details, see Generating a Poster from a Form.
Public
Anonymous users can scan the QR code to access and fill in the form page without login.
- Open: Fill in the information in a new window.
- Copy: Copy the link and share it with anonymous users.
 : Common QR code (WeLink, WeChat, or WeCom). Generate a poster by clicking the button in the QR code. For details, see Generating a Poster from a Form.
Copying a Process
If the data for a new process is similar to a previous one, you can copy a historical application to create an application.
- Log in to the no-code workbench by referring to Logging In to the No-Code Workbench.
- In the task center, click My Applications. Figure 15 Clicking My Applications

You can also go to the corresponding app and click My Applications.
Figure 16 Clicking My Applications in an application
- In the application list on the right, click the process to be copied.
- In the initiation process, click
 next to the form. Figure 17 Clicking the copy button
- Confirm the operation.
The current version does not support the copy of attachment type field values.
- On the displayed page, set related information and click the submit button. Figure 18 Setting process information

Feedback
Was this page helpful?
Provide feedbackThank you very much for your feedback. We will continue working to improve the documentation.See the reply and handling status in My Cloud VOC.
For any further questions, feel free to contact us through the chatbot.
Chatbot


