
Managing Forms on PCs
Creating a Form Group
If there are too many forms in an application, you can create groups to manage and view the forms.
- Log in to the no-code workbench by referring to Logging In to the No-Code Workbench.
- In All Apps, hover over the target application's … and choose Edit.
- In the navigation pane, choose Create > Create Group. Figure 1 Creating a group

- Enter a group name and click the confirm button.
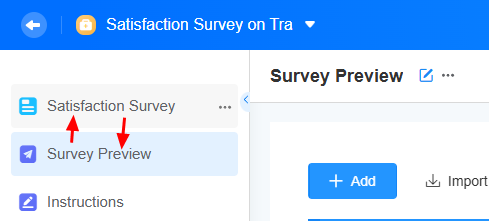
Drag a form to the group.
Figure 2 Dragging a form to the group
- Click
 next to a group and perform the following operations:
 - Change Name: Change the group name.
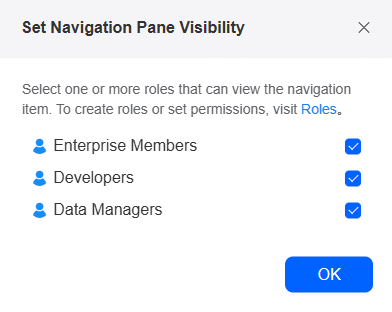
- Set Visibility: Select roles. Only users with those roles can see the navigation item. Figure 3 Setting the visibility permission
- Delete: Delete the group. Empty the group first, then delete it.
Modifying a Form
After creating a form, you can change its content, like updating the logic or data structure.
- Log in to the no-code workbench by referring to Logging In to the No-Code Workbench.
- In All Apps, hover over the target application's ... and choose Edit.
- On the left of the displayed page, select the form to be edited and click
 . Figure 4 Entry for editing a form
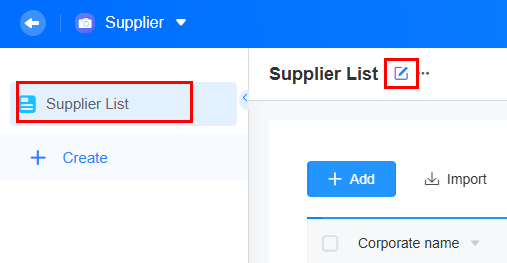
- See Creating a Form to modify the form.
Modifying the Form Name and Icon
You can change the form name. For example, if the form's purpose changes, update the name to help users understand it better.
- Log in to the no-code workbench by referring to Logging In to the No-Code Workbench.
- In All Apps, hover over the target application's … and choose Edit.
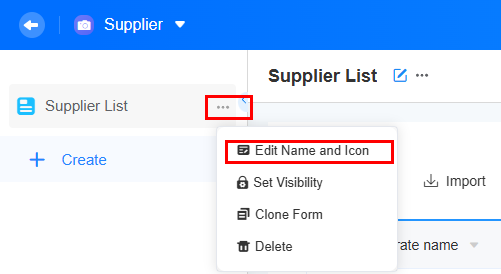
- Click ... of the target form and choose Edit Name and Icon. Figure 5 Choosing Edit Name and Icon
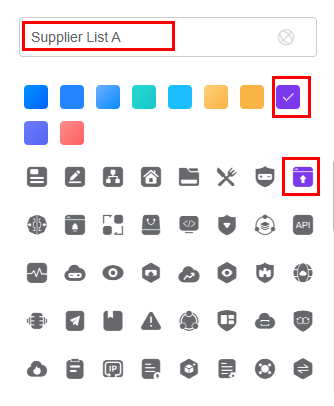
- Modify the form name, icon, and icon background color as required. Figure 6 Modifying the name, icon, and icon background color
 After the modification, return to the application editing page. The form name, icon, and icon background color have been changed.Figure 7 Viewing the modified name and icon
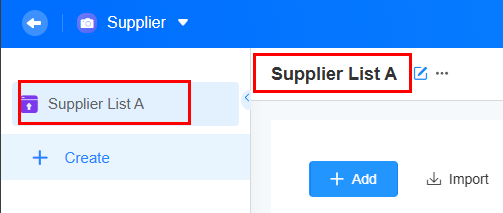
Cloning a Form
If the service scenarios are similar, you can clone a form to create a new one quickly. When you clone a form, only the metadata structure is copied, not the instance data.
- Log in to the no-code workbench by referring to Logging In to the No-Code Workbench.
- In All Apps, hover over the target application's ... and choose Edit.
- Click ... of the target form and choose Clone Form. Figure 8 Cloning a form

- Enter a name and click OK.
After cloning the form, the new form shows up in the left directory. If the application has a form filling page, the form filling page will also be cloned.
Figure 9 Setting the name of the cloned form Figure 10 Viewing the cloned form
Sorting Forms
On the form development page, drag forms up or down to sort them.
- Log in to the no-code workbench by referring to Logging In to the No-Code Workbench.
- In All Apps, hover over the target application's … and choose Edit.
- Drag forms up or down to sort them. Figure 11 Sorting forms
Deleting Form Data
You can delete some data with filters or all data. This operation cannot be undone. This includes subtables and attachments. Anything linked to the deleted data will be affected.
- Log in to the no-code workbench by referring to Logging In to the No-Code Workbench.
- In All Apps, click the target application. The application development page is displayed.
- Select a form on the left.
- Click
 next to Delete and choose to delete all or filtered data.
 All data: If the form data is old or has sensitive information, you can delete it all at once. You can delete up to 5,000 records at a time.
- Click
 next to Delete and choose to delete all data. The data deletion page is displayed. Figure 12 Selecting all data
- In the displayed dialog box, confirm the deletion.
Filter data: Create a filter to find the data you want and delete it.
- See Figure 13 to set filter criteria. You can add more criteria. Use and or or to combine them.
- After setting the filter criteria, save the settings and name the filter. Figure 14 Saving a filter

- (Optional) Click
 next to the filter and set it as the default filter. Figure 15 Setting the filter as the default filter
- Click
 next to Delete and choose to delete the filtered data. The data deletion page is displayed. Figure 16 Deleting filtered data
- In the displayed dialog box, confirm the deletion.
- Click

Exporting Form Data
After collecting data, you can save the form data to your local PC. If the form data is abnormal, you can import the data back to the no-code workbench to fix it.
- Log in to the no-code workbench by referring to Logging In to the No-Code Workbench.
- In All Apps, click the target application. The application development page is displayed.
- Select a form on the left.
- Click
 next to Export and choose All Data or Filter Data.
 Exporting all data: Export all data on the form filling page to the local PC.
- Click
 next to Export and choose Export Data > All Data. Figure 17 Selecting all data
- On the data export page, select the fields to be exported and click Confirm. Figure 18 Selecting fields to export

Filtering data: Create a filter to find the data you want and export it.
- See Figure 19 to set filter criteria. You can add more criteria. Use and or or to combine them.
- After setting the filter criteria, save the settings and name the filter. Figure 20 Saving a filter
- (Optional) Click
 next to the filter and set it as the default filter. Figure 21 Setting the filter as the default filter
- Click
 next to Export and choose Export Data > Filter Data. Figure 22 Exporting filtered data
- In the displayed dialog box, select the fields to be exported and confirm the export. Figure 23 Selecting fields to export

- Click

Exporting Files of Attachment Fields in a Form
Download attachment fields from records in batches, compress them into a .zip file, and ensure the total size does not exceed 500 MB. If the size exceeds 500 MB, export the files in smaller batches.
- Log in to the no-code workbench by referring to Logging In to the No-Code Workbench.
- In All Apps, click the target application. The application development page is displayed.
- Select a form on the left.
- Click
 next to Export and choose to export all files or filtered files.
 Exporting all files: Export all files in the attachment field. The exported file will be in ZIP format with a maximum size of 500 MB. If the size exceeds 500 MB, export the file in batches.
- Click
 next to Export and choose to export all files. Figure 24 Selecting all files
- On the Export File page, select the attachment fields to be exported and click Confirm. Figure 25 Setting the fields to export

Exporting files from the filtered attachment fields: Create a filter to export files that meet the criteria.
- See Figure 26 to set filter criteria. You can add more criteria. Use and or or to combine them.
- After setting the filter criteria, save the settings and name the filter. Figure 27 Saving a filter
- (Optional) Click
 next to the filter and set it as the default filter. Figure 28 Setting the filter as the default filter
- Click
 next to Export and choose to export the filtered files. Figure 29 Exporting filtered data
- On the Export File page, select the attachment fields to be exported and click Confirm. Figure 30 Setting the fields to export

- Click

Importing a Form Data File
When importing form data, follow the platform's rules to make sure the data is accurate. Here are the rules to follow:
- Use the platform's standard template to enter data. Import only the first form in XLS or XLSX format.
- If you change the table header, the import may fail.
- Each file must not exceed 10 MB.
- Each sheet can have up to 200 columns and 10,000 rows.
- These fields cannot be imported: reference, summary, attachment, formula, subtable, matrix table, text combination, privacy protection, location, electronic signature, rich text, and auto number.
- If field names are the same, choose the right match yourself.
- Log in to the no-code workbench by referring to Logging In to the No-Code Workbench.
- In All Apps, click the target application. The application development page is displayed.
- Click a form on the left. On the displayed page, click Import.
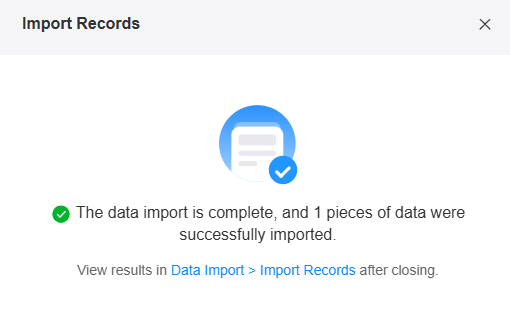
- On the displayed dialog box, select the file to import, or drag it onto the page, then click Next.
- Set up the mapping as prompted and click Import. The dialog box as shown in Figure 32 is displayed. Complete the import as prompted. Figure 31 Setting up the mapping

Modifying Form Data
You can modify some data using filters or all data. Check if the batch modification button is enabled in the form view. Here are the rules for modifying data:
- In the form view, enable the batch modification button first. Figure 33 Enabling the batch modification button

- Batch data changes cannot be undone.
- This function is unavailable to fields selected as Unique.
- Modify up to 5,000 records at a time.
- These fields cannot be modified in batches: associated record, reference, OCR, summary, attachment, formula, subtable, matrix table, text combination, privacy protection, location, and auto number.
- Log in to the no-code workbench by referring to Logging In to the No-Code Workbench.
- In All Apps, click the target application. The application development page is displayed.
- Select a form on the left.
- Click
 next to Modify and choose to modify all data or filtered data.
 Modifying all data: Select the fields to be modified and replace the field values with new values or clear the field content.
- Click
 next to Modify and choose to modify all data. Figure 34 Modifying all data
- On the page for batch modification, select the fields to be modified and the modified content, and click the confirm button. Figure 35 Modifying data in batches

Modifying the values of fields after filtering: Create a filter to filter data that meets the criteria and modify the field values.
- See Figure 36 to set filter criteria. You can add more criteria. Use and or or to combine them.
- Click
 next to Modify and choose to modify the filtered data. Figure 37 Modifying the filtered data
- On the batch modification page, select the fields to be modified and the modified content, and click the confirm button. Figure 38 Modifying the filtered data

After the modification, you can view that the company type is changed to Limited by shares.
Figure 39 Viewing the modified data
- Click
Hiding Columns
After a form is created, you can hide some columns. For example, you can hide columns that contain customer privacy information, such as phone numbers and ID card information.
- Log in to the no-code workbench by referring to Logging In to the No-Code Workbench.
- In All Apps, click the target application. The application development page is displayed.
- On the form page, click the icon to hide columns. Figure 40 Hiding columns

- Hide columns as required. Figure 41 Hiding columns

- Show all: Display all columns in the form.
- Hide all: Hide all columns in the form.
- Click
 to hide the column in the form. To display a hidden column, click
  .
. - Drag
 to adjust the position of a column in the form.
Sorting Fields in a Form
After creating a form, you can sort its fields to quickly find target data, especially when dealing with large and complex data volumes.
- Log in to the no-code workbench by referring to Logging In to the No-Code Workbench.
- In All Apps, click the target application. The application development page is displayed.
- On the form page, click the icon to sort fields. Figure 42 Sorting fields

- Click Select Fields to Sort.
- Select required fields, set sorting rules, and click the sorting button.
After the sorting rule is set, click Reset to reset the sorting.
Figure 43 Sorting fields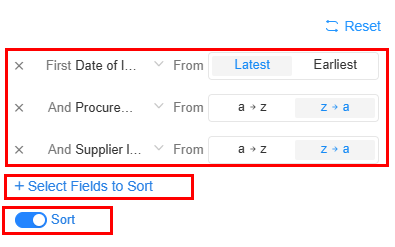
Customizing a Filter
When processing form data, you can create custom filters to quickly find target data and set them as default filters. This way, only the data that meets the filter criteria will be displayed each time the form is opened.
- Log in to the no-code workbench by referring to Logging In to the No-Code Workbench.
- In All Apps, click the target application. The application development page is displayed.
- On the form page, click the filter icon. Figure 44 Clicking the filter icon

- Click Add, set filter criteria, and click the button to save the settings. Figure 45 Setting filter criteria

- On the page that is displayed, enter a filter name and click the confirm button.
- Under Custom Filter, click
 , and select Set as Default Filter.
 When the default filter is applied, only the data that meets the criteria is shown each time the form view page is opened.
Figure 46 Effect
- Click
 and cancel the setting of the default filter.
 - Click
 and choose Rename to change the filter name.
 - Click
 and choose Delete to delete the filter.
 - Click
 to view, add, or modify filter criteria.
- Click
Freezing Fields
Freeze columns in a form to keep them always visible during horizontal scrolling, helping users in comparing and searching for data relationships.
- Log in to the no-code workbench by referring to Logging In to the No-Code Workbench.
- In All Apps, click the target application.
- On the form page, click
 next to the field to be frozen and click the button to freeze it.
 After the setting, the column and all preceding columns are frozen. For example, freeze the company type column so that the company type and company name columns remain visible when you scroll horizontally. See Figure 48.
Figure 47 Freezing the company type column
- Click
 next to a frozen column and click the button to unfreeze the column.

Generating a Poster from a Form
When sharing a form, you can generate a poster for the form. Exquisite posters help quickly collect data.
- Log in to the no-code workbench by referring to Logging In to the No-Code Workbench.
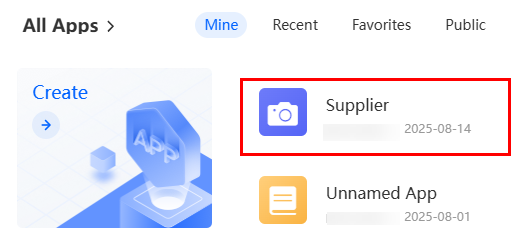
- In All Apps, click the target application. Figure 49 Clicking the target application
- On the left of the application development page, select a form on the left and click Add. Figure 50 Selecting the add button

- Click
 . The sharing rule page is displayed. Figure 51 Clicking the share icon
- Move the cursor to the
 icon under Internal Sharing or Public and click the button to generate a poster. Figure 52 Generating a poster
- On the displayed page, select a poster template and set the background, title, and description. Figure 53 Setting a poster

Table 1 Parameters for generating a poster Parameter
Description
Poster template
Select a poster template as required.
Background Settings
You can customize the poster background. The background image to be uploaded must be in JPG or PNG format and the size cannot exceed 500 KB.
Title
Title of a poster. The value contains a maximum of 20 characters.
Description
Description of a poster. The value contains a maximum of 100 characters.
QR code location
Position of the QR code on the poster, for example, center or bottom.
Tag
Whether to display a tag in a poster. See Figure 54.
- After the setting is complete, click Download to download the poster to the local host.
- Share the poster with other portal users. They can scan the QR code to complete the questionnaire. See Figure 55.


Feedback
Was this page helpful?
Provide feedbackThank you very much for your feedback. We will continue working to improve the documentation.See the reply and handling status in My Cloud VOC.
For any further questions, feel free to contact us through the chatbot.
Chatbot


