Updated on 2025-07-29 GMT+08:00
Example
Preparations
- Creating a product and device
- Create a product. Access the IoTDA service page and click Access Console. Click the target instance card. Choose Products in the navigation pane and click Create Product. Set the parameters as prompted and click OK. For details, see Creating a Product.
- Create a device. On the IoTDA console, choose Devices > All Devices in the navigation pane, and click Register Device. Set the parameters as prompted and click OK. For details, see Registering an Individual Device.
Configuring a Data Forwarding Rule
- Access the IoTDA service page and click Access Console. Click the target instance card.
- In the navigation pane, choose Rules > Data Forwarding.
Figure 1 Data forwarding - List

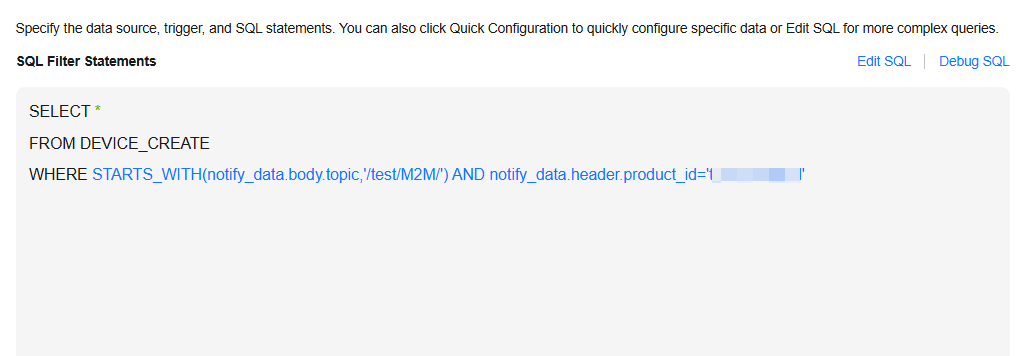
- On the Rule List tab page, click Create Rule. Set the rule parameters and forwarded data, and configure the data filtering statement as follows: STARTS_WITH(notify_data.body.topic,'/test/M2M/').

- Configuration of Figure 2: For all devices in the resource space XXX, when they report messages with topics containing /test/M2M/, the forwarding rule will be triggered and the messages will be forwarded to the specified forwarding target.
- To forward the data reported by a specified device, add AND notify_data.header.device_id='${Device ID}' to the SQL statements.
- To forward the data reported by a specified product, add AND notify_data.header.product_id='${Product ID}' to the SQL statements.
Figure 3 Data forwarding - M2M_SQL statement example
- For details about SQL settings, see SQL Statements.
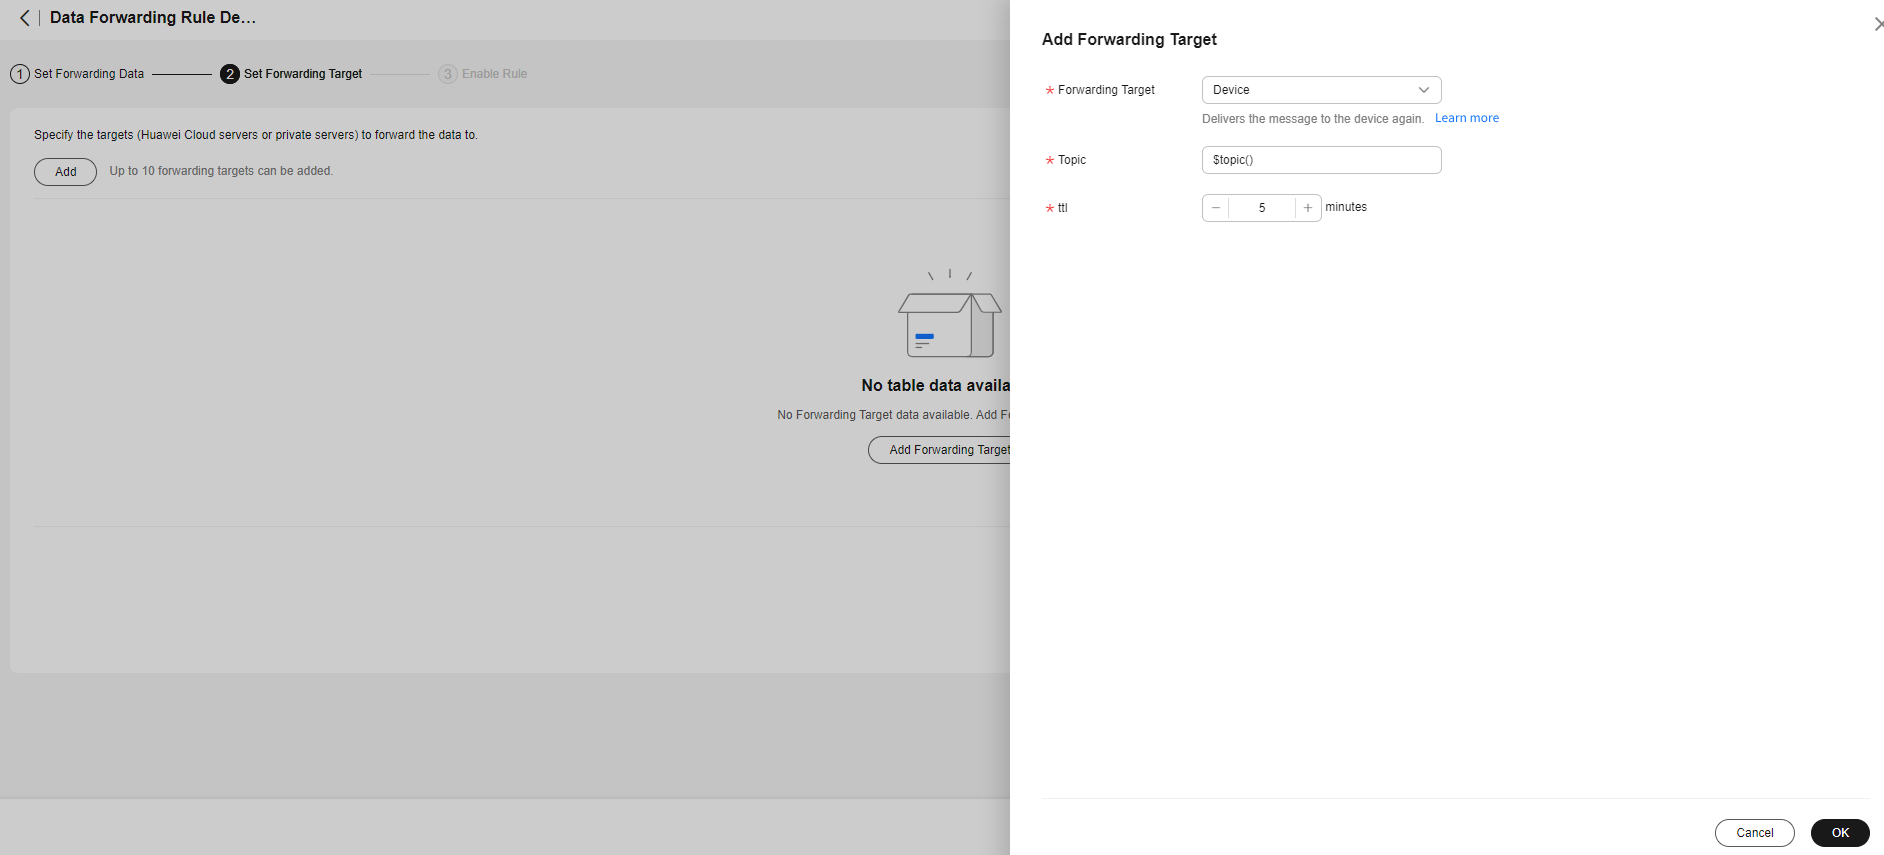
- Set the forwarding target. Click Add. Select Device for Forwarding Target, set Topic to $topic() (the topic remains unchanged after forwarding), and set ttl to 5 minutes (data is cached for 5 minutes). Click OK.
Figure 4 Creating a forwarding target - to a device
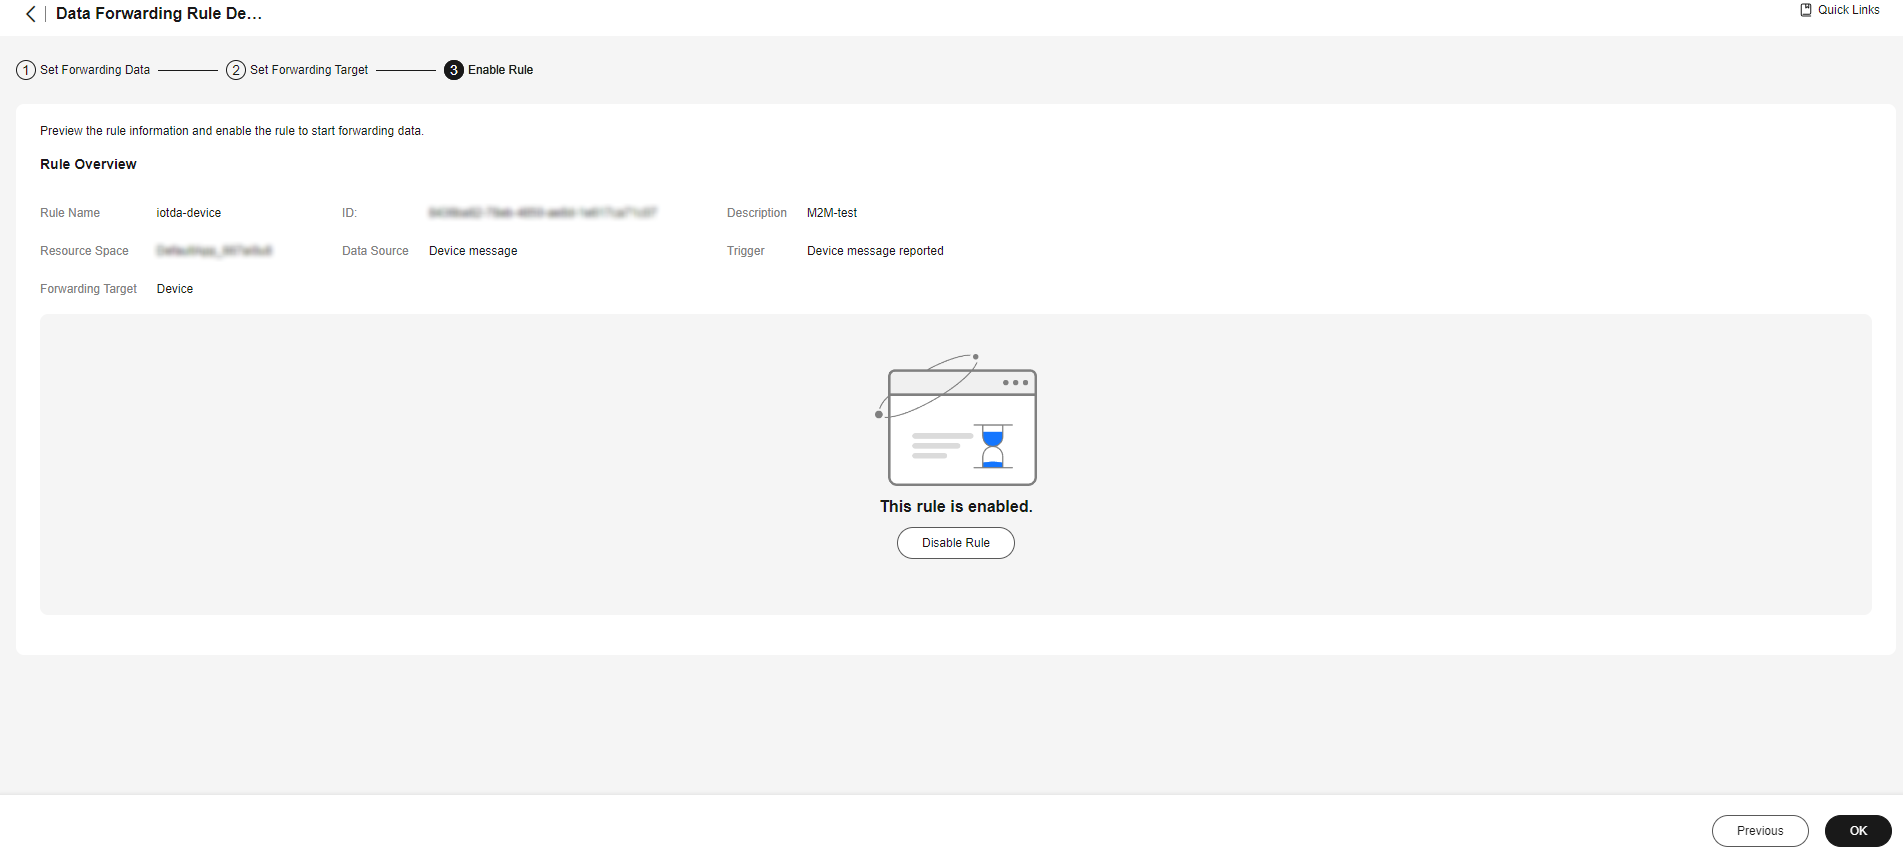
- Click Enable Rule in the middle of the page.
Figure 5 Enabling a rule - Forwarding data to a device
Verification
- To use the M2M communication function, perform the following steps:
- Access the IoTDA service page and click Access Console. Click the target instance card.
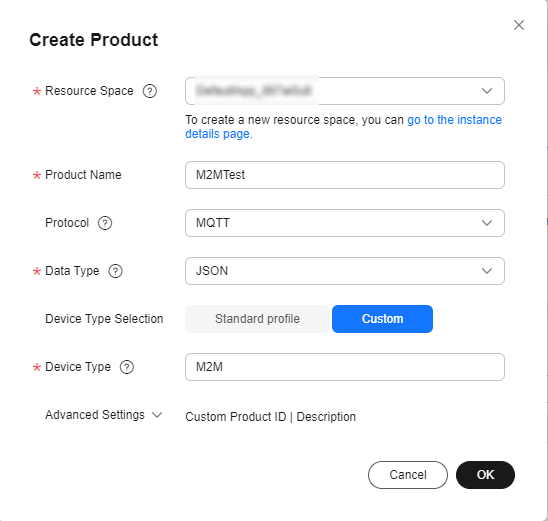
- Create a product. Select MQTT for Protocol.
Figure 6 Creating a product - M2M
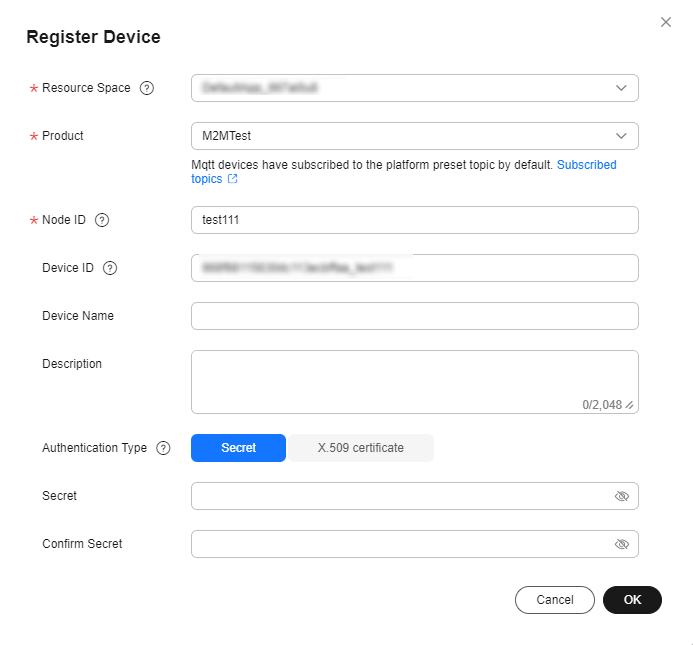
- Register device A (test111) and device B (test222) under the product created in step 1. For details, see Registering an Individual Device.
Figure 7 Device - Registering an M2M device
- This section uses MQTT.fx as an example to describe how to implement M2M communications. You can also test based on your service requirements.
- Open two MQTT.fx to simulate devices A (test111) and B (test222).
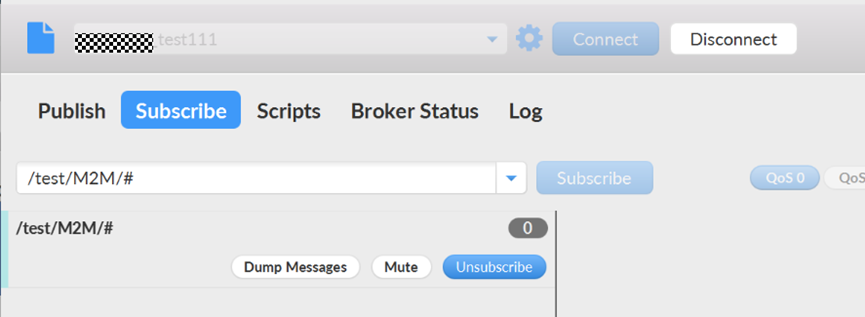
- On the Subscribe page of device B, enter the topic /test/M2M/# and click Subscribe.
Figure 8 Entering a topic on the Subscribe page of device B
- Let device A send a message to device B. On the Publish page of device A, enter the topic /test/M2M/${Any word}. Enter the message to be sent (for example, hello) in the text box, and click Publish.
Figure 9 Entering a message on the Publish page of device A

On the Subscribe page of device B, you can see the received message, as shown in the following figure.
Figure 10 Subscribe page of device B
Parent topic: M2M Communications
Feedback
Was this page helpful?
Provide feedbackThank you very much for your feedback. We will continue working to improve the documentation.See the reply and handling status in My Cloud VOC.
The system is busy. Please try again later.
For any further questions, feel free to contact us through the chatbot.
Chatbot


