Creating a Data Portal
A data portal is a collection of dashboards and data screens organized in a menu format. It allows for the creation of complex analytical menus with navigation capabilities. This section describes how to create a data portal.
Prerequisites
- A project has been created by referring to Creating a Project.
- A data source has been connected by referring to Connecting to a Data Source.
- A dataset has been created by referring to Creating a Dataset.
- A dashboard or large screen has been created by referring to Creating a Dashboard and Creating a Large Screen.
Procedure
- Log in to the DataArts Insight console.
- Click
 in the upper left corner of the management console to select a region. Then, select an enterprise project in the upper right corner.
 - On the top menu of the console, click Project. On the displayed My Projects page, click the name of the desired project.
- In the navigation pane on the left, choose Work Management > Data Portals. On the displayed page, click Create Portal.
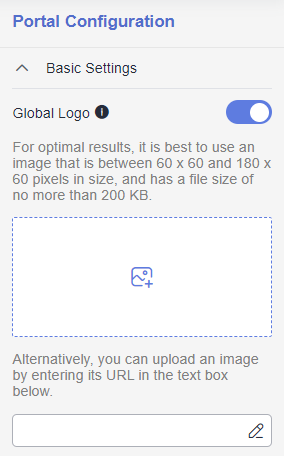
- Click Portal Configuration on the right of the page to set the data portal title and upload the logo. For details about the parameters, see Table 1.
Figure 1 Portal configuration

Table 1 Parameters for configuring a portal Parameter
Description
Logo
You can set your logo in two ways: by uploading an image or by entering the image URL. Click
 in the input box to access the logo selection dialog box, where you can check, delete, or change your logo. You are advised to use an image of 60 x 60 to 180 x 60 pixels and keep the file size under 200 KB.NOTE:
- Note that the Logo link must be accessible to the browser and comply with the content security policy.
- Use this feature with caution as it may result in the leakage of your icons.
- Uploaded images are only visible within the current project.
Main title
You can determine whether to display the main title and configure the name and text format.
- The following fonts are supported: Regular, Light, Dark, and Bold.
- The font size ranges from 16 to 100.
NOTE:
- The name can contain up to 32 characters. Only letters, numbers, hyphens (-), and underscores (_) are allowed.
- Color setting: You can customize the color of the main title.
Subtitle
You can determine whether to display the subtitle and configure the name and text format.
- The following fonts are supported: Regular, Light, Dark, and Bold.
- The font size ranges from 12 to 100.
NOTE:
- The name can contain up to 32 characters. Only letters, numbers, hyphens (-), and underscores (_) are allowed.
- Color setting: You can customize the color of the subtitle.
Restore default settings
Restore the settings.
Portal URL
User-defined domain name. You can use the user-defined domain name to open the data portal.
NOTE:- The name can contain up to 32 characters. Only letters, numbers, hyphens (-), and underscores (_) are allowed.
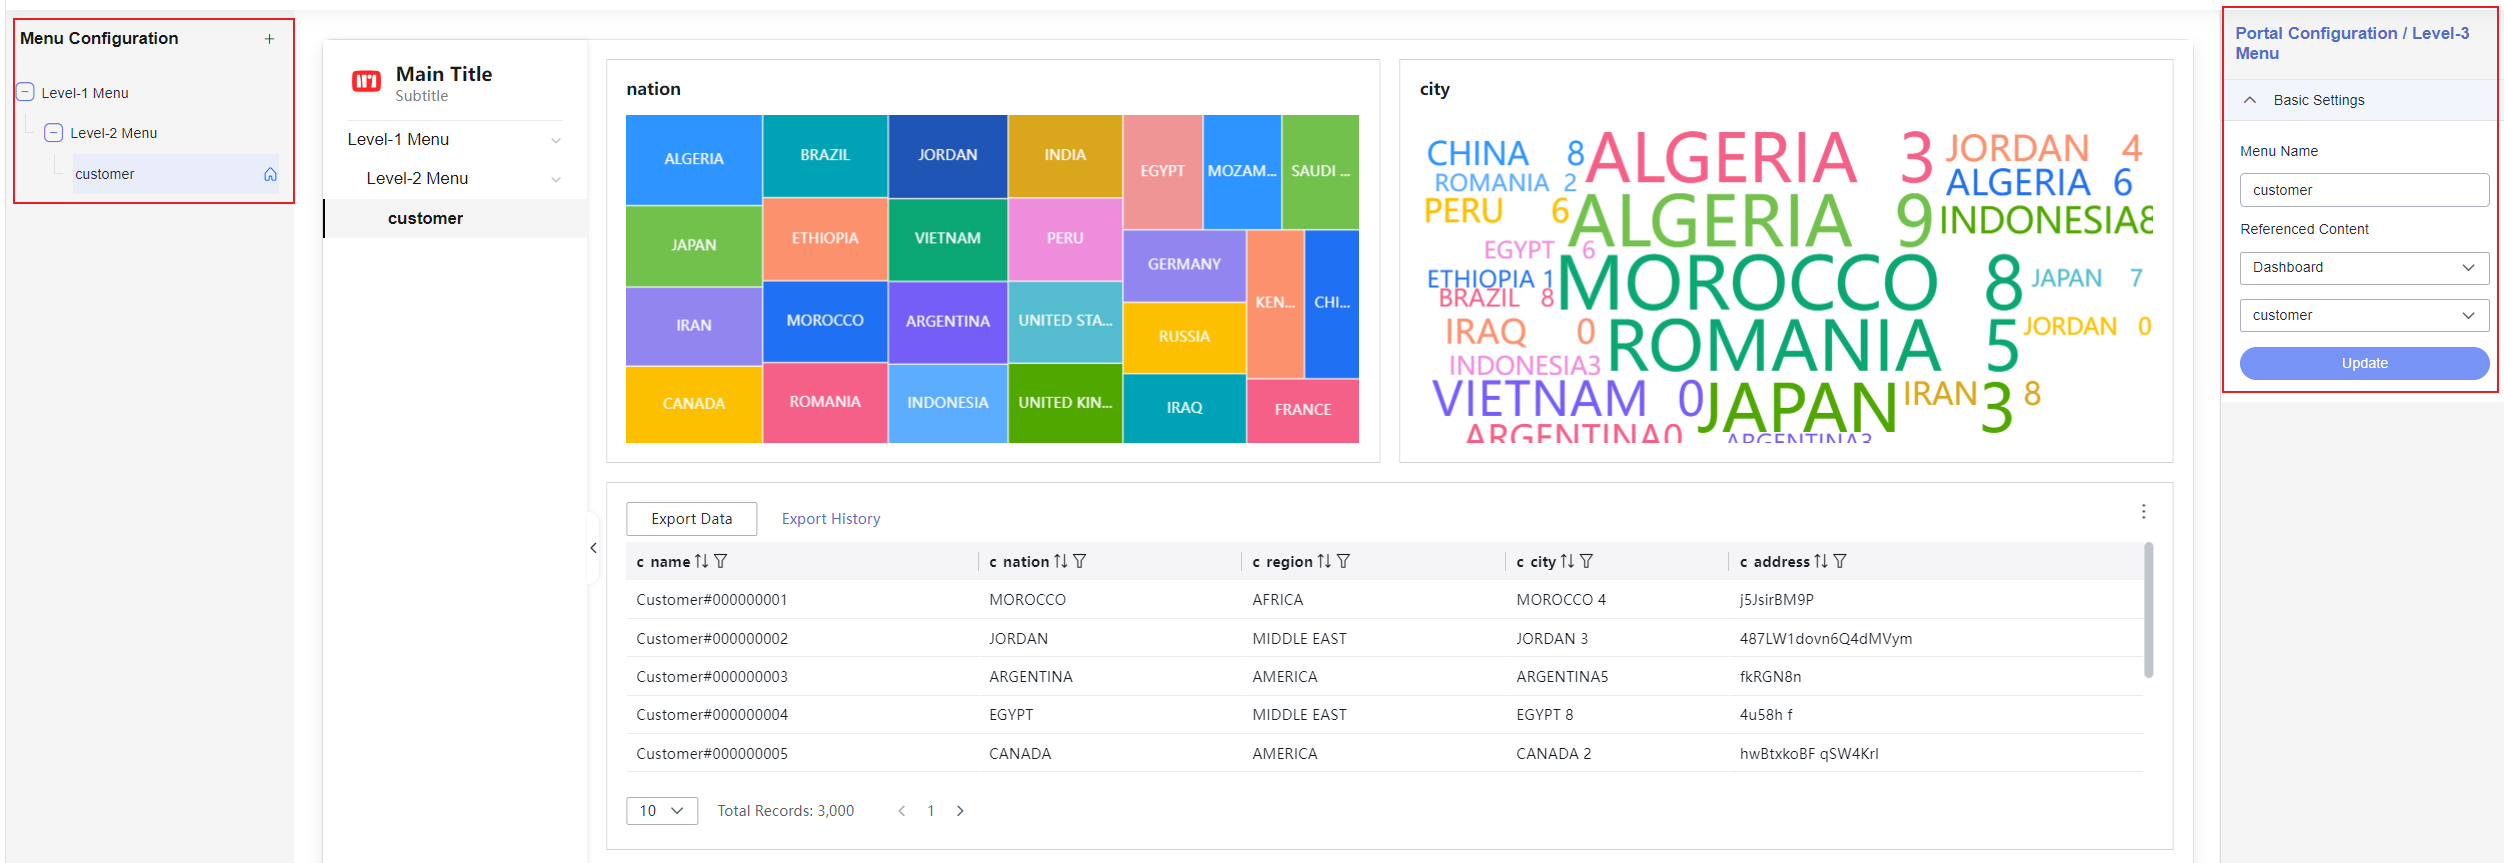
- Configure the menu hierarchy, name, and select the referenced content.
Figure 2 Menu configuration

Table 2 Menu configuration parameters Parameter and Icon
Description

Add a menu.
Renaming
Click
 and click Rename, or double-click the menu name to change name. The name can contain up to 32 characters. Only letters, numbers, hyphens (-), and underscores (_) are allowed.
Delete
Delete a menu.
Menu settings
- Level-1 menu basic configuration: Set the menu name.
- Level-2 menu basic configuration: Set the menu name.
- Level-3 menu basic configuration:
- Menu name: Set the menu name.
- Referenced content: You can select a published dashboard and screen. You need to have the permission to view the dashboard and screen.
NOTE:
A maximum of five levels are supported. Each level supports a maximum of 50 menu items.
- Once the configuration is complete, click Preview in the upper right corner of the page. After confirming that the configuration is correct, click Save. The data portal is successfully created.
Table 3 Parameters in the page header area Parameter and Icon
Description

Click the icon to return to the Data Portals page.

Click the icon to rename the portal. (The name of the portal is the name displayed in the portals, which is different from the main title of the portal.) The name can contain up to 32 characters. Only letters, numbers, hyphens (-), and underscores (_) are allowed.
Preview
Click Preview to display the portal content on the current page. After you click Preview, the button changes to Edit.
Save
Save the current portal configuration. If you do not click Save, all changes to the portal are not persisted.
Feedback
Was this page helpful?
Provide feedbackThank you very much for your feedback. We will continue working to improve the documentation.See the reply and handling status in My Cloud VOC.
For any further questions, feel free to contact us through the chatbot.
Chatbot


