Adding an Invoke Template Diagram Element to a Flow
Function of the Assignment Diagram Element
Huawei Cloud Astro Zero enables quick creation of Word, Excel, Email, and SMS templates, enhancing document efficiency and standardization. You can configure this diagram element to generate a document based on the template configured in an application. For details, see Templates.
Using the Invoke Template Diagram Element
- Create a template scenario.
A template scenario is a collection of service scenarios. Multiple templates can be created in a template scenario. The templates share the data structure. After a template scenario is created, it can be called in flows.
- Log in to the application designer by referring to Logging In to the Application Designer.
- In the navigation pane, choose Logic.
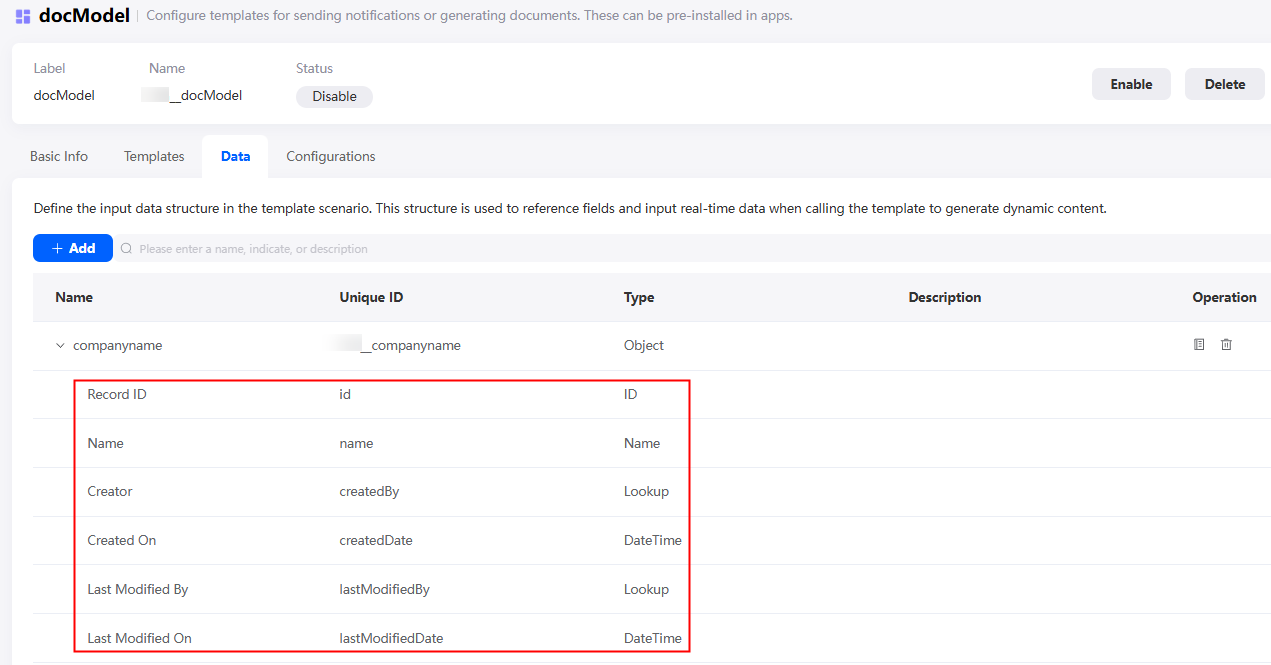
- Choose More > Templates, and click Add Template Scenario.
Figure 1 Selecting Add Template Scenario
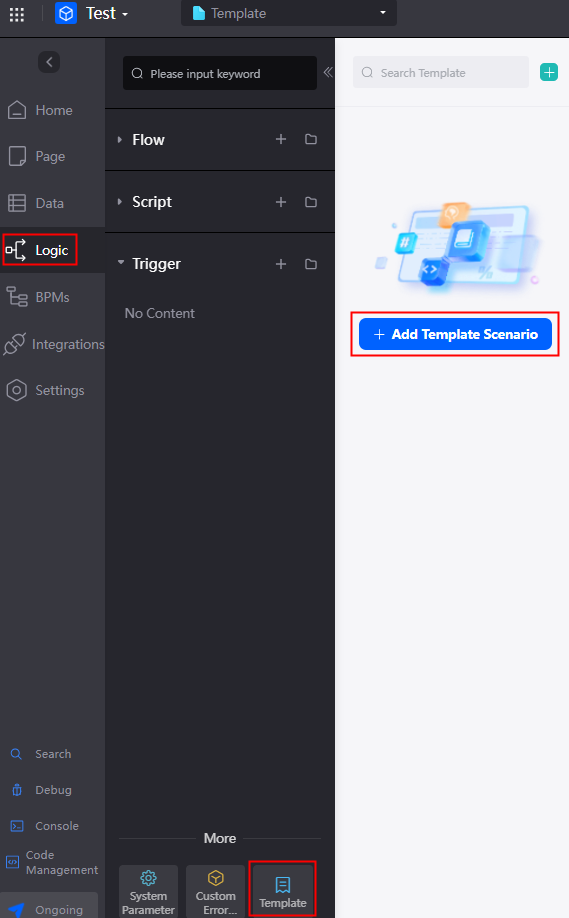
- Enter the label and name of the template and click Confirm.
Figure 2 Creating a template scenario

- In the created template scenario, click the Configurations tab, configure the file storage location, and click the save button.
Figure 3 Configuring the file storage information
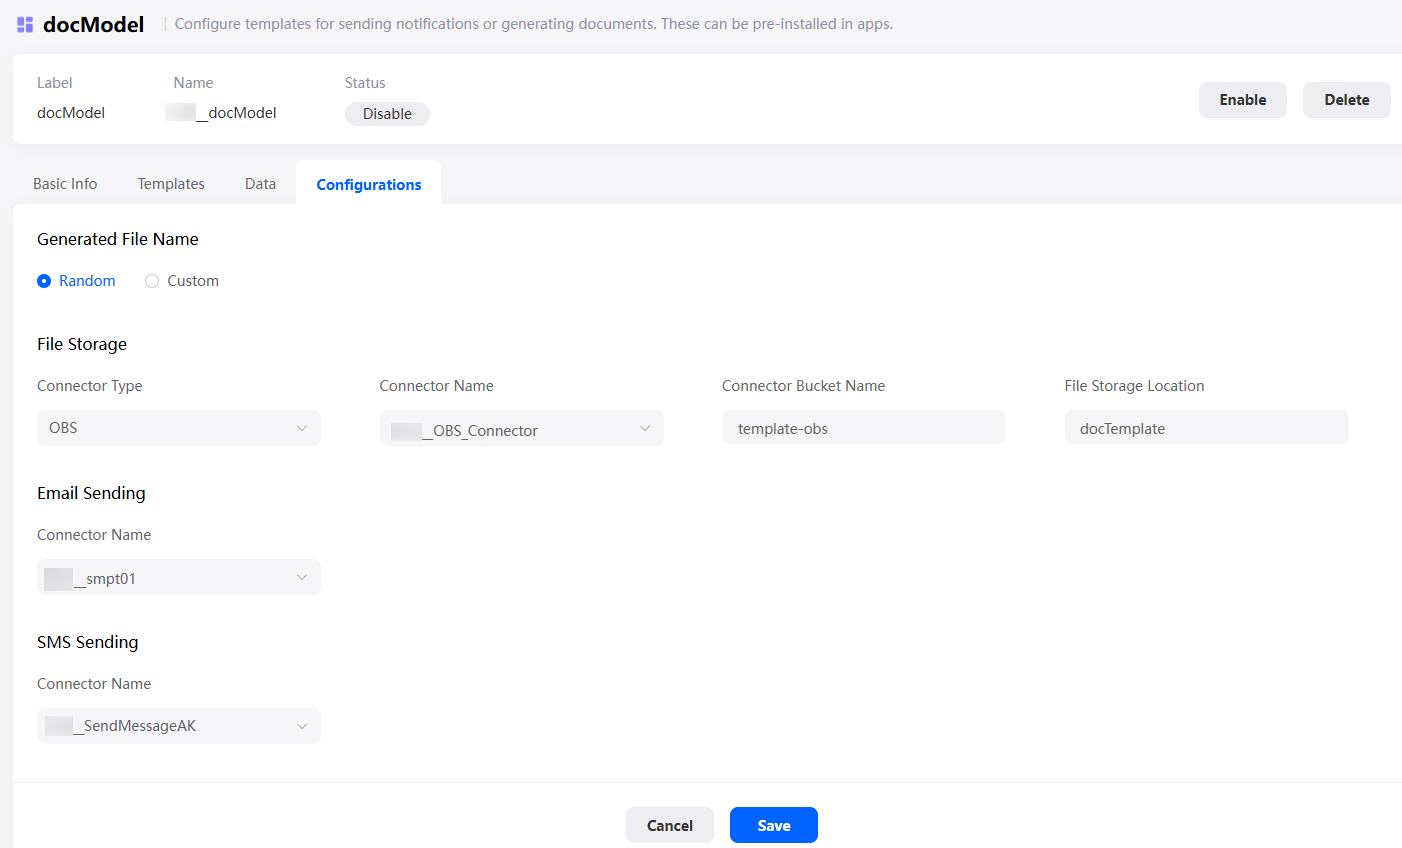
Table 2 Configuration parameters Parameter
Description
Generated File Name
Set the name of the file generated based on the template. The file name can be Random or Custom. If this parameter is set to Custom, you can specify the name of the generated file based on service requirements.
File Storage > Connector Type
Connector type of the file storage. Currently, only OBS and MINIO are supported.
File Storage > Connector Name
Name of the OBS or MinIO connector created in the platform. You can choose Integrations > Connector > Connector Instance > Storage > OBS/MINIO to view the name.
File Storage > Connector Bucket Name
OBS or MinIO bucket name configured during connector creation.
File Storage > File Storage Location
You can specify the path for storing files in the OBS or MinIO bucket.
Email Sending > Connector Name
Name of the SMTP email service connector created in the platform. You can view the connector on the Integrations > Connector > Connector Instance > Message > Email by SMTP page. For details about how to create an SMTP email service connector, see Interconnecting with SMTP to Send Emails.
SMS Sending > Connector Name
Name of the SMN connector created in the platform. You can view the connector on the Integrations > Connector > Connector Instance > Message > SMN page. For details about how to create an SMN connector, see Connecting to SMN to Send SMS Messages.
- Add parameters to the template.
The template parameters added here correspond to the content to be replaced in the document template.
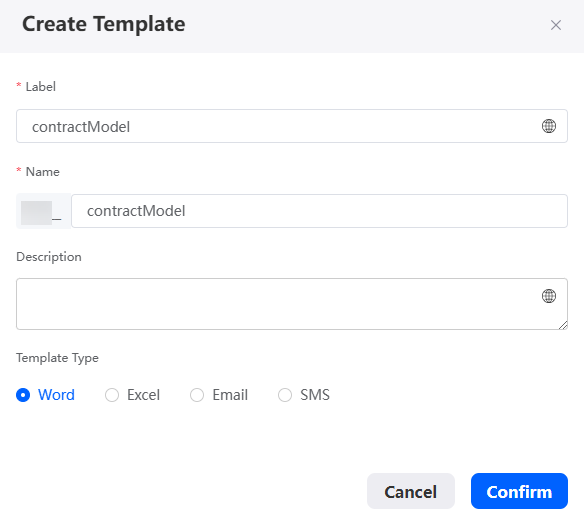
- Click the Data tab and click the add button.
- Set parameters and click Save.
Figure 4 Parameters for creating a template

Table 3 Parameter descriptions Parameter
Description
Name
Name of a parameter in the new template, which is displayed on the page.
Value: 1–64 characters.
Unique ID
ID of a template parameter, which is unique in the system and cannot be modified after being created. The naming requirements are as follows:
- The value cannot exceed 64 characters, including the prefix namespace.
To prevent duplicate data names among different tenants, each tenant must define a unique namespace when first creating an application. A tenant can create only one namespace. After being created, the namespace cannot be modified.
- Start with a letter and can contain only letters, digits, and underscores (_). It cannot end with an underscore (_).
Type
Select a parameter type from the drop-down list box. The options are text, number, currency, date, and date/time.
This parameter is displayed only when this parameter is set to Basic.
Object
Select the required object. After the object is created, the parameter inherits the structure of the object, as shown in Figure 5.
This parameter is displayed only when this parameter is set to Object.
Description
Enter the description of the template parameter in the text box as required.
Value: 1–255 characters.
- The value cannot exceed 64 characters, including the prefix namespace.
- Add a template.
You can add multiple templates to a template scenario. These templates can be preset in applications to send notifications or generate documents.
- Click the Templates tab and click Add.
- Set the template label and name, and click the confirm button.
Figure 6 Setting template parameters
- On the Templates tab page, click
 next to the created template. The document template page is displayed.
 - Set related parameters based on the template type set in 3.b.
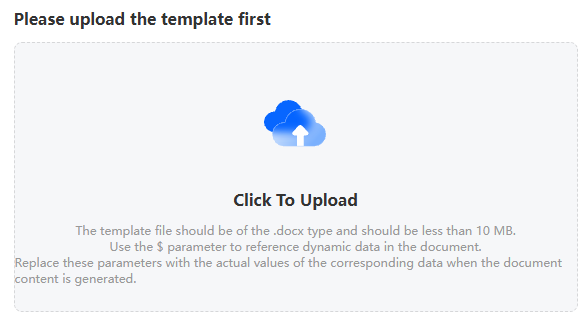
- When Template Type is set to Word, click Click To Upload, select a Word document, and then view the upload result.
The uploaded Word document must be in .docx format and should be less than 10 MB in size. If the document contains dynamic data (variables), use ${parameter} to define dynamic data. These parameters will be replaced with actual values when the document is generated.Figure 7 Uploading a Word document
- When Template Type is set to Excel, click Click To Upload, select an Excel document, and then view the upload result.
The uploaded Excel file must be in .xlsx format, with no more than 10 sheets. Each sheet must not exceed 200 columns, 1,000 rows, or 500 characters per cell. If the document contains dynamic data (variables), use ${parameter} to define dynamic data. These parameters will be replaced with actual values when the document is generated.
Figure 8 Uploading an Excel file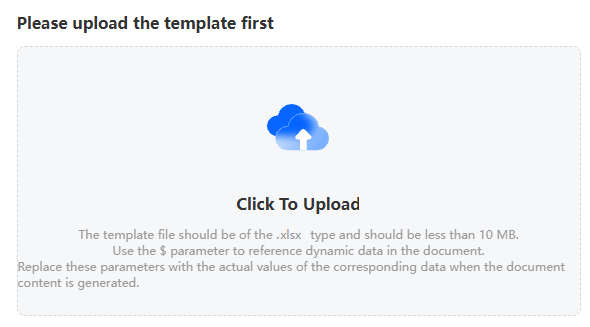
- When Template Type is set to Email. Click Edit, set the email content, and click Save.
Figure 9 Setting the email content
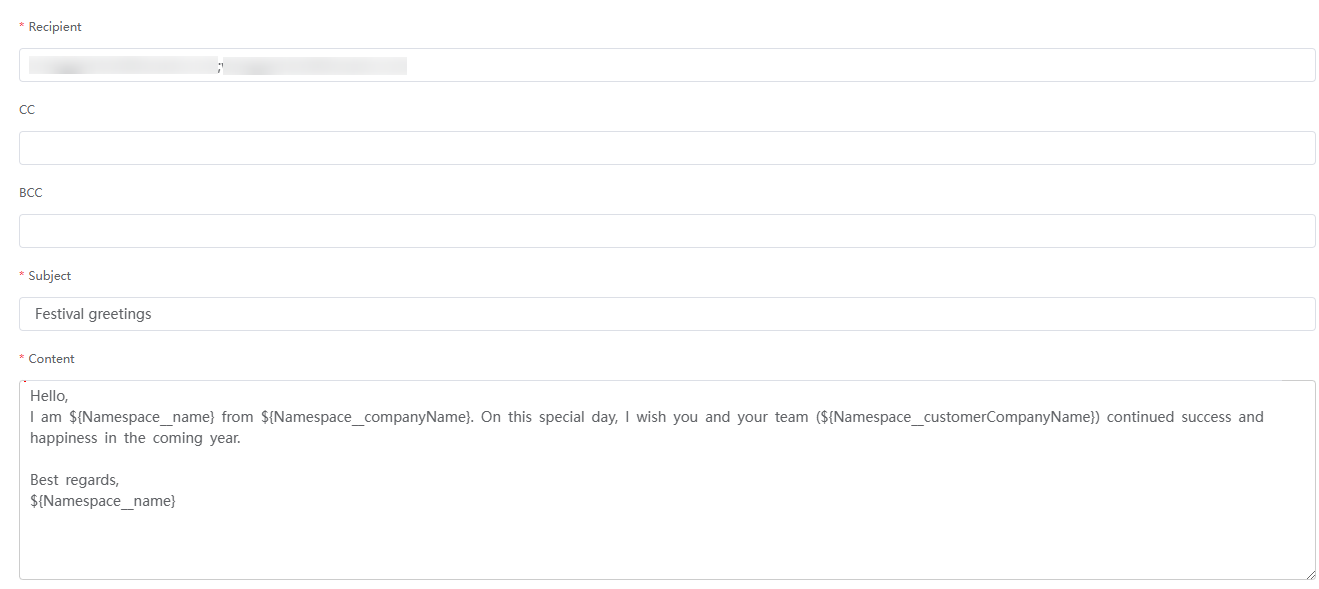
Table 5 Parameters for setting an email Parameter
Description
Recipient
Recipient's email address (max. 4,096 characters). Use semicolons (;) to separate multiple addresses.
CC
Cc recipient address (max. 4,096 characters). Use semicolons (;) to separate multiple addresses.
BCC
Bcc recipient address (max. 4,096 characters). Use semicolons (;) to separate multiple addresses.
Subject
Email subject (max. 4,096 characters).
Content
Email content (max. 4,096 characters). Keep email content concise, clear, and logical to ensure accurate information delivery.
- When Template Type is set to SMS, click Edit, set SMS content, and click Save.
Figure 10 Setting the SMS message content
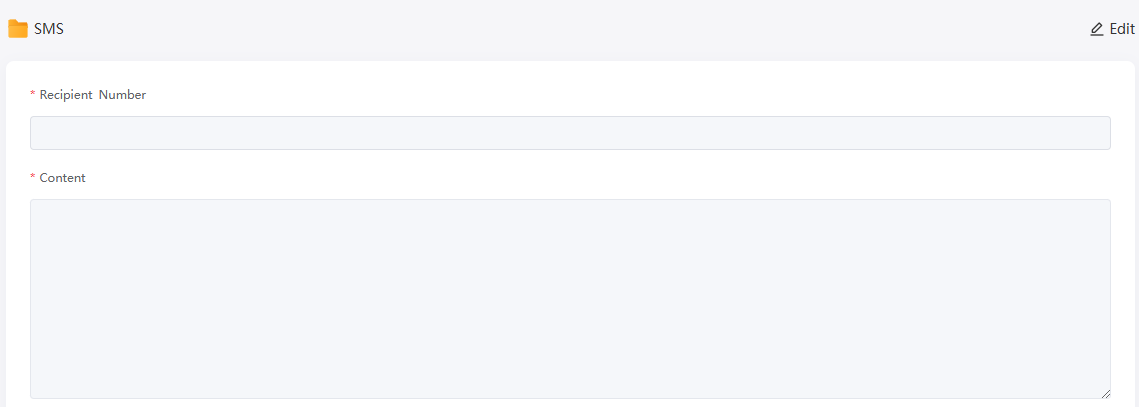
Table 6 Parameters for setting the SMS message content Parameter
Description
Recipient Number
Recipient's mobile number (max. 4,096 characters).
Content
Message content.
- When Template Type is set to Excel, click Click To Upload, select an Excel document, and then view the upload result.
- When Template Type is set to Word, click Click To Upload, select a Word document, and then view the upload result.
- If the preview meets your expectation, click Enable in the upper right corner of the page to enable the document template.
- Return to the document template scenario and click the enable button to enable the template scenario.
- Use the Invoke Template diagram element.
- On the flow design page, drag the Invoke Template diagram element from the basic area to the canvas.
- Select the Invoke Template diagram element, click
 , and set basic information.
Table 7 Parameter description Parameter
Description
Label
Label of the diagram element, which is displayed on the flow design page. The system automatically assigns a value in a specific Templatesequence number format, with the sequence number starting at 0 for each type of diagram element.
Name
Diagram element name, which must be unique in the current flow. The naming requirements are as follows:
- Value: 1–80 characters.
- Start with a letter and can contain letters, digits, and underscores (_). It cannot end with an underscore (_).
Description
Description of the diagram element.
Value: 1–255 characters.
- Click
 and set the Invoke Template diagram element.
Figure 11 Setting the Invoke Template diagram element
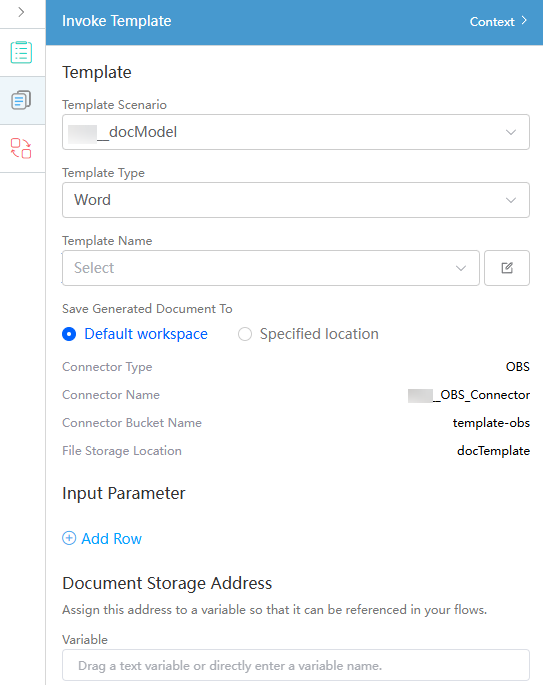
Table 8 Parameter description Parameter
Description
Template Scenario
Select the template scenario associated with the Invoke Template diagram element, that is, the template scenario created in 1.
Document Template
Select the document template created in 3.
Connector Type
Connector type of the generated document. The connector type can be saved to the default workspace (that is, the connector type specified when the template scenario is created in 1.e) or reset.
Connector Name
Connector name of the generated document. The connector name can be saved to the default workspace (that is, the connector name specified when the template scenario is created in 1.e) or reset.
Connector Bucket Name
Connector type of the generated document. The document can be saved to the default workspace (the connector bucket name specified when the template scenario is created in 1.e) or be reset.
File Storage Location
Path for storing the generated file. The file can be stored in the default workspace (that is, the file storage path specified when the template scenario is created in 1.e) or reset.
Input Parameter
Transfer data to the template and assign the input parameter variables to the corresponding template parameters at a time.
Document Storage Address
Assign the file storage location to a variable so that the file storage location can be referenced in service orchestration.
Feedback
Was this page helpful?
Provide feedbackThank you very much for your feedback. We will continue working to improve the documentation.See the reply and handling status in My Cloud VOC.
For any further questions, feel free to contact us through the chatbot.
Chatbot

