
Enabling the Service
Scenarios
Workspace Application Streaming can be enabled after tenant information is configured on the console.
Prerequisites
- The administrator has permission to perform operations on Workspace Application Streaming.

- By default, a Huawei Cloud account has the operation permissions on all Huawei Cloud services. If you use such an account, you do not need to confirm it.
- To use Workspace Application Streaming, the IAM account created under the Huawei Cloud account must be added to the admin user group or a user group with Workspace Application Streaming operation permissions. Go to the IAM page to check whether the user belongs to the admin user group. If not, grant the IAM account the permission for using Workspace Application Streaming.
- The AD server and RD Licensing server have been prepared by referring to How Do I Deploy a Windows AD Server? and How Do I Deploy an RD Licensing Server?, and the licenses have been configured and activated on the servers.
- Required only when the AD is interconnected.
- To ensure the continuous availability of the RD Licensing server, configure RDS authorization and security policies for the server by referring to How Do I Configure RDS Licensing and Security Policies?.
- You have configured the network communication between Workspace Application Streaming and Windows AD by referring to How Do I Configure Network Connection Between Workspace Application Streaming and the Windows AD? and prepared the following data:
- Domain Name
- Domain Administrator Account
- Domain Administrator Password
- Name of Active Domain Controller
- IP Address of Active Domain Controller
- Active DNS IP Address
- (Optional) Name of Standby Domain Controller
- (Optional) IP Address of Standby Domain Controller
- (Optional) Standby DNS IP Address
Required only when the AD is interconnected.
Procedure
Enabling service self-check
- Log in to the Workspace Application Streaming console as an administrator.
- Click Activate the Service.
- Service provisioning guides enterprises to determine whether to interconnect with the AD server.
- No: If you choose not to interconnect with the AD server, only single-session applications can be created in the current project. Go to 10.
- Yes: If you choose to interconnect with the AD server, single-session applications and multi-session applications can be created in the current project. Go to 4.
- After the AD server and RDS license server are configured in Prerequisites, click YES.
- Click Finish.
Configuring the project
- In the navigation pane on the left, choose Tenant Configuration.
- Select a project, or click Create Project to create one.
(Optional) Setting the enterprise ID
- Set the enterprise ID.
- The enterprise ID is the unique identifier of your tenant environment. End users need to enter the enterprise ID when logging in to the system.
It is recommended that identifiable fields, such as the enterprise name, be used as the enterprise ID. The enterprise ID can be changed.
- The enterprise ID can contain a maximum of 32 characters, including digits, letters, underscores (_), and hyphens (-).
- The enterprise ID is the unique identifier of your tenant environment. End users need to enter the enterprise ID when logging in to the system.
Configuring the AD domain
- Configure the connection to Windows AD.
- Domain Name: Windows AD domain name
- Domain Administrator Account: administrator name for logging in to the Windows AD server
- Domain Administrator Password: administrator password for login
- Name of Active Domain Controller: It can be the host name of the AD service or the combination of the host name of the AD service and the domain name.
- The host name of the AD service: Log in to the AD server using the corresponding IP address, choose Control Panel > System and Security > System to obtain the computer name as the host name, replace the letters of the host name with uppercase letters, and use the host name as the active domain controller name. For example, if the host name is Fa-2016Ad-01, the active domain controller name is FA-2016AD-01.
- The combination of the host name of the AD service and the domain name: Log in to the AD server using the corresponding IP address, choose Control Panel > System and Security > System, obtain the computer name as the host name, add the domain name to the host name, and use the combined name as the active domain controller name. For example, if the host name is Fa-2016Ad-01 and the domain name is vdesk.cloud.com, the active domain controller name is Fa-2016Ad-01.vdesk.cloud.com or FA-2016AD-01.vdesk.cloud.com.
- IP Address of Active Domain Controller: service plane IP address of the Windows AD server
- Active DNS IP Address: service plane IP address of the DNS server
- Deleting Computer Objects on AD
- Yes: When the APS is deleted, the computer objects in the AD domain are also deleted.
- No: When the APS is deleted, the computer objects in the AD domain are not deleted.
- (Optional) Advanced settings
- Name of Standby Domain Controller
- IP Address of Standby Domain Controller
- Standby DNS IP Address
Configuring the network
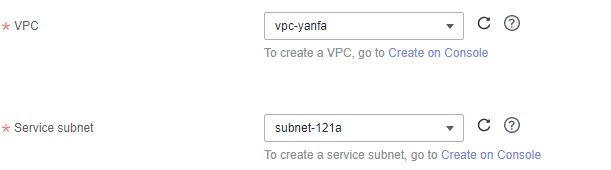
- Configure the VPC and Service subnet, as shown in Figure 1.
- To configure an existing VPC, select an existing VPC and service subnet.
- To configure a new VPC, click Create on Console, and create a VPC and service subnet.
- The resources required by Workspace Application Streaming will be created in the selected VPC subnet. After the first successful purchase, the VPC cannot be modified.
- A VPC is an isolated, configurable, and manageable virtual network environment for cloud applications, facilitating internal network management and configuration. Your Workspace Application Streaming service will be created in the selected VPC subnet to facilitate your access to the resources and applications on the enterprise intranet.
- The DNS server address of the selected subnet will be automatically changed. Do not manually change it. You are advised to select a dedicated Workspace subnet and ensure that the DHCP function is enabled for the subnet.
- Select a network access mode, as shown in Figure 2. By default, Internet is selected. You can select multiple options.
- If you require high network quality and security, you can purchase a Direct Connect connection and perform network construction in advance.
- To enable Direct Connect, you need to create an endpoint service client which is charged. If you disable Direct Connect, the endpoint service client will be deleted.
- The Direct Connect access mode provides the load balancing capability. You do not need to add a third-party load balancing device.
- If you want to upgrade the client online through Direct Connect, you need to configure a VPC endpoint for accessing OBS using the OBS private address. You can submit a service ticket to query the endpoint service of the corresponding region.
- In the Desktop deletion configuration area, select whether to send a notification.
- Yes: A notification email about desktop deletion will be sent.
- No: No notification email about desktop deletion will be sent.
- Click Save Configuration to start deploying Workspace Application Streaming resources.
When Workspace Application Streaming resources are successfully deployed, Workspace Application Streaming has been enabled. You can go to create a user.
If enabling the service fails, perform operations as prompted.

Feedback
Was this page helpful?
Provide feedbackThank you very much for your feedback. We will continue working to improve the documentation.See the reply and handling status in My Cloud VOC.
For any further questions, feel free to contact us through the chatbot.
Chatbot


