
Setting Up a Website Using the WordPress Application Image
FlexusL provides a wide range of high-quality application images for you to choose from. This section uses the WordPress application image as an example to describe how to set up a website in three steps.
Process Flow
|
Procedure |
Description |
|---|---|
|
Sign up for a HUAWEI ID, enable Huawei Cloud services, and top up your account. |
|
|
Purchase and configure a FlexusL instance, including setting the login password, logging in to the server, configuring the security group, and adding and resolving a domain name. |
|
|
Go to the image application dashboard, set the username and password, and install WordPress. |
|
|
Access the image application dashboard, design your homepage, install plug-ins, and configure the email address. |
Preparations
- Before purchasing a FlexusL instance, sign up for a HUAWEI ID and enable Huawei Cloud services. For details, see Signing Up a HUAWEI ID and Enabling Huawei Cloud Services and Completing Real-Name Authentication.
If you have enabled Huawei Cloud services and completed real-name authentication, skip this step.
- Ensure that your account has sufficient balance. If not, top up your account.
Step 1: Purchase and Configure a FlexusL Instance
- Purchase a FlexusL instance.
- On the Flexus L Instance page, click Buy FlexusL and specify parameters required for purchasing a FlexusL instance.
For details, see Purchasing a FlexusL Instance.

Parameter
Example
Description
Region
CN-Hong Kong
For low network latency and quick resource access, select the region nearest to your target users. After a FlexusL instance is created, the region cannot be changed. Exercise caution when selecting a region.
NOTE:By default, all FlexusL instances created by the same account in the same region are located in the same VPC. They can communicate with each other over a private network. FlexusL instances that are created by different accounts or located in different regions cannot communicate with each other over a private network. For details, see Resource Configuration for FlexusL Instances.
Image
WordPress application image
Application image: includes applications, initialization data, runtime environment, and OS. You can use the WordPress application image to quickly set up a website.
For details, see Images Supported by FlexusL Instances.
Instance specifications
2 vCPUs | 2 GiB memory and 60 GiB system disk
Select instance specifications based on your service requirements. Outbound traffic exceeding the traffic package is billed. For billing details, see Billing.
(Optional) Instance name
Wordpress-Example
You can customize your instance name.
If this parameter is left blank, the instance name is in the default format: image name-region-random number. In a batch creation, a hyphen followed by an incremental number is added to the end of each instance name by default.
(Optional) Associated service resources
- Data disk: 10 GiB
- Host security
- Cloud backup vault: 70 GiB
You can associate other services with your FlexusL instance as needed.
Required duration
- 1 month
- Auto-renew
The minimum duration of a purchase is one month and the maximum duration is three years.
Auto-renew is enabled by default, which means the purchased FlexusL instances will be automatically renewed before they expire. If you do not enable auto-renew during the purchase process, you can still enable it later after the instances are created. Monthly subscription allows you to renew the subscription for one month every time. The number of renewal times is not limited.
For more information about auto-renewal rules, see Auto-Renewal Rules.
Quantity
1
Set the number of FlexusL instances to be purchased. One instance is created by default. A maximum of five instances can be created in the same region.
To increase the quota, submit a service ticket.
- Click Buy Now.
On the displayed page, confirm the order details, read and select the agreement, and click Submit.
- Select a payment method and complete the payment.
- Go back to the FlexusL console and view the purchased FlexusL instance.
Check that the instance status is running and go to the next step.
- On the Flexus L Instance page, click Buy FlexusL and specify parameters required for purchasing a FlexusL instance.
- Configure security group rules.
- Click the purchased instance.
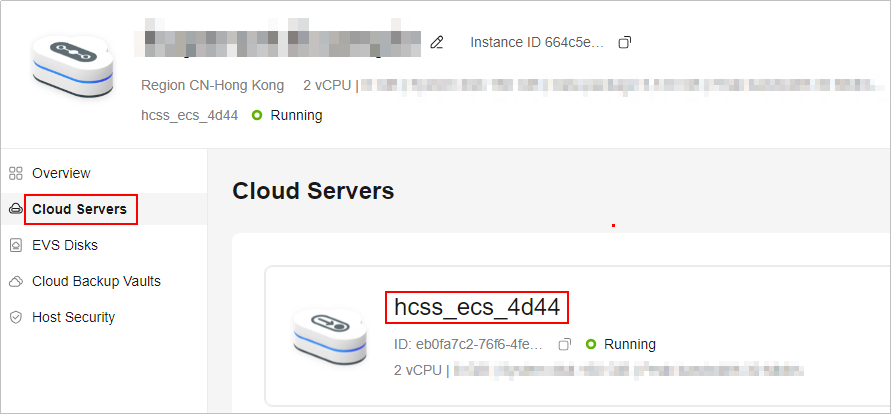
- In the navigation pane on the left, choose Cloud Servers and then click the server name.
- On the Security Groups tab, click Add Rule. In the displayed dialog box, add rules displayed in the following figure and click OK.
The following figure only displays common rules. You can add more rules as needed.
Table 1 Security group rules Priority
Action
Type
Protocol & Port
Source
Description
100
Allow
IPv4
TCP: 3306
0.0.0.0/0
Allows access to MySQL databases
100
Allow
IPv4
TCP: 80
0.0.0.0/0
Allows access to the FlexusL instance via HTTP
100
Allow
IPv4
TCP: 443
0.0.0.0/0
Allows access to the FlexusL instance via HTTPS
100
Allow
IPv4
TCP: 9001
0.0.0.0/0
Allows external access to the application management page
- (Optional) Add and resolve a domain name.
If you want your users to access the website through a domain name, add and resolve a domain name for the server. If the website is only used for personal development or testing, there is no need to add a domain name and you can skip this step.
- In the navigation pane on the left, choose Cloud Servers and then click the server name.
- On the Server Details page, click the Domain Names tab and click Add Domain Name.
Parameter
Description
Domain Name
Enter a domain name that will be added for the instance, for example, wpwebsite.com.
NOTE:A domain name that is not registered can be added. After the domain name is added, it must be registered and licensed. To ensure that a domain name can be used normally, register the domain name and complete ICP licensing before adding the domain name.
Enterprise Project
Select an enterprise project from the drop-down list.
Enterprise projects are associated with public zones. You can manage public zones by enterprise project.
NOTE:This parameter is displayed only when your account is an enterprise account.
- Click OK.
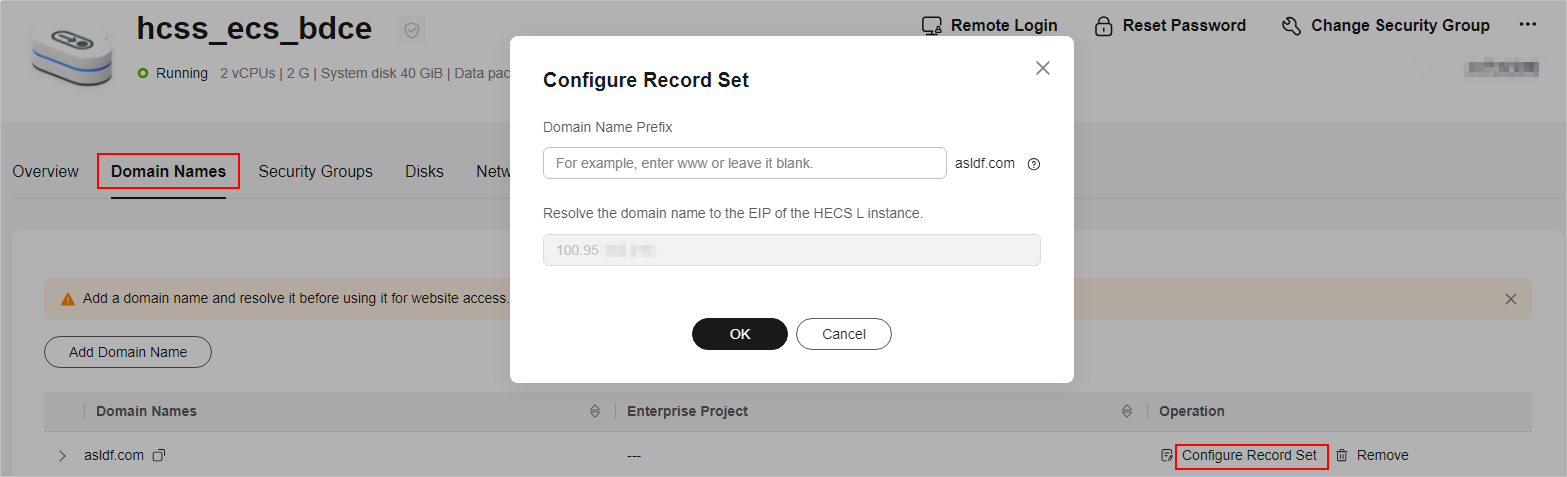
- In the row containing the wpwebsite.com domain name, click Configure Record Set.
Parameter
Description
Domain Name Prefix
If you enter a prefix, a subdomain is used for website access. Either the domain name or its subdomains can be resolved to the EIP of the instance.
Suppose the domain name is wpwebsite.com.
- If the domain name prefix is left empty, wpwebsite.com is resolved to the EIP.
- If the domain name prefix is www, the subdomain www.wpwebsite.com is mapped to the EIP.
EIP
The EIP bound to the instance is displayed here automatically.
- On the Domain Names tab, view the domain name resolution details.
- Apply for ICP licensing for the domain name.
To successfully access the server using a domain name, you must file the domain name. Domain name filing in the Huawei Cloud ICP license center is free of charge. For details, see ICP Filing Process.
- (Optional) Apply for and install an SSL certificate for your instance.
Install an SSL certificate if you need to enable HTTPS on your server. For details, see About SCM and SSL Certificate Usage.
Step 2: Initialize WordPress
The image application dashboard needs to be initialized only when you log in for the first time.
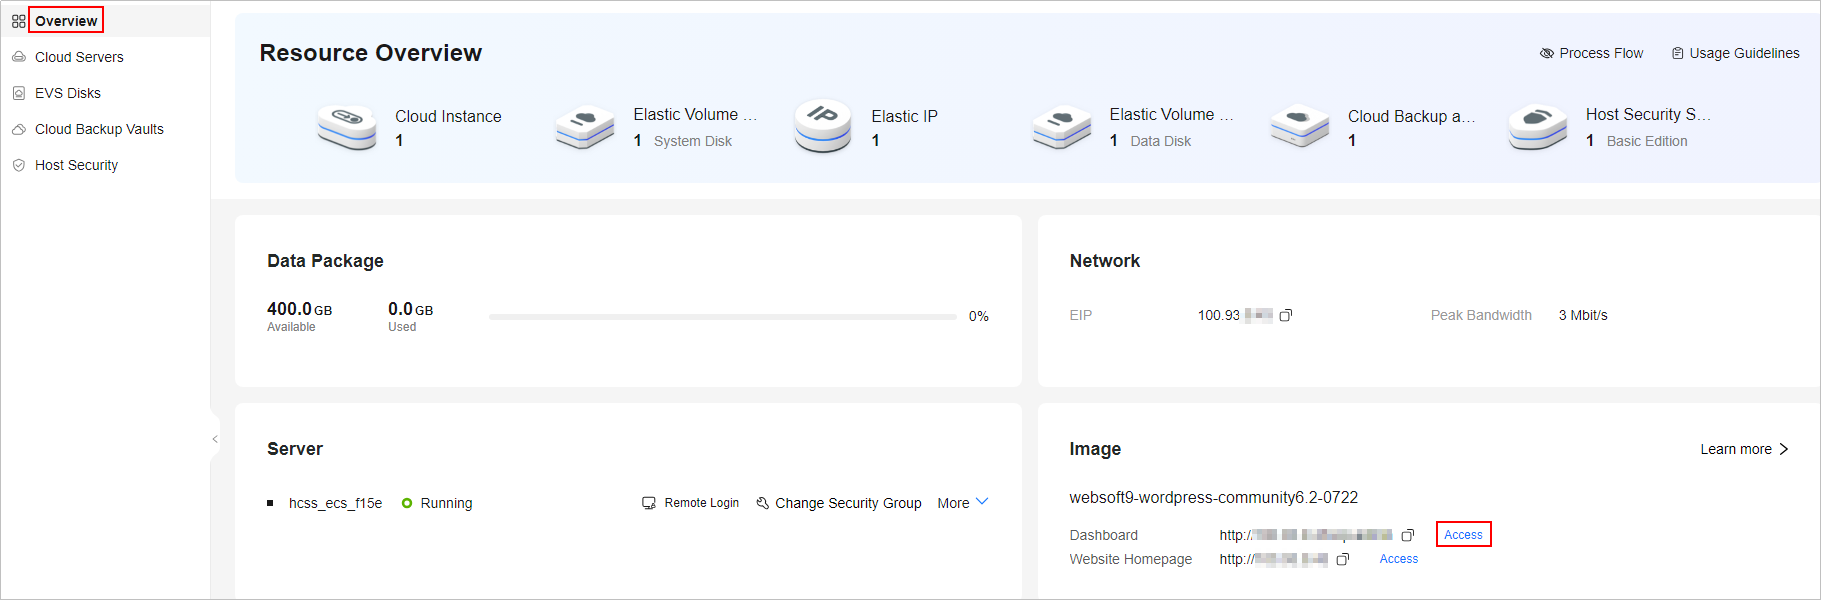
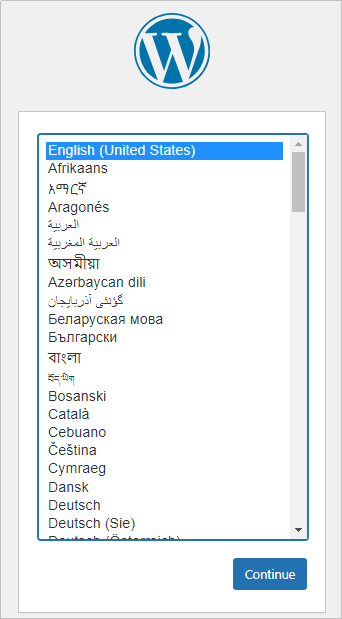
- On the Overview page, click Access in the Dashboard field in the Image area.
- Select the WordPress language and continue.
- Set the website title, WordPress administrator username, password, and email, and click Install WordPress.
Keep your website administrator username, password, and email secure. If you forgot the password, you can use this email to reset the password.

- Enter the administrator username and password and click Log In.
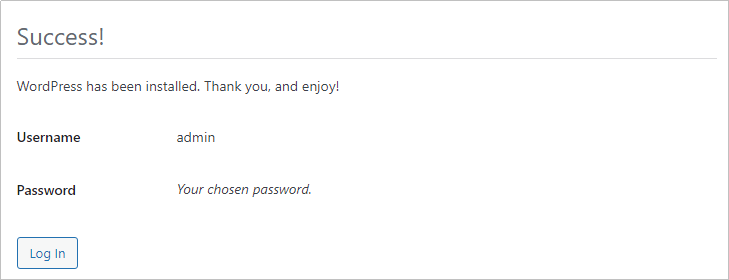
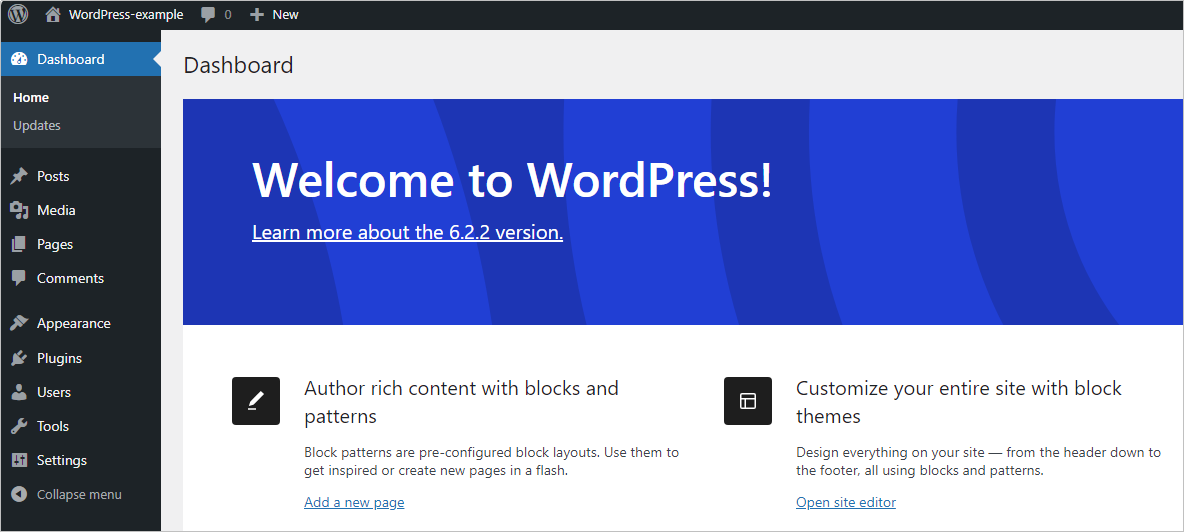
Then, you have obtained a WordPress hosting server.
Step 3: Deploy a Website
Log in to the WordPress dashboard and deploy a website based on your service requirements.
- Set up a website with WordPress.
- On the Overview page, click Access in the Dashboard field in the Image area.
- Enter the username and password set in step 3 to log in to the dashboard.
After logging in, design your website using WordPress.
- On the Overview page, click Access in the Dashboard field in the Image area.
- Preview the created website page.
During the website deployment, you can preview the website homepage at any time.
- On the Overview page, click Access in the Website Homepage field in the Image area.
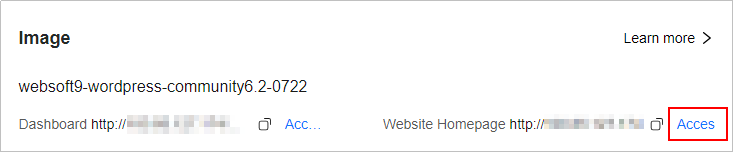

- On the Overview page, click Access in the Website Homepage field in the Image area.
Related Information
- For details about FlexusL best practices, see Best Practices for FlexusL.
- For details about how to remotely log in to the server, change or reinstall the OS, upgrade the package, add data disks, and back up data, see FlexusL Operations.
Feedback
Was this page helpful?
Provide feedbackThank you very much for your feedback. We will continue working to improve the documentation.See the reply and handling status in My Cloud VOC.
For any further questions, feel free to contact us through the chatbot.
Chatbot


