
Using DBeaver to Connect to an Instance from a Windows Server
DBeaver is a multi-platform database client for you to connect to different databases using particular drivers. This section describes how to use DBeaver to connect to a GaussDB instance.
Step 1: Obtain the Driver Package
- Obtain the driver package and its verification package.
Download the driver package and its verification package of the relevant version to any local directory. Table 1 lists the download list.
- Verify the driver package.
To prevent the driver package from being maliciously tampered during transfer or storage, perform the following steps to verify the driver package:
- Press Win+R to open the Run text box. Type cmd in the Open field and press Enter to open the Command Prompt window.
- Run the following command to obtain the hash value of the driver package:
certutil -hashfile {Local directory of the driver package}\{Driver package name} sha256
- Replace {Local directory of the driver package} with the actual download path, for example, C:\Users.
- Replace {Driver package name} with the name of the downloaded driver package, for example, GaussDB_driver.zip.
Example: certutil -hashfile C:\Users\GaussDB_driver.zip sha256
- Compare the hash value obtained in 2.b with the hash value of the verification package obtained in 1.
- Extract the gsjdbc4.jar package from the driver package.
Decompress the driver package obtained in 1 to the local PC. Then, go to any OS directory in the directory of the driver package corresponding to the type of the instance to be connected, extract the gsjdbc4.jar package from the GaussDB-Kernel_Database version_OS version_64bit_Jdbc.tar.gz package, and save it to any local directory. The following is an example:
To connect to a distributed instance, go to the GaussDB_driver\Distributed\Euler2.5_X86_64 directory, find the GaussDB-Kernel_503.1.0.SPC2300_Euler_64bit_Jdbc.tar.gz package, and extract the gsjdbc4.jar package from it.

The same JDBC driver package is used across different operating systems and CPU architectures. You only need to focus on the instance type when obtaining the required gsjdbc4.jar package.
Step 2: Obtain the DBeaver Client Installation Package
The DBeaver official website provides client installation packages for different OSs. Download the required DBeaver client installation package, and install it on the local PC.
Step 3: Create a Driver
- Start the DBeaver client.
- Choose Database > Driver Manager.
- In the displayed window, click New.
- On the Settings tab, set Driver Name, Class Name, URL Template, Default Port, Default Database, and Default User, select a driver type, and click OK.
Table 2 Parameters Parameter
Description
Driver Name
Use a name that is easy to identify, for example, GaussDB Driver.
Driver Type
Set it to Generic.
Class Name
Set it to org.postgresql.Driver.
URL Template
Set it to jdbc:postgresql://{host}[:{port}]/[{database}].
Default Port
Set it to the port of your DB instance specified during instance creation. The default port of a GaussDB instance is 8000.
Default Database
Set it to the name of the database to be connected. After a DB instance is created, a database named postgres is generated by default.
Default User
Set it to the name of the user who will access the GaussDB instance. The default user is root.
- On the Libraries tab, click Add File and select the gsjdbc4.jar package obtained in 3 of section "Step 1: Obtain the Driver Package".
- After the file is added, the Driver class field is empty. Click Find Class and select the identified driver class. The driver class must be the same as the class name specified on the Settings tab.
- Click OK to complete the driver settings.
Step 4: Connect to the Database
- On the DBeaver client, choose
 to create a connection.
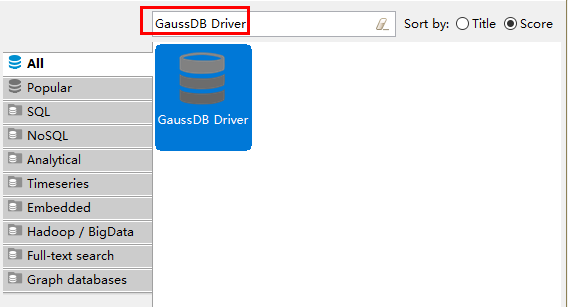
 - Search for the driver created in Step 3, select the driver, and click Next.
Figure 1 Selecting a driver
- Enter the host IP address, port number, database name, username, and password.
Table 3 Parameters Parameter
Description
Host
Private IP address of the DB instance to be connected. To view the private IP address and port of the DB instance, perform the following steps:- Log in to the GaussDB management console.
- Select the region in which the target instance is located.
- Click the name of the target instance to enter the Basic Information page.
- In the Connection Information area, view the EIP of the instance.
If no EIP is bound to the instance, bind one to the instance first. For details, see Binding an EIP.
Port
Port of your DB instance specified during instance creation. The default port of a GaussDB instance is 8000.
Database/Schema
Name of the database to be connected. After a DB instance is created, a database named postgres is generated by default.
Username
Name of the user who will access the GaussDB instance. The default user is root.
Password
Password of the user who will access the GaussDB instance.
- Click Test Connection. If Connected is displayed in the dialog box, the connection is successful. Click OK.
- Click Finish to connect to the database. You can view information about the connected database in the Database Navigator area.
Feedback
Was this page helpful?
Provide feedbackThank you very much for your feedback. We will continue working to improve the documentation.See the reply and handling status in My Cloud VOC.
For any further questions, feel free to contact us through the chatbot.
Chatbot


