
Multi-Account Identity and Permissions Management Using IAM Identity Center
Overview
In this section, management account A is used to create a user Alice in the IAM Identity Center and associate it with member account a__abc in the organization. The member account has been associated with the permission set PolicySet (configured with the ECS management permission). This case describes how to manage identity and permissions of multiple accounts.
Prerequisites
IAM Identity Center needs to obtain member account information from the organization created by the Organizations service. Before using IAM Identity Center, you must enable the Organizations service and create an organization. Then, log in to IAM Identity Center using the organization's management account.
Creating a User
- Log in to the Huawei Cloud console using the organization's management account.
- Click
 in the upper left corner of the page and choose Management & Governance > IAM Identity Center.
 - In the navigation pane, choose Users.
- Click Create User in the upper right corner of the page.
Figure 1 Creating a user

- Configure user information and click Next in the lower right corner of the page.
The user details are mandatory. The contact methods, job-related information, and address are optional.
Figure 2 Configuring user information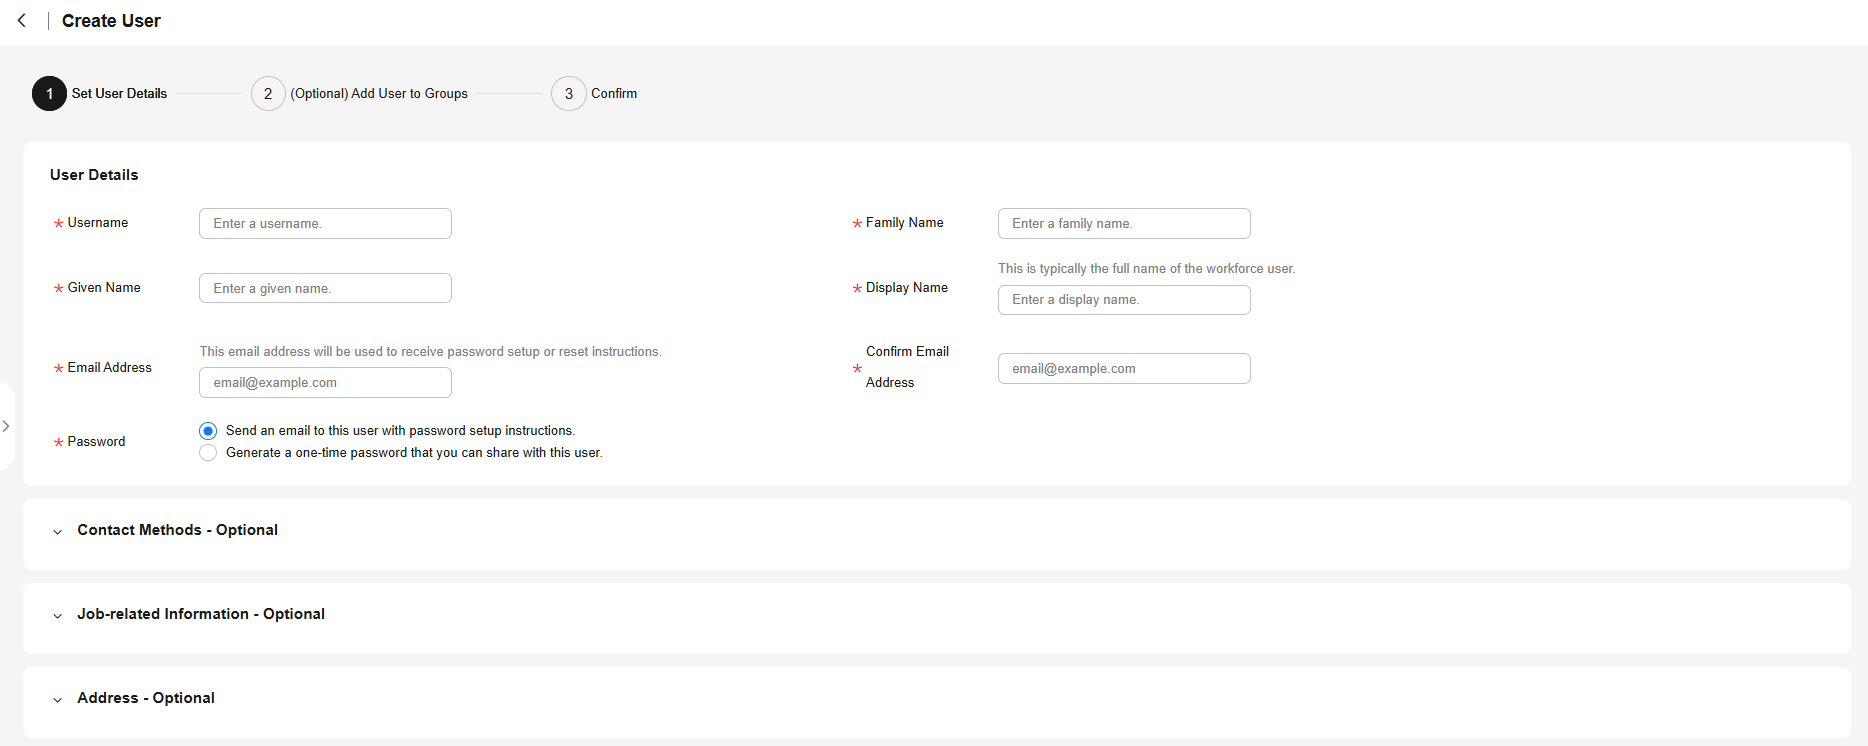
Table 1 Basic information Parameter
Description
Username
IAM Identity Center username, for example, Alice.
The value is user-defined and must be unique.
Password
Select a password generation method.
- Send an email to this user with password setup instructions: The system will send an email to the user. The user can set a password following the instructions in the email.
- Generate a one-time password that you can share with this user: An automatically generated one-time password will be displayed on the page indicating that the user is created. The administrator copies the information and sends it to the user. When the user uses the one-time password to log in through the user portal URL, the system prompts the user to change the password. The user can only log in to the console using the new password.
CAUTION:
If the page is closed, the one-time password generated by the system will no longer be displayed again. To obtain the password again, you need to reset the password.
Email Address
Email address of the user.
The value is user-defined and must be unique. It can be used to authenticate the user and reset the password.
Confirm Email Address
Enter the email address again for confirmation. The Email Address and Confirm Email Address must be the same.
Family Name
Family name of the user.
Given Name
Given name of the user.
Display Name
Display name of the user.
The value is user-defined and can be the same as the display name of another IAM Identity Center user. Generally, this value is the real name of the user.
- In the Confirm step, confirm the configuration and click OK in the lower right corner of the page. The created IAM Identity Center user is displayed in the user list.
- If Send an email to this user with password setup instructions is selected for Password in step 5, the user list will be displayed, showing the newly created IAM Identity Center user.
- If Generate a one-time password that you can share with this user is selected for Password in step 5, a page that contains detailed information about the one-time password will be displayed. You can copy the information and send it to the user. The user can use the username and one-time password to log in through the user portal URL.
Figure 3 Confirming user creation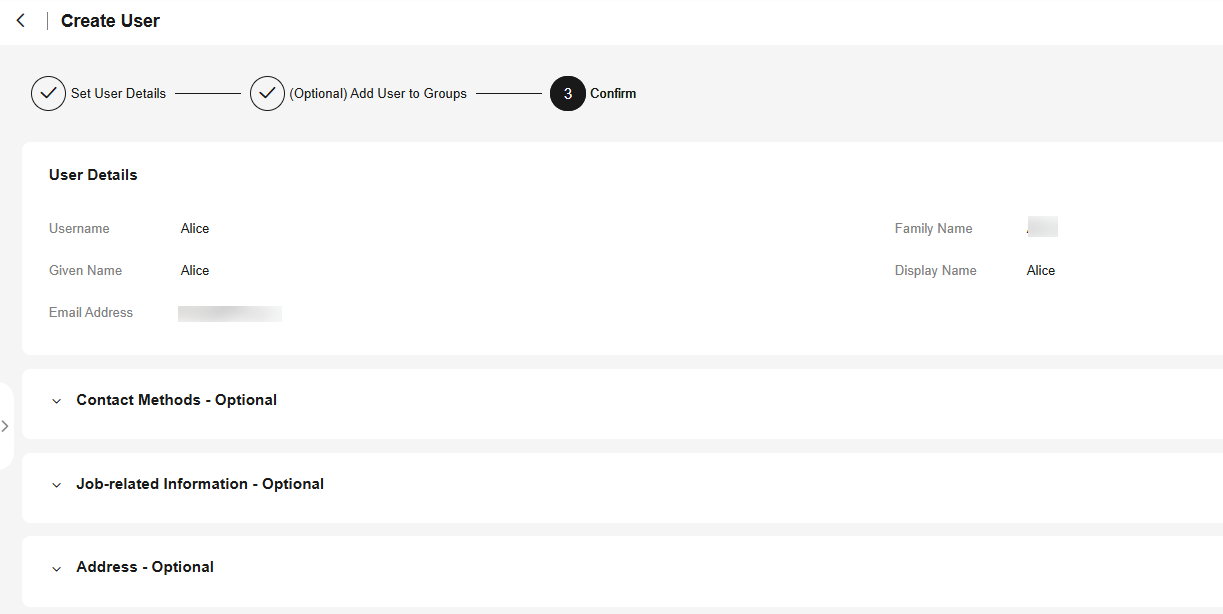
Creating a User Group
- Log in to the Huawei Cloud console using the organization's management account.
- Click
 in the upper left corner of the page and choose Management & Governance > IAM Identity Center.
 - In the navigation pane, choose Groups.
- Click Create Group in the upper right corner of the page.
Figure 4 Creating a group

- On the Create Group page, set Group Name (for example, ere123) and Description.
The group name must be unique in IAM Identity Center.
Figure 5 Creating a group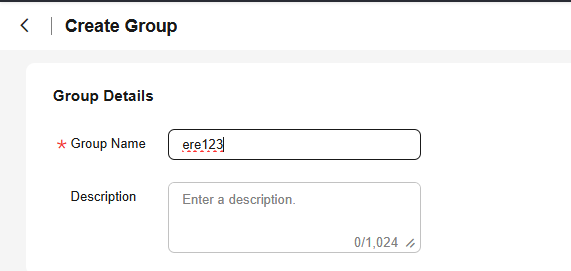
- (Optional) Select users to be added to this group.
Figure 6 Adding a user

- Click OK. The user group ere123 is created and displayed in the user group list.
Creating a Permission Set
- In the navigation pane, choose Multi-Account Permissions > Permission Sets.
- Click Create Permission Set in the upper right corner of the page.
Figure 7 Creating a permission set

- In the Specify Details step, configure the basic information for the permission set and click Next.
Figure 8 Specifying permission set details
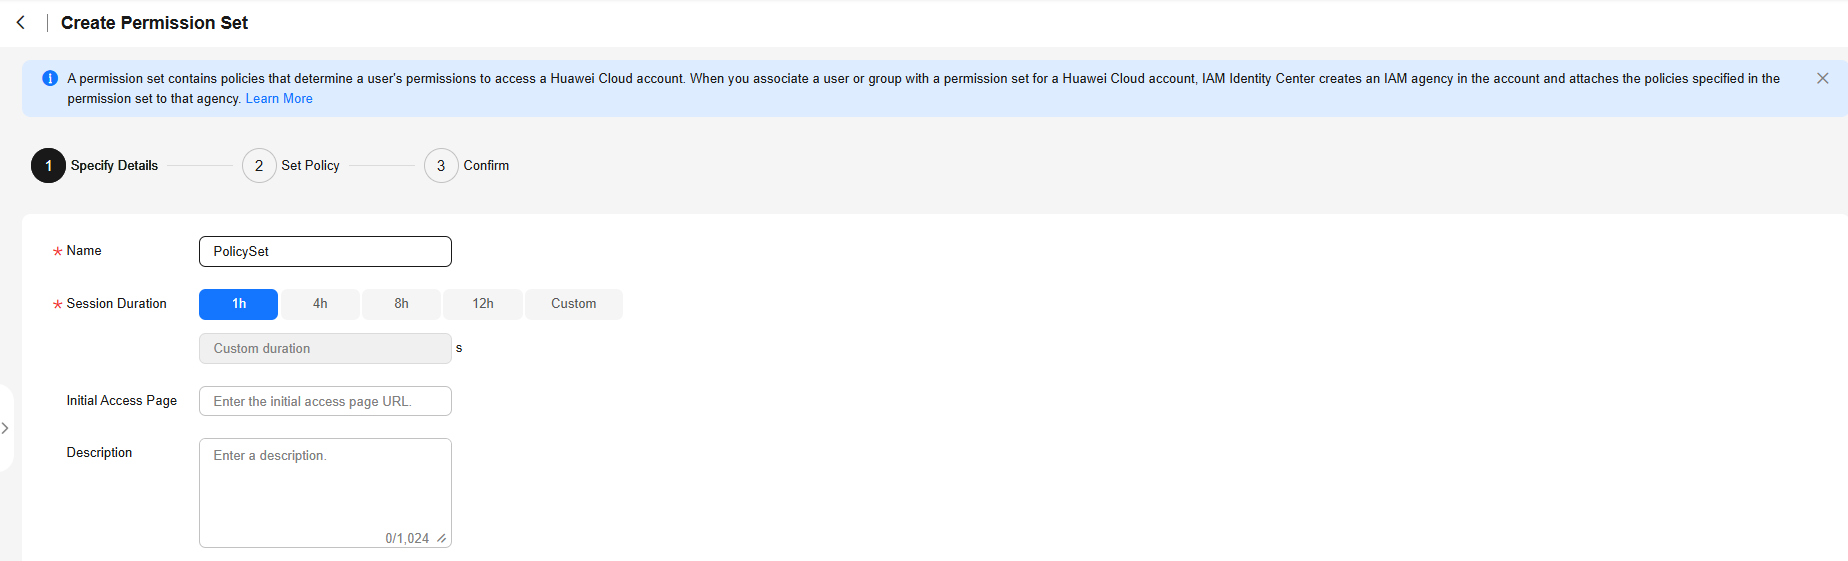
Table 2 Permission set details Parameter
Description
Name
Name of a permission set, for example, PolicySet.
The value is user-defined and must be unique.
Session Duration
The length of time a user can be logged in to the console.
When the user's login duration exceeds the configured session duration, the user is automatically logged out. To maintain access, the user needs to log back in again.
Initial Access Page
The page a user lands on after login using the user portal URL.
For example, if you enter the IAM console URL, users will land on the IAM console after login.
Description
Description of a permission set.
- In the Set Policy step, configure system-defined policies, custom identity policies, and custom policies for the permission set and click Next.
If you enable Identity Policy Only, only identity policies are displayed in the system-defined policy list, and custom policy configuration box will not be displayed. If no identity policies are available for a cloud service, you can disable Identity Policy Only. Then, you can select identity policies and policies for some functions of the cloud service.
- System-defined policies: You can select system-defined policies preconfigured in IAM Identity Center, including policies and identity policies.
- Custom identity policies: You can create custom identity policies in visual editor or JSON view to supplement system-defined identity policies.
- Custom policies: You can create custom policies only in JSON view to supplement system-defined policies.
Figure 9 Setting policies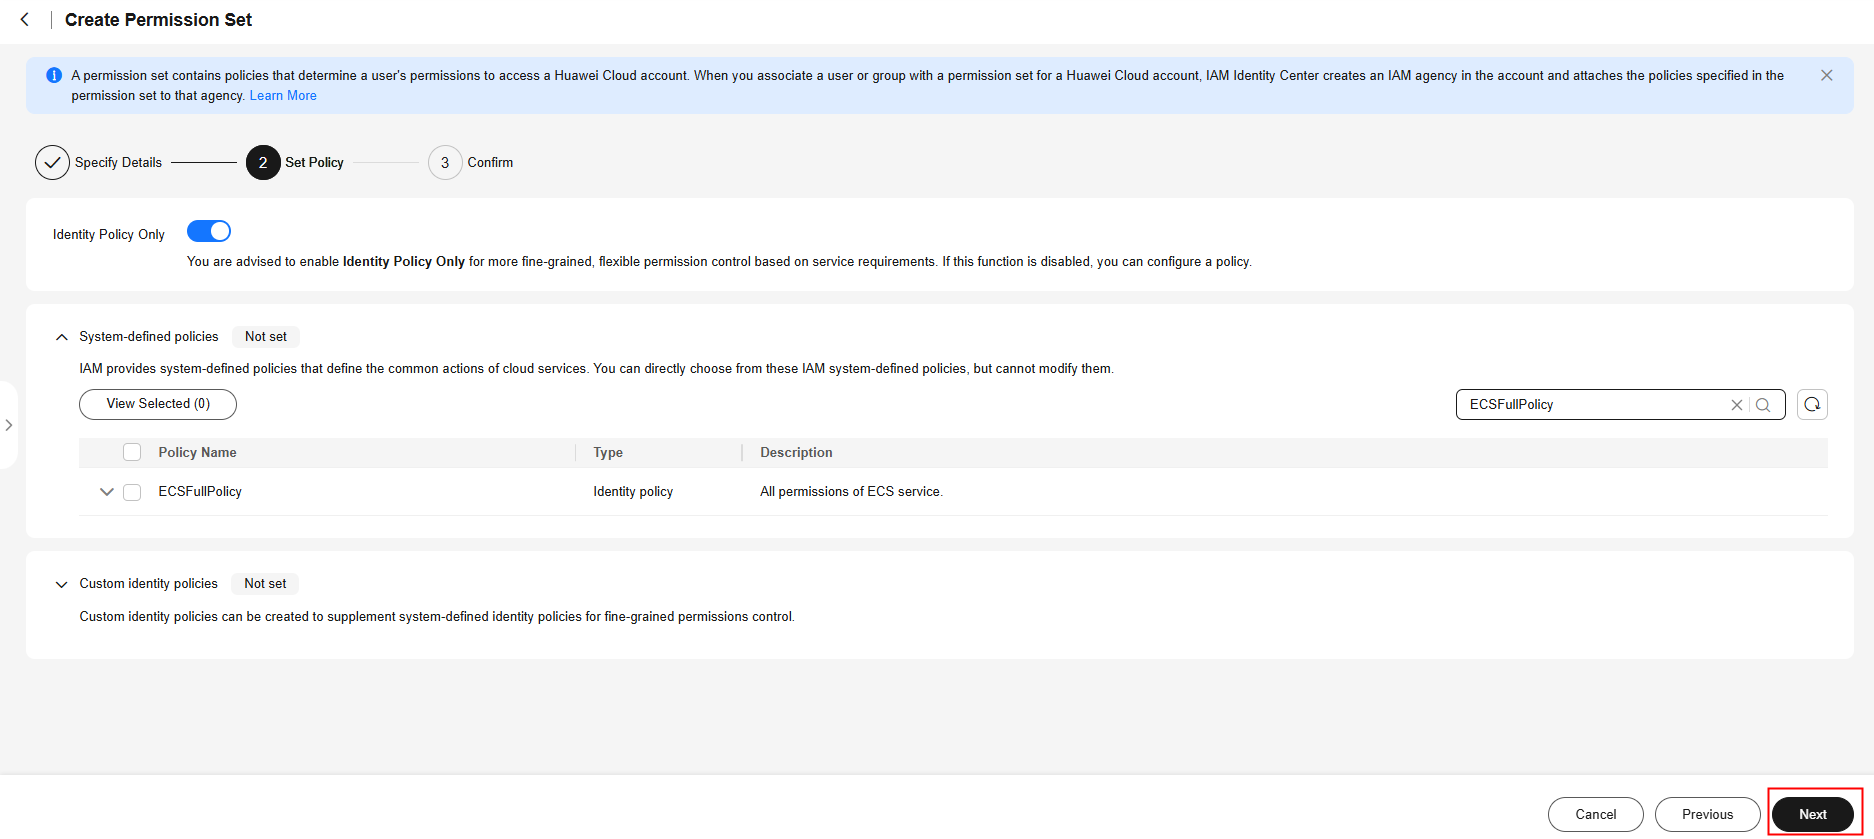
- In the Confirm step, confirm the configuration and click OK in the lower right corner.
Figure 10 Confirming configuration
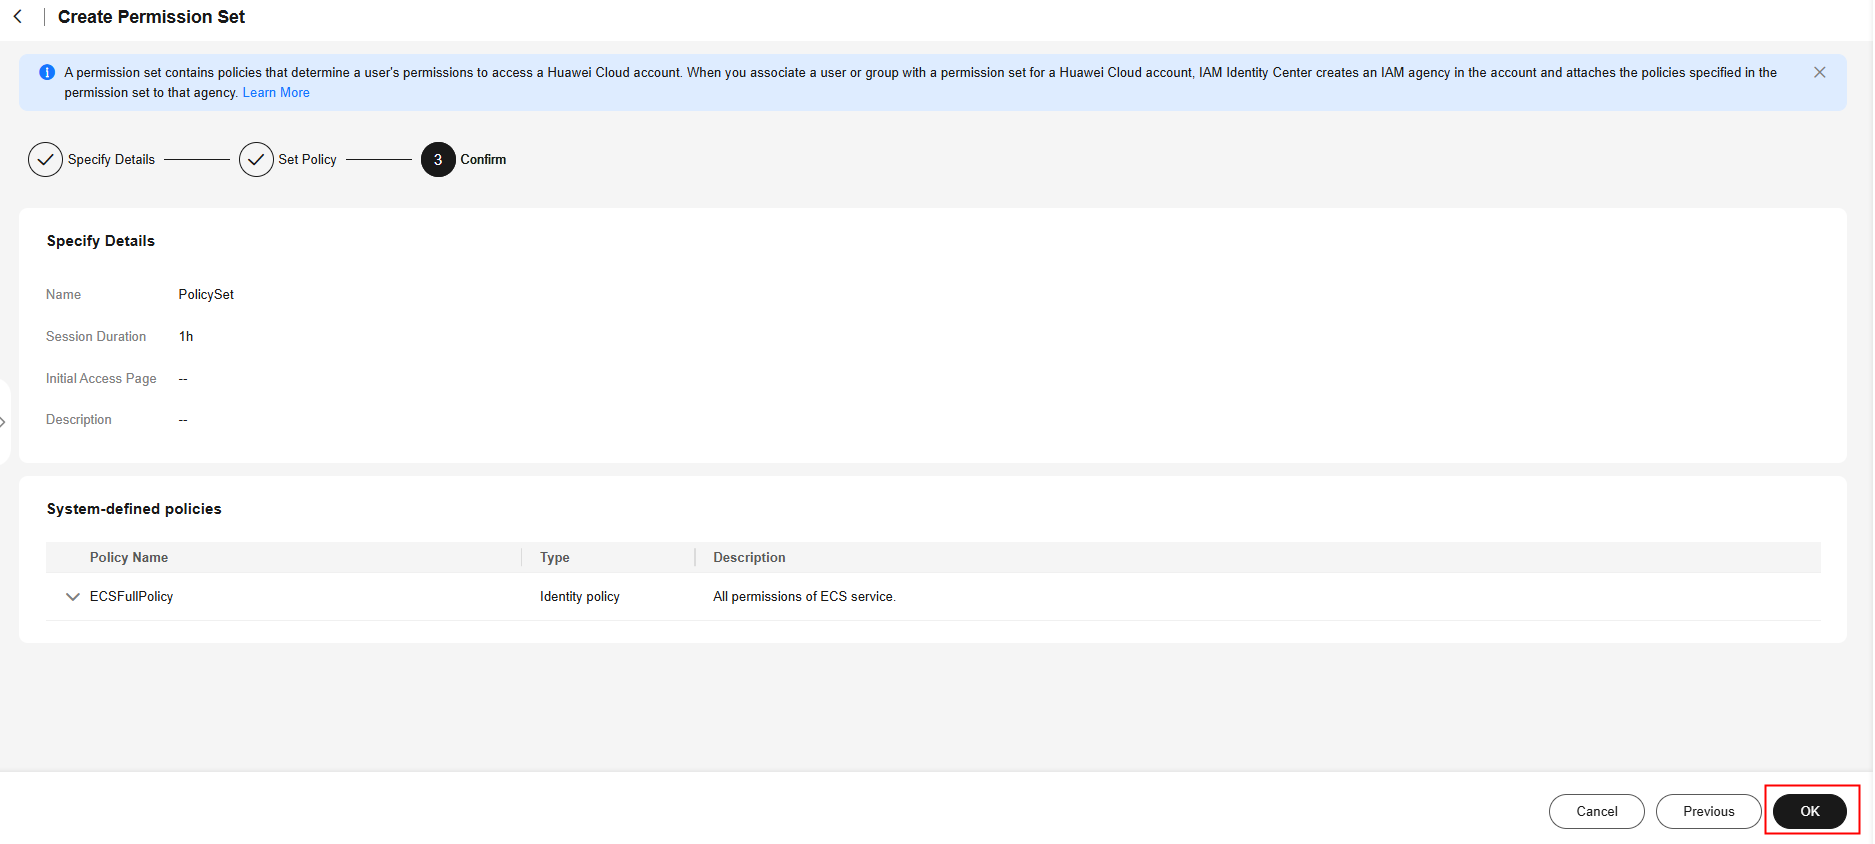

By default, newly created permission sets are not attached to any accounts. Their status will change to Attached after you attach them to accounts.
Associating the Account with the User and Permission Set
- In the navigation pane, choose Multi-Account Permissions > Accounts.
By default, accounts are displayed in an organizational hierarchy. You can click
 to switch to the list view.Figure 11 Account view
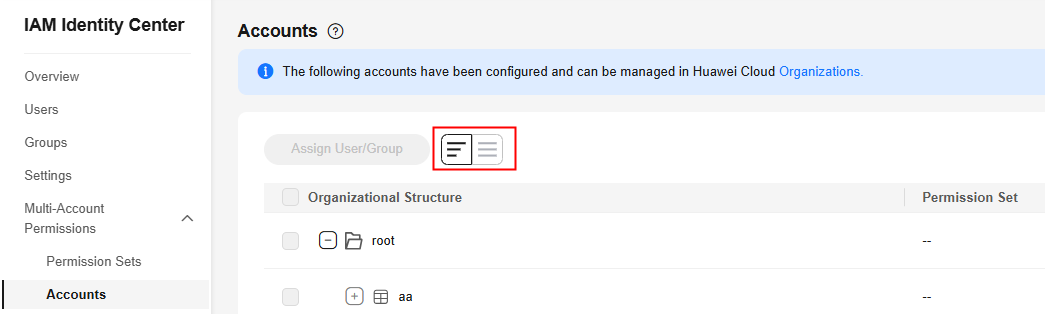
- In the account list, select account a_abc and click Assign User/Group in the upper left corner.
Alternatively, locate a target account and click Assign User/Group in the Operation column.
Figure 12 Selecting an account
- In the Select User/Group step, select one or more users/groups, for example, group ere123, and click Next.
Figure 13 Assigning users/groups

- In the Select Permission Set step, select one or more permission sets and click Next.
Figure 14 Selecting one or more permission sets

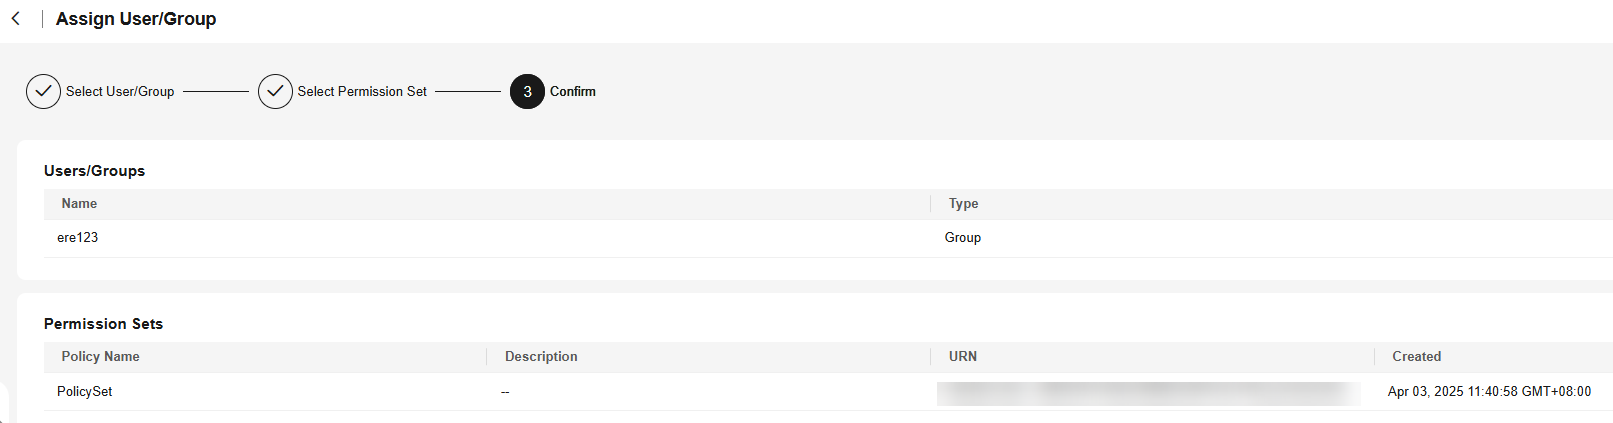
- In the Confirm step, confirm the configuration and click OK.
Figure 15 Confirming configuration
Logging In as an IAM Identity Center User and Accessing Resources
- In the navigation pane, choose Overview, obtain the user portal URL, and send the URL to user Alice.
The URL of the user portal can also be obtained from the password setup instruction email sent to the user or from the one-time password page displayed when the user was created.
Figure 16 Obtaining the user portal URL
- Open a browser and access the user portal URL. In this example, the user is Alice. Enter Alice for the IAM Identity Center username, and click Next.
The login password is obtained when creating users. If the password is forgotten or needs to be changed, the administrator can reset the password for another password setup instruction email or a new one-time password.
Figure 17 User login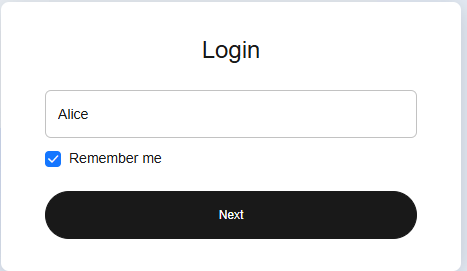
- Enter the password, and click Log In.
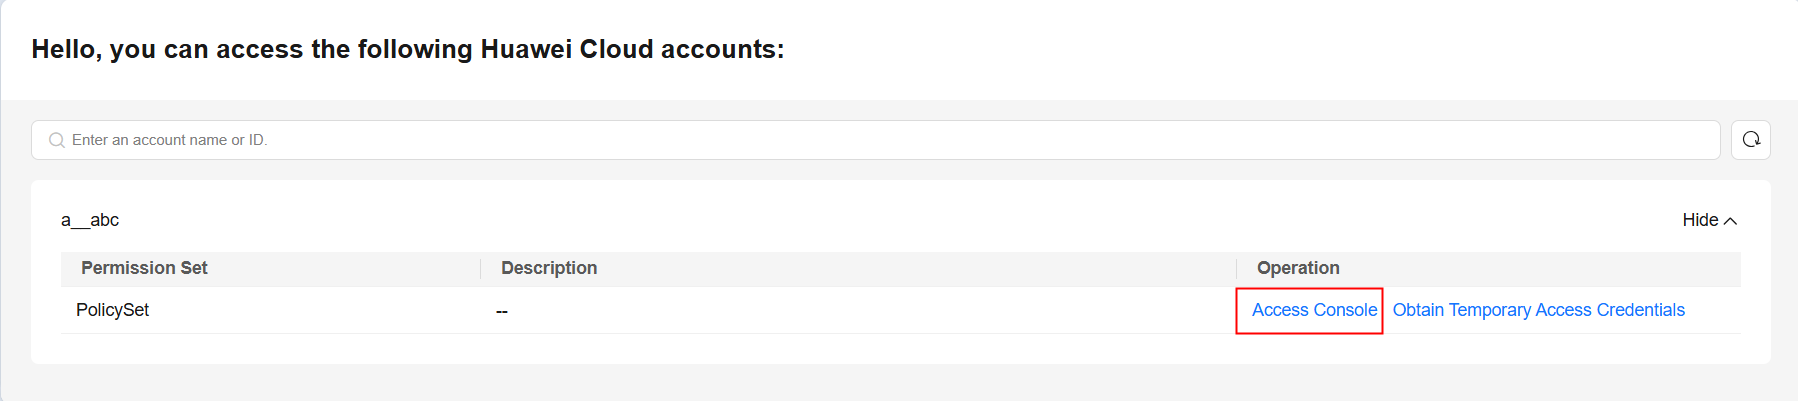
- Click Access Console in the Operation column to access the ECS resources controlled by the permission set PolicySet of the account.
Figure 18 Accessing resources
Feedback
Was this page helpful?
Provide feedbackThank you very much for your feedback. We will continue working to improve the documentation.See the reply and handling status in My Cloud VOC.
For any further questions, feel free to contact us through the chatbot.
Chatbot


