
Creating an Application and a Model
This section describes how to use COC to quickly manage your resources and applications on the application and resource management page, including synchronizing resources, creating applications and modeling, and performing operations on a UniAgent. The procedure is as follows:
- Preparations: Sign up for a HUAWEI ID, complete real-name authentication, and enable COC.
- Synchronize resources. Obtain resources in all regions to which the current user belongs and synchronize the resources to COC.
- Create an application and model the associations between the application and resources. This feature facilitates resource management by service logic unit.
- Perform operations on a UniAgent. Install, upgrade, and uninstall a UniAgent on the corresponding node.
Preparations
- Sign up for a HUAWEI ID and complete real-name authentication.
Before using COC, sign up for a HUAWEI ID, enable Huawei Cloud services, and complete real-name authentication.
If you already have enabled Huawei Cloud services and completed real-name authentication, skip this step.
- Enable COC.
Upon your first login, enable COC first.
If you have enabled COC, skip this step.
Synchronizing Resources
- Log in to COC.
- In the navigation pane, choose Resources > Application and Resource Management. On the displayed page, click the Resources tab and click
 to synchronize resources.
Figure 1 Synchronizing resources
to synchronize resources.
Figure 1 Synchronizing resources
Creating an Application and a Model
- In the navigation pane, choose Resources > Application and Resource Management.
- Click the Applications tab. On the displayed tab page, click Create Application.
Figure 2 Creating an application

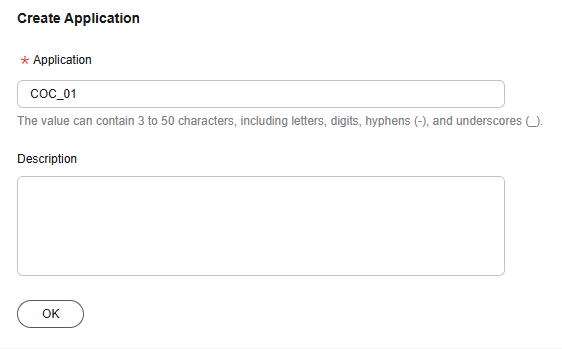
- Set Application Structure Type to Lightweight.
- Specify Application and Description. For example, set the application name to COC_01.
- Click OK.
Figure 3 Creating an application
- Specify the component name, for example, COC_001, and click OK.
Figure 4 Creating a component

- Configure the new group by referring to Table 1 and retain the preset values for other parameters.
Table 1 Parameters for creating a group Parameter
Description
Group
Customize a group name based on the naming rule. For example, COC_0001.
Available Cloud Service Providers
Select the cloud service provider to which the target instance belongs. Example: Huawei Cloud.
Region
Select a region from the drop-down list. For example, CN North-Beijing4.
Resource Association Method
Select a resource association method. For example, Manual association.
Associate with Resource
Manually associate the corresponding resource data with the group.
Figure 5 Creating a group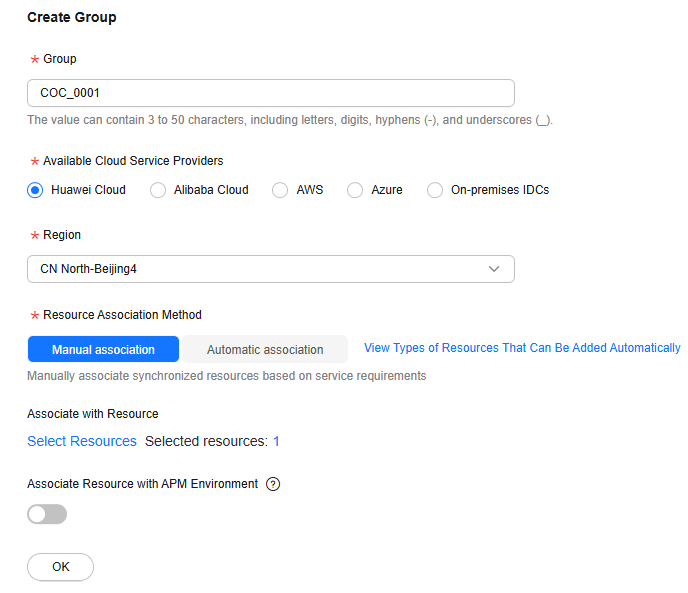
- Click OK.
- Click OK in the lower part of the page to complete the resource modeling.
Performing Operations on a UniAgent
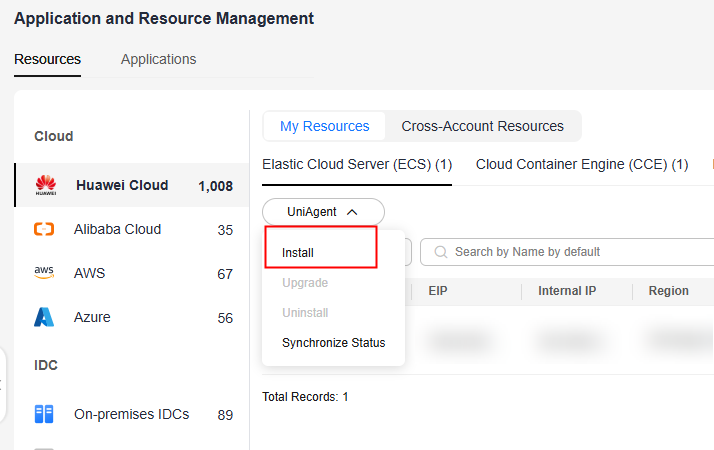
- In the navigation pane, choose Resources > Application and Resource Management.
- Click the Resources tab. On the My Resources tab page, select the specified instances.
- Click UniAgent and select Install.
Figure 6 Installing a UniAgent
- On the displayed Install UniAgent page, specify required information and click OK to trigger the automated installation process. Wait until the installation is complete.
Figure 7 Setting parameters


When installing a UniAgent for ECSs in the same VPC, you need to manually install a UniAgent for the first ECS and set this ECS as the installation node. For details, see Installing a UniAgent for the First Time.
Feedback
Was this page helpful?
Provide feedbackThank you very much for your feedback. We will continue working to improve the documentation.See the reply and handling status in My Cloud VOC.
For any further questions, feel free to contact us through the chatbot.
Chatbot


