
Migrating an ECS from a Shared Security Group to a Dedicated Security Group
Scenarios
If instances for different purposes are associated with the same security group, their specific network isolation and security control requirements cannot be met. In addition, the security group rules become complex, making subsequent maintenance difficult. To ensure network security and improve management efficiency, you are advised to associate an instance dedicated for specific purposes with a dedicated security group. You can migrate an instance from a shared security group to a dedicated one by referring to this section. In this way, each instance is associated with a dedicated security group, improving network management flexibility and security.
Solution Architecture
As the below figure shows, two instances (ECS-01 and RDS-01) are deployed in Subnet-A01 of VPC-A and are associated with the same security group (Sg-A). ECS-01 needs to communicate with the Internet, while RDS-01 only needs communications over a private network. To ensure database security and simplify subsequent maintenance and management, you can disassociate ECS-01 from security group Sg-A and create a dedicated security group Sg-X for it.
Before associating the new security group with ECS-01, you must add allow rules to the security group to avoid interrupting ECS network traffic.

Constraints
- The security groups of an ECS can be changed, but those of an RDS instance cannot be changed once it is created.
- For details about constraints on security groups, see Constraints on Using Security Groups.
Resource Planning

The following resource details are only for your reference. You can modify them if needed.
| Resource | Quantity | Description |
|---|---|---|
| VPC and subnet | VPC: 1 Subnet: 1 |
|
| ECS | 1 | Configure the ECS as follows:
|
| RDS | 1 |
|
| Security group | 2 | |
| The new security group that ECS-01 will be associated with. In this example, the security group is Sg-X. After the migration: ECS-01 is associated with Sg-X with rules listed in Table 4. |
| Direction | Action | Type | Protocol & Port | Source/Destination | Description |
|---|---|---|---|---|---|
| Inbound | Allow | IPv4 | TCP: 22 | Source: the public IP address of the local PC. In this example, the public IP address is 11.13.XX.XX/32. If the source is set to 0.0.0.0/0, remote logins to the instances in the security group are allowed from any IP address. In this example, ECS-01 needs to communicate with the public network. Exposing port 22 to the public network will leave your instances vulnerable to network risks. To address this issue, set the source to a trusted IP address. | Allows remote logins to Linux ECSs over SSH port 22. |
| Inbound | Allow | IPv4 | ICMP: All | IP address: 0.0.0.0/0 | Allows external instances to ping the instances in the security group, for example, to verify the network connectivity between the local PC and the instances in the security group. |
| Inbound | Allow | IPv4 | All | Source: current security group (Sg-A) | Allows the instances in the security group to communicate with each other using IPv4 addresses. |
| Inbound | Allow | IPv6 | All | Source: current security group (Sg-A) | Allows the instances in the security group to communicate with each other using IPv6 addresses. |
| Outbound | Allow | IPv4 | All | Destination: 0.0.0.0/0 | Allows the instances in the security group to access the external networks using IPv4 addresses. |
| Outbound | Allow | IPv6 | All | Destination: ::/0 | Allows the instances in the security group to access the external networks using IPv6 addresses. |
| Direction | Action | Type | Protocol & Port | Source/Destination | Description |
|---|---|---|---|---|---|
| Inbound | Allow | IPv4 | TCP: 3306 | The source can be either of the following:
| Allows access to the MySQL database over port 3306. |
| Inbound | Allow | IPv4 | ICMP: All | IP address: 0.0.0.0/0 | Allow external instances to ping instances in the security group, for example, to verify the network connectivity between the ECS and RDS instance. |
| Inbound | Allow | IPv4 | All | Source: current security group (Sg-A) | Allows the instances in the security group to communicate with each other using IPv4 addresses. |
| Inbound | Allow | IPv6 | All | Source: current security group (Sg-A) | Allows the instances in the security group to communicate with each other using IPv6 addresses. |
| Outbound | Allow | IPv4 | All | Destination: 0.0.0.0/0 | Allows the instances in the security group to access the external networks using IPv4 addresses. |
| Outbound | Allow | IPv6 | All | Destination: ::/0 | Allows the instances in the security group to access the external networks using IPv6 addresses. |
| Direction | Action | Type | Protocol & Port | Source/Destination | Description |
|---|---|---|---|---|---|
| Inbound | Allow | IPv4 | TCP: 22 | Source: the public IP address of the local PC. In this example, the public IP address is 11.13.XX.XX/32. | Allows remote logins to Linux ECSs over SSH port 22. |
| Inbound | Allow | IPv4 | ICMP: All | IP address: 0.0.0.0/0 | Allows external instances to ping the instances in the security group, for example, to verify the network connectivity between the local PC and the instances in the security group. |
| Inbound | Allow | IPv4 | All | Source: current security group (Sg-X) | Allows the instances in the security group to communicate with each other using IPv4 addresses. |
| Inbound | Allow | IPv6 | All | Source: current security group (Sg-X) | Allows the instances in the security group to communicate with each other using IPv6 addresses. |
| Outbound | Allow | IPv4 | All | Destination: 0.0.0.0/0 | Allows the instances in the security group to access the external networks using IPv4 addresses. |
| Outbound | Allow | IPv6 | All | Destination: ::/0 | Allows the instances in the security group to access the external networks using IPv6 addresses. |
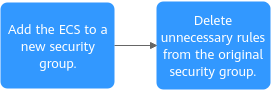
Procedure
Figure 2 shows the procedure for migrating an ECS from a shared security group to a dedicated security group.
(Optional) Creating Resources Before Migration
You can create the resources required for a security group migration drill by taking the following steps.
- Create a VPC and subnet.
For details, see Creating a VPC with a Subnet.
- Create a security group, name it Sg-A, and add rules by referring to Table 2.
- For details about how to create a security group, see Creating a Security Group.
- For details about how to manage security group rules, see Adding a Security Group Rule, Modifying a Security Group Rule, and Deleting One or More Security Group Rules.
- Create an RDS instance and an ECS. Ensure that the MySQL client on the ECS can connect to the RDS instance.
For details, see Buying an RDS for MySQL Instance and Connecting to It Using a MySQL Client.
Step 1: Add the ECS to a New Security Group
- Create a security group, name it Sg-X, and add rules by referring to Table 4.
- For details about how to create a security group, see Creating a Security Group.
- For details about how to manage security group rules, see Adding a Security Group Rule, Modifying a Security Group Rule, and Deleting One or More Security Group Rules.
-
For details, see How Do I Log In to My ECS?
- Log in to RDS-01 from ECS-01.
mysql -h <private-IP-address-of-RDS-01> -P <port-of-RDS-01> -u <administrator-account> -p
Example command:
mysql -h 192.168.0.242 -P 3306 -u root -p
After a successful login, continuously observe the database login status during the migration.
- Add the rule (TCP: 3306) in Table 5 to the original security group Sg-A for accessing the database. For details, see Adding a Security Group Rule. Before the migration, RDS-01 and ECS-01 are in the same security group, and the instances in the security group can communicate with each other. Therefore, you do not need to enable port 3306. After the migration, ECS-01 is in security group Sg-X. To ensure that ECS-01 can access RDS-01, you need to add a rule that allows traffic over port 3306 to security group Sg-A where RDS-01 is located.
Table 5 The rule to be added to security group Sg-A Direction
Action
Type
Protocol & Port
Source/Destination
Description
Inbound
Allow
IPv4
TCP: 3306
The source can be either of the following:
- IP address: CIDR block of the VPC where ECS-01 is located. In this example, 192.168.0.0/16 is used.
- Security group: security group that ECS-01 is associated with. In this example, Sg-X is used.
Allows access to the MySQL database over port 3306.
- Add ECS-01 to the new security group Sg-X. For details, see Adding an Instance to a Security Group.
- Remove ECS-01 from the original security group Sg-A. For details, see Removing an Instance from a Security Group. Observe the database login status while removing the ECS from the security group.
- If the database login is not interrupted, the configuration of port 3306 in security group Sg-A is correct. Go to 7.
- If the database login is interrupted, associate ECS-01 with security group Sg-A again.
After the login is restored, identify the possible causes and try again.
- Log in to ECS-01 from a local PC and verify the configuration of port 22 in security group Sg-X.
For example, if you use PuTTY to remotely log in to ECS-01, enter the EIP of ECS-01 in Host Name (or IP address). In this example, the EIP is 1.92.XX.XX.
Figure 3 PuTTY configurations
- Ping ECS-01 from the local PC to verify the ICMP port configuration in security group Sg-X:
ping <EIP-of-the-ECS>
Example command:
ping 1.92.XX.XX
Step 2: Delete Unnecessary Rules from the Original Security Group
After the migration is complete, wait until the ECS and RDS services are stable before deleting unnecessary rules from the original security group.
- Delete the rules used by the ECS from the original security group Sg-A. For details, see Deleting One or More Security Group Rules. Table 6 lists the rule to be deleted. After the deletion, the rules of security group Sg-A are listed in Table 3.
Table 6 The rule in security group Sg-A to be deleted Direction
Action
Type
Protocol & Port
Source/Destination
Description
Inbound
Allow
IPv4
TCP: 22
Source: the public IP address of the local PC. In this example, the public IP address is 11.13.XX.XX/32.
Allows remote logins to Linux ECSs over SSH port 22.
- Remotely log in to ECS-01 from the local PC and check whether you can log in to ECS-01.
For example, if you use PuTTY to remotely log in to ECS-01, enter the EIP of ECS-01 in Host Name (or IP address). In this example, the EIP is 1.92.XX.XX.
Figure 4 PuTTY configurations - Log in to RDS-01 through ECS-01 to check whether the network connection between ECS-01 and RDS-01 is normal:
mysql -h <private-IP-address-of-RDS-01> -P <port-of-RDS-01> -u <administrator-account> -p
Example command:
mysql -h 192.168.0.242 -P 3306 -u root -p
Feedback
Was this page helpful?
Provide feedbackThank you very much for your feedback. We will continue working to improve the documentation.See the reply and handling status in My Cloud VOC.
For any further questions, feel free to contact us through the chatbot.
Chatbot


