Connecting to a Custom Data Source
Overview
ROMA Connect can use a custom connector as a data source for data integration tasks. Before using a custom data source, you need to connect it to ROMA Connect.
Prerequisites
- Each connected data source must belong to an integration application. Ensure that an integration application is available before connecting a data source, or create one first.
- A connector instance is available. Otherwise, create a connector and publish a connector first.
Procedure
- Log in to the ROMA Connect console. On the Instances page, click View Console next to a specific instance.
- In the navigation pane on the left, choose Data Sources. In the upper right corner of the page, click Access Data Source.
- On the Custom tab page, select the connector to be used as the custom data source and click Next.
- Configure the data source connection information.
Table 1 Data source connection information Parameter
Description
Data Source Name
Enter a data source name. It is recommended that you enter a name based on naming rules to facilitate search.
Encoding Format
Default: utf-8
Integration Application
Select the integration application to which the data source belongs.
Description
Enter the descriptive information.
Connector Instance
Select a published connector instance under the connector.
Other parameters
Set the subsequent configuration items based on the data source information defined when you create the connector.
You can find the connector on the Assets page and view the data source metadata of the connector.
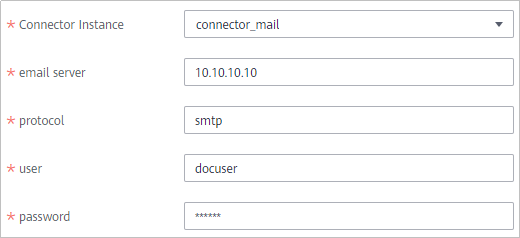
The following is an example of connecting to a custom data source for reading email data.
The email server, protocol, user, and password are the data source parameters defined in the connector.
Figure 1 Custom data source configuration example
- Click Create.
Feedback
Was this page helpful?
Provide feedbackThank you very much for your feedback. We will continue working to improve the documentation.See the reply and handling status in My Cloud VOC.
For any further questions, feel free to contact us through the chatbot.
Chatbot


