Creating a Workflow
A workflow is a series of interrelated steps used to implement business logic or complete specific tasks. You can create workflows to complete specific tasks or instructions in agents or applications. Before using a workflow in an agent or application, you need to create an executable workflow.
Step 1: Creating a Workflow
- Log in to the agent development platform.
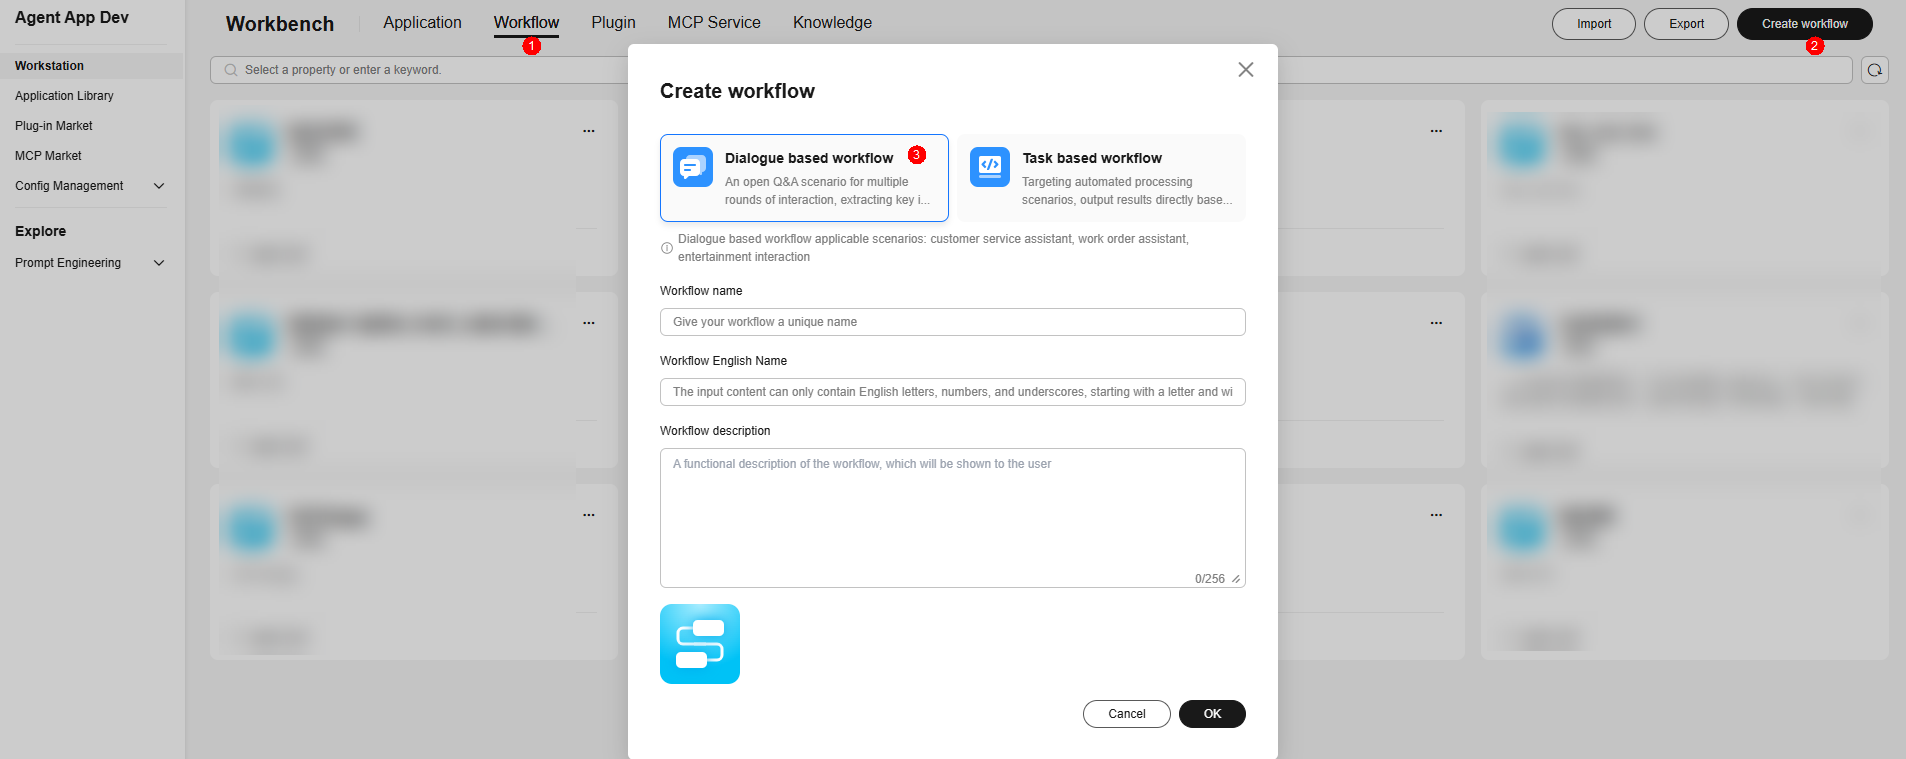
- In the navigation pane, choose Workstation. On the Workflow tab page, click Create workflow in the upper right corner.
- In the Create workflow dialog box, select Dialogue based workflow or Task based workflow, and enter the workflow name, English name, and description.
- Click the image in the lower left corner of the dialog box to modify the workflow icon and click OK. The workflow orchestration page is displayed.
Initially, a workflow contains the Start and End nodes.
- The Start node is used to start a workflow.
- The End node returns the execution result of a workflow.
Figure 1 Creating a workflow
Step 2: Orchestrating a Workflow
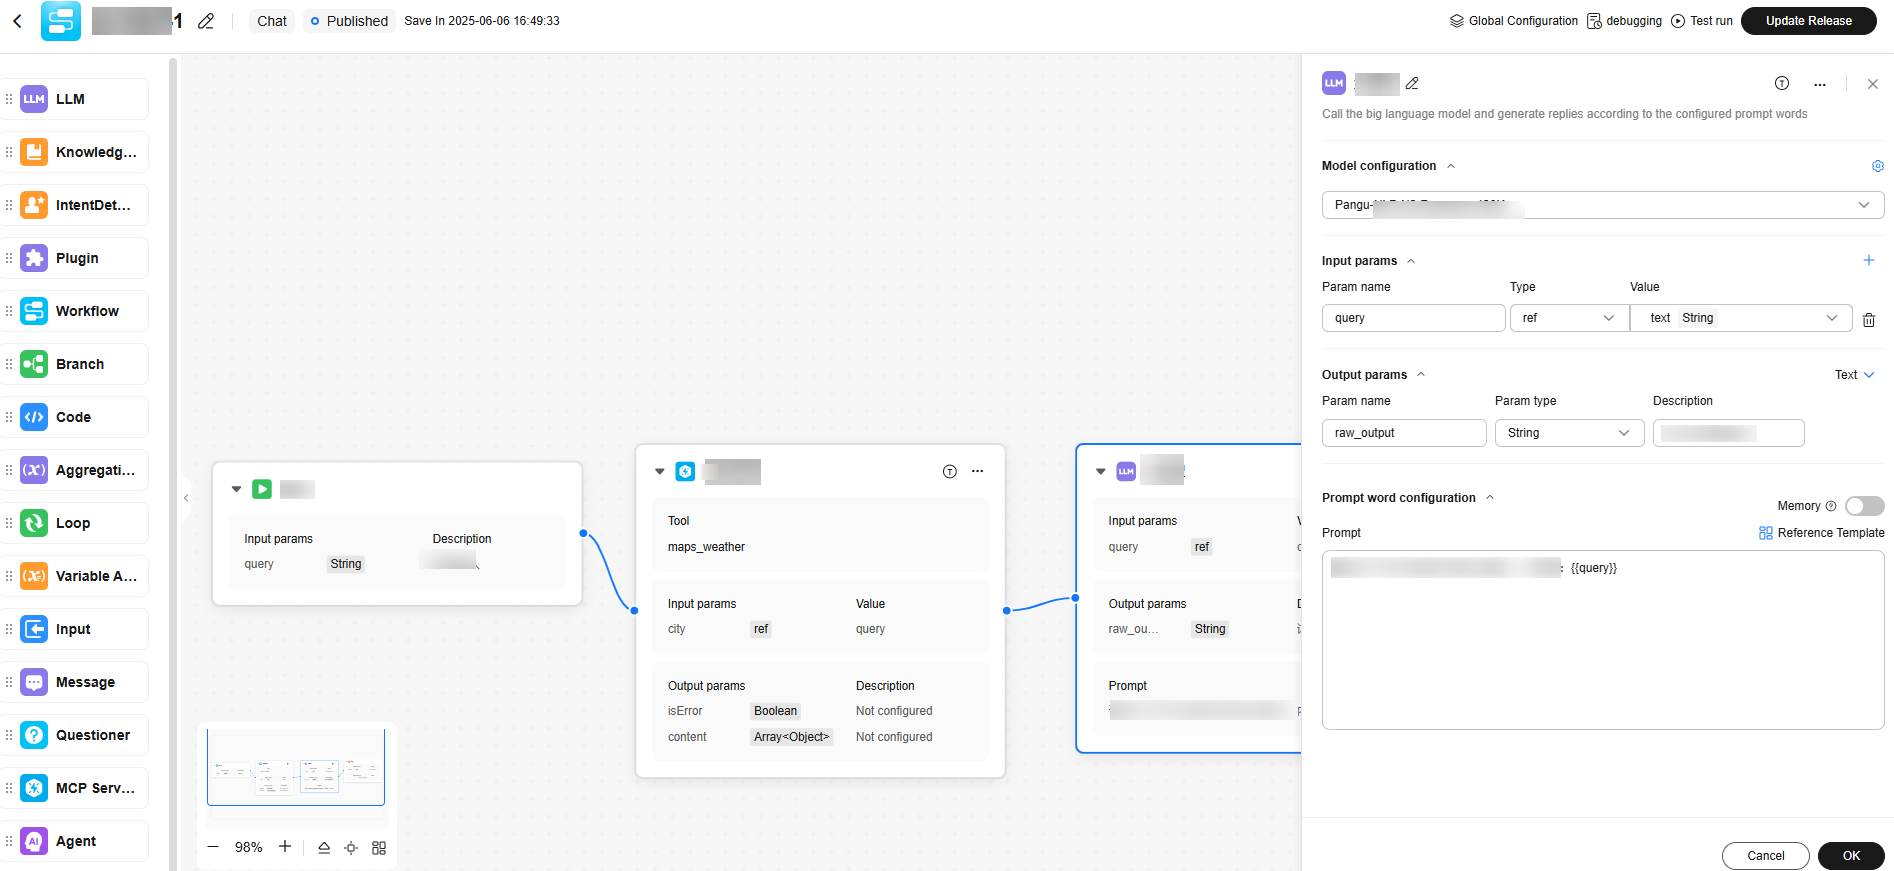
After creating a workflow, add nodes to the canvas and connect the nodes based on the task execution sequence.
Basic nodes are built in the workflow for you to use. You can also add plug-in nodes to execute specific tasks.
- Select the nodes you want to use in the left pane. (Nodes may vary depending on the version. Use the current version.)
- Connect the nodes.
- Set the input and output parameters of the nodes.
Figure 2 Orchestrating a workflow

Step 3: Debugging and Publishing a Workflow
To use the workflow in an application, you need to publish the workflow.
- Click Run.
The border of a node that is successfully executed is displayed in green. You can view the input and output of the node in the upper right corner of the node.
- Click Publish.
Managing Workflows
On the workflow management page, you can copy workflows, copy workflow IDs, copy call paths, and delete workflows.
Copying a workflow
- On the workflow list page, click ... in the lower right corner of the workflow to be copied and click Copy. The workflow will be copied to your workflow list.
- Nodes cannot be copied across canvases.
Copying an ID
On the workflow list page, click ... in the lower right corner of the workflow and choose Copy ID to copy the ID.
For details about how to call the workflow interface, see Using APIs to Call a Workflow.
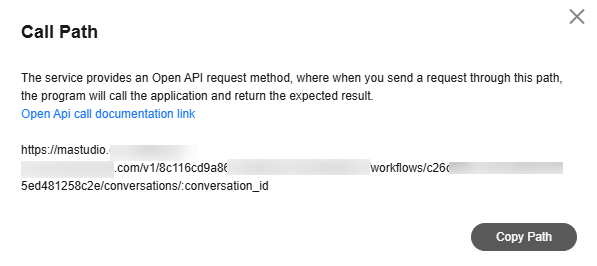
On the workflow list page, click ... in the lower right corner of the workflow and choose Call Path. In the new dialog box, click Call Path again to copy the call path.

Deleting a workflow
To delete a workflow that is no longer required, find the workflow in the Workflow list, click ... in the upper right corner, and choose Delete.

If a workflow has been added to an application, the workflow will be deleted from the application when you delete the workflow.
Feedback
Was this page helpful?
Provide feedbackThank you very much for your feedback. We will continue working to improve the documentation.See the reply and handling status in My Cloud VOC.
For any further questions, feel free to contact us through the chatbot.
Chatbot


