Voice Modeling
MetaStudio allows customizing virtual avatar voices.
Prerequisites
Before creating a voice modeling task, you need to prepare the following items by referring to Procedure:
- Record a WAV or MP3 audio of a human, with a pause of 2–3 seconds between phrases. Script Examples (Advanced Edition) is recommended.
Video
Watch this video to learn how to train your voice model and create a lifelike voice for your virtual avatar.
Procedure
- Log in to the MetaStudio console and go to the Overview page.
- Click Go to MetaStudio Console to go to the MetaStudio console.
- Click the Voice Modeling card to go to the voice modeling page.
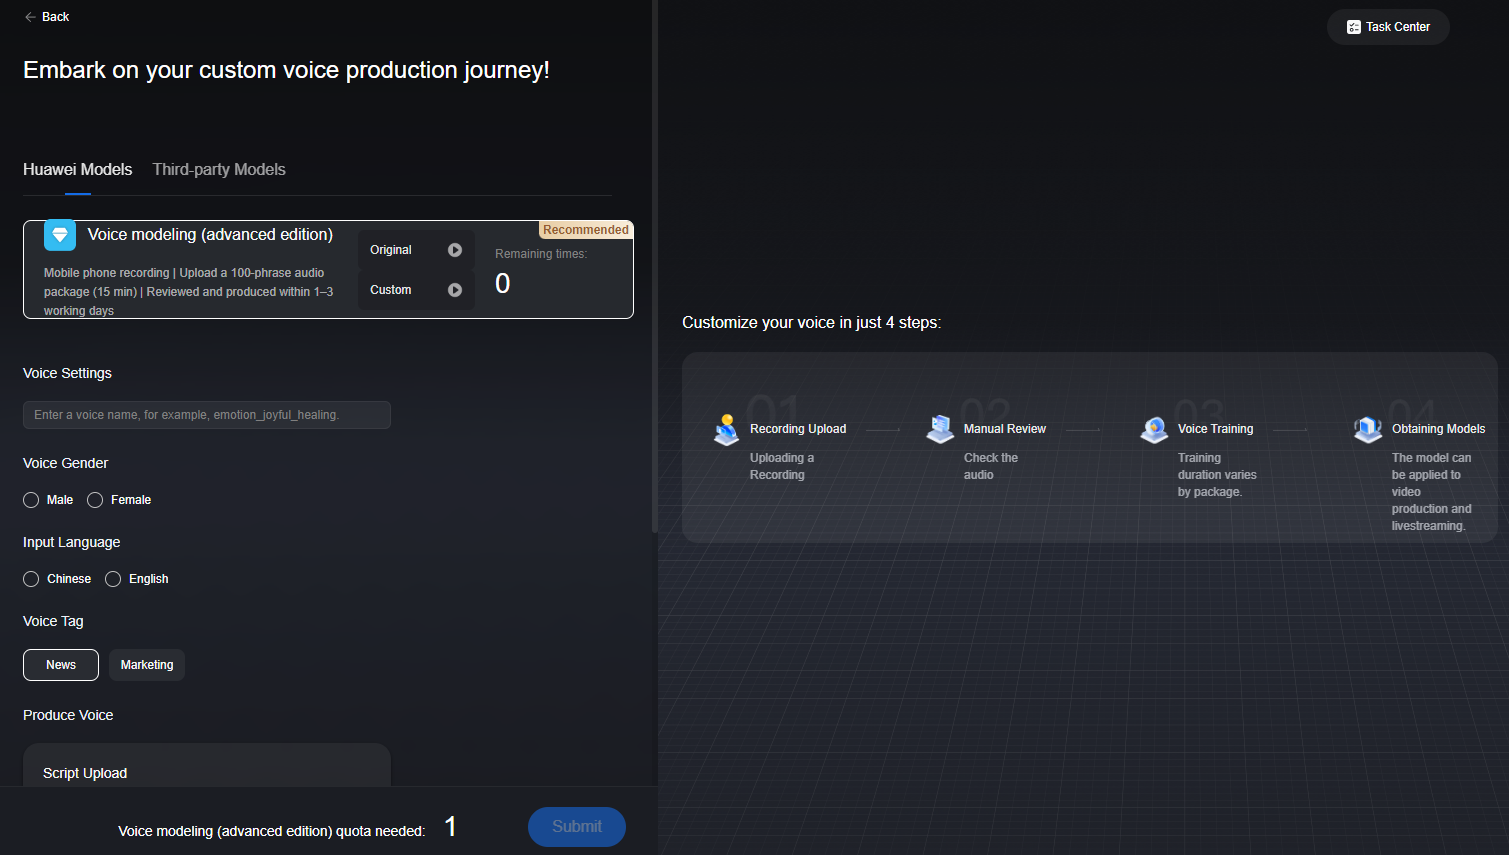
Figure 1 Customizing a voice

- Under the Huawei Models tab, configure voice modeling parameters.
For details, see Table 1.
Table 1 GUI operations Parameter
Description
Voice modeling
Select Voice modeling and record a WAV or MP3 audio, with a pause of 2–3 seconds between phrases. The audio duration ranges from 10–30 minutes (recommended: 15 minutes).
Voice Settings
Enter a voice name. Example: joyful female
Produce Voice
If you select Script Upload, upload a recorded WAV or MP3 audio. You do not need to compress the audio or upload TXT files.
Voice Gender
Gender of the voice. Example: Female
Input Language
Select the language of the uploaded script, for example, Chinese.
Voice Field
Field to which a voice applies. Select a field based on the selected script example.
- Check the box for authorizing the voice use and click Submit.
The Information dialog box is displayed, notifying you of the remaining voice modeling quota and indicating that one resource will be consumed this time.
- After confirming the information, click Submit. After the voice modeling task is submitted, the message Production task submitted is displayed.
Model review and modeling take about seven working days.
- You can click View Production Tasks to view the review progress of the voice modeling task.
When the status changes to Reviewed, algorithm training is automatically started. If there are multiple algorithm training tasks, queuing and delay may occur.
- After the training is complete, choose Assets > My Models in the navigation pane.
- Select the Voices > Activated tab, find the generated voice, and click the avatar in the voice card to preview the voice.
Figure 2 Voice

Feedback
Was this page helpful?
Provide feedbackThank you very much for your feedback. We will continue working to improve the documentation.See the reply and handling status in My Cloud VOC.
For any further questions, feel free to contact us through the chatbot.
Chatbot


