Developing a C# Function Using Visual Studio
C# supports JSON serialization and deserialization interfaces and provides the HC.Serverless.Function.Common.JsonSerializer.dll file.
The interfaces are as follows:
T Deserialize<T>(Stream ins): Deserializes data into objects of function programs.
Stream Serialize<T>(T value): Serializes data to the returned response payload.
This section uses Visual Studio 2022 as an example to describe how to create a .NET Core 6.0 ClassLibrary project. The procedure for other runtime versions is similar.
Step 1: Creating a Project
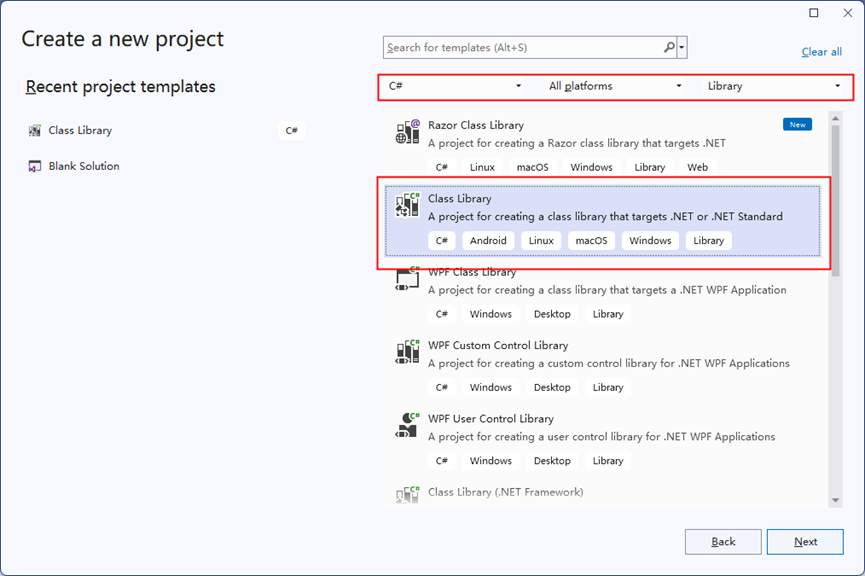
- In Visual Studio, select Create a new project, select Class Library as shown in Figure 1, click Next, and select .NET 6.0 to create a project.
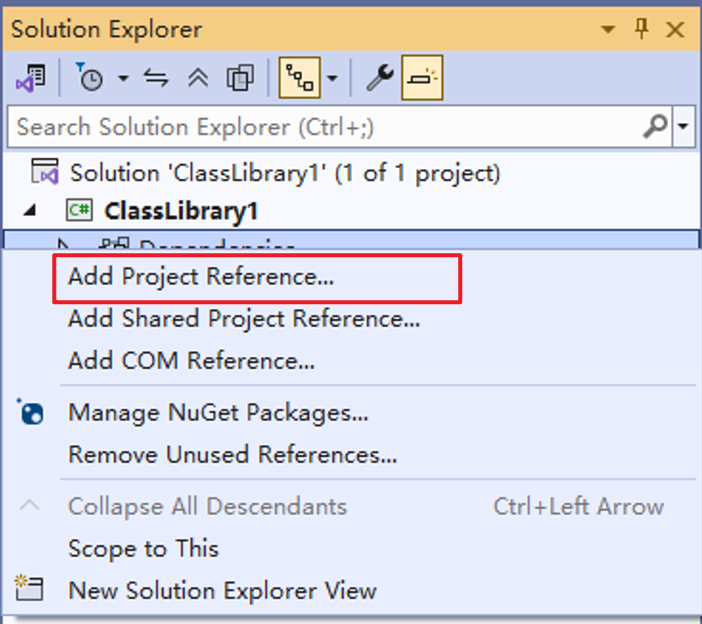
- As shown in Figure 2, right-click the ClassLibrary project in the Solution Explorer and choose Add Project Reference from the shortcut menu.
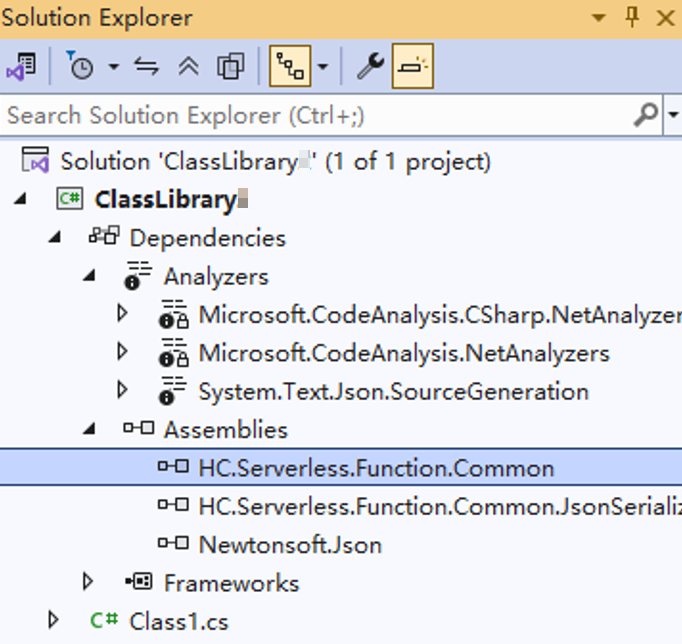
- Choose Browse, click Browse (B), select the three libraries in the downloaded .dll file for reference, and click OK.
The .dll file contains three libraries: HC.Serverless.Function.Common.dll, HC.Serverless.Function.Common.JsonSerializer.dll and Newtonsoft.Json.dll.
- View the references, as shown in Figure 3.
Step 2: Packaging Code
Sample code:
1 2 3 4 5 6 7 8 9 10 11 12 13 14 15 16 17 18 19 20 21 22 23 24 25 26 27 28 29 |
using HC.Serverless.Function.Common; using System; using System.IO; namespace ClassLibrary2 { public class Class1 { public Stream ContextHandlerSerializer(Stream input, IFunctionContext context) { var logger = context.Logger; logger.Logf("CSharp runtime test(v1.0.2)"); JsonSerializer test = new JsonSerializer(); TestJson Testjson = test.Deserialize<TestJson>(input); if (Testjson != null) { logger.Logf("json Deserialize KetTest={0}", Testjson.KetTest); } return test.Serialize<TestJson>(Testjson); } public class TestJson { public string KetTest { get; set; }//Define the attribute of the serialization class as KetTest. } } } |
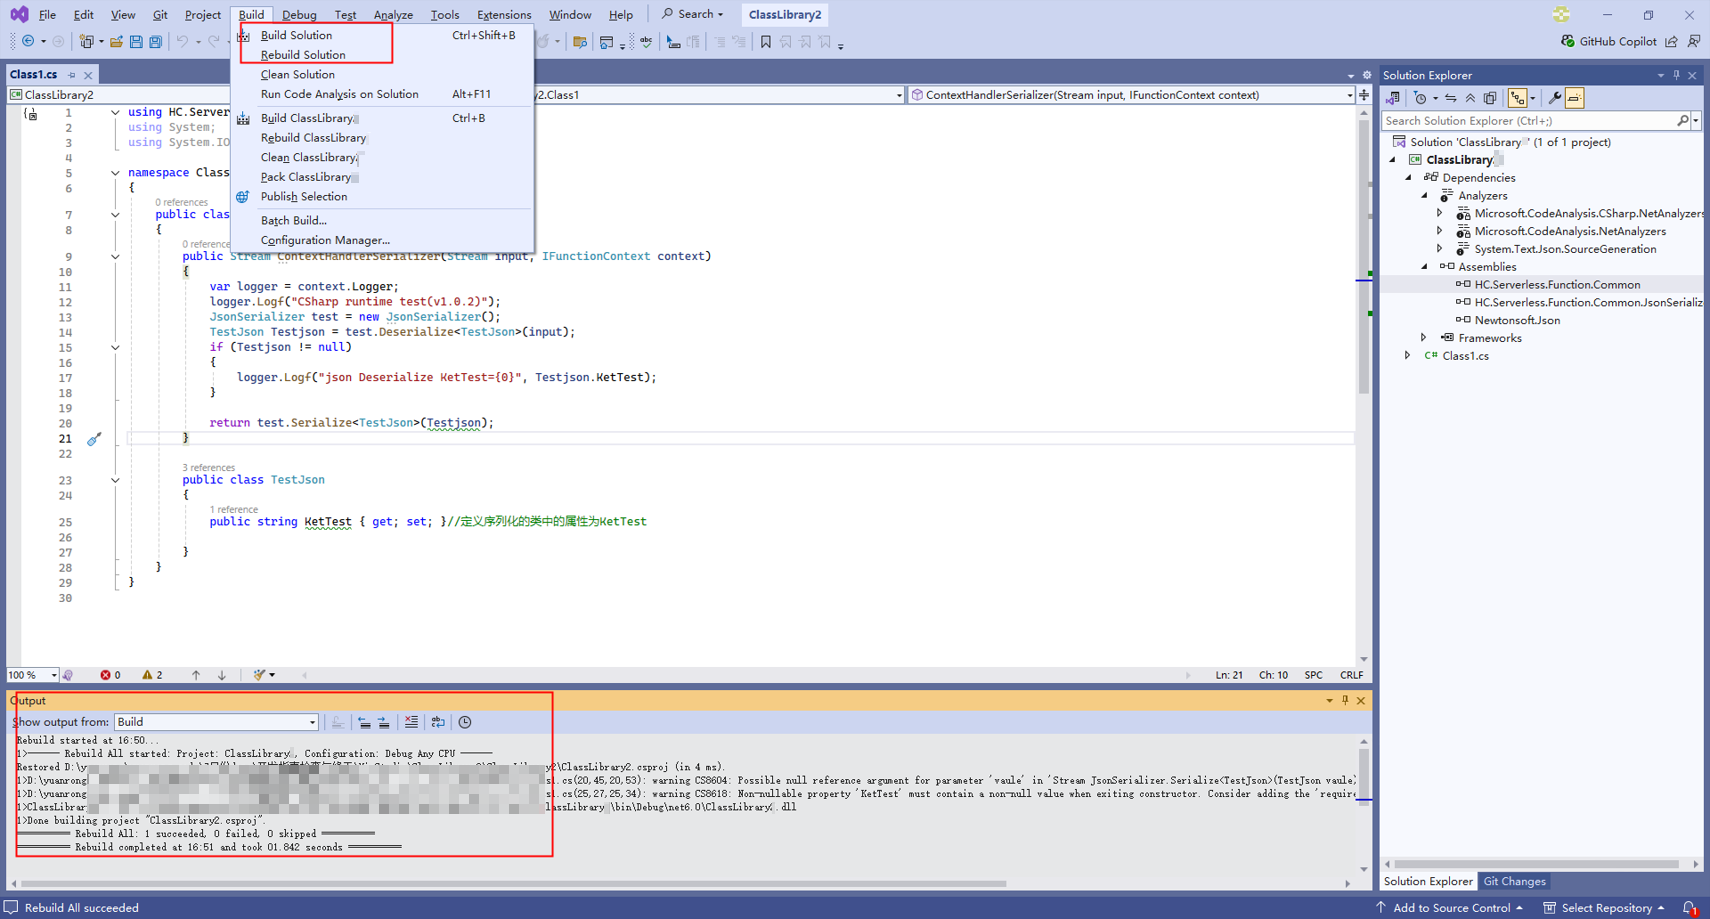
- As shown in Figure 4, choose Build > Build Solution from the menu bar and copy the path of the generated .dll file in the output box.
- View the generated file in the local folder, as shown in Figure 5.
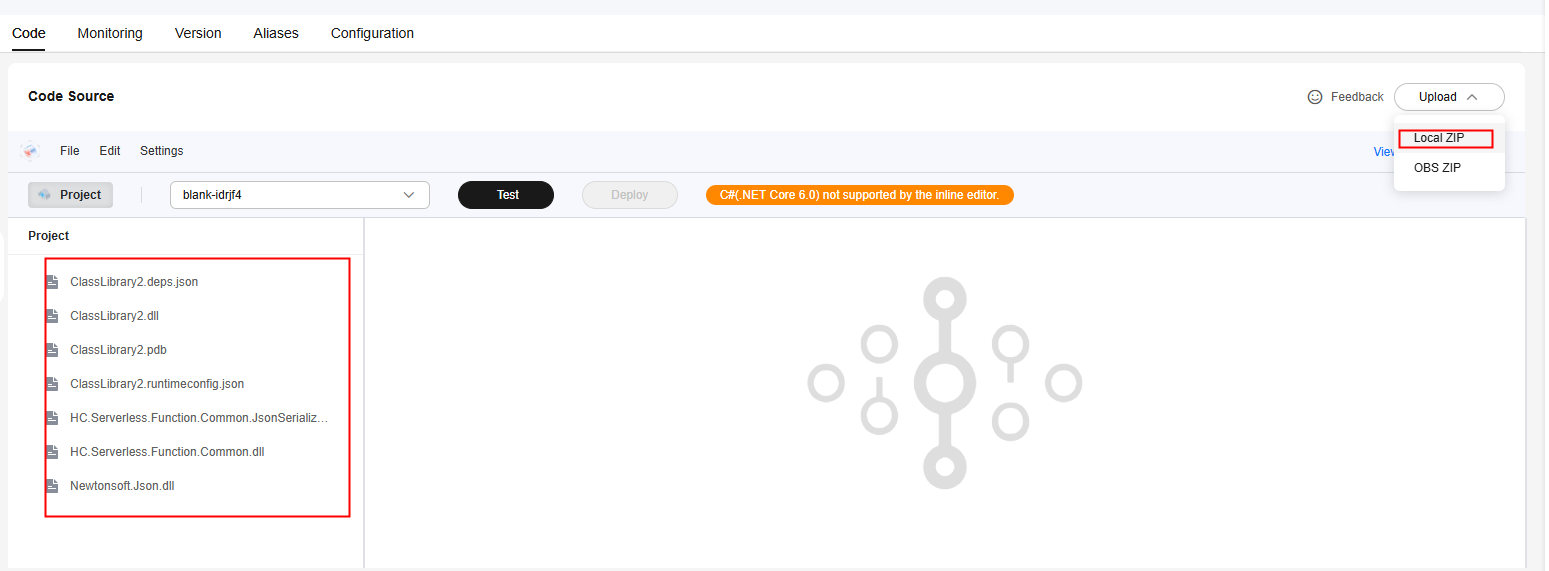
- Create the ClassLibrary.runtimeconfig.json file in the folder and add the following content to the file: After the operation is complete, there are seven files in total.
{
    "runtimeOptions": {
        "framework": {
            "name": "Microsoft.NETCore.App",
            "version": "6.0.0"
        }
    }
}
- The name of the *.runtimeconfig.json file is the name of an assembly.
- The Version parameter in the file indicates the version number of the target framework.
- Compress the files in the folder into a .zip package. Do not compress the entire folder. Ensure that seven files are displayed after the package is decompressed.
Step 3: Testing the Function
- On the FunctionGraph console, create a C# (.NET Core 6.0) event function from scratch and upload the ZIP code package created in 4, as shown in Figure 6.
- Choose Configuration > Basic Settings, set Handler to ClassLibrary2::ClassLibrary2.Class1::ContextHandlerSerializer, and click Save, as shown in Figure 7.
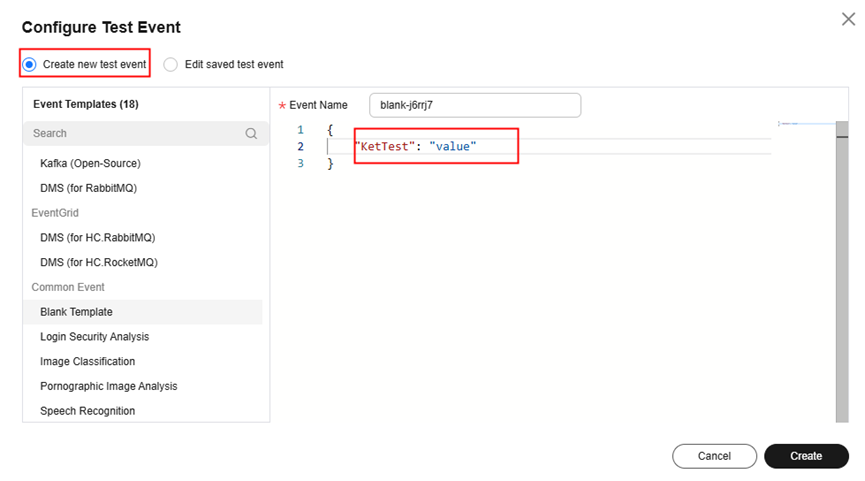
- Return to the Code tab page, click Test to configure a test event. As shown in Figure 8, change key to KetTest to identify the corresponding value.

The attribute of the serialization class must be defined as KetTest.
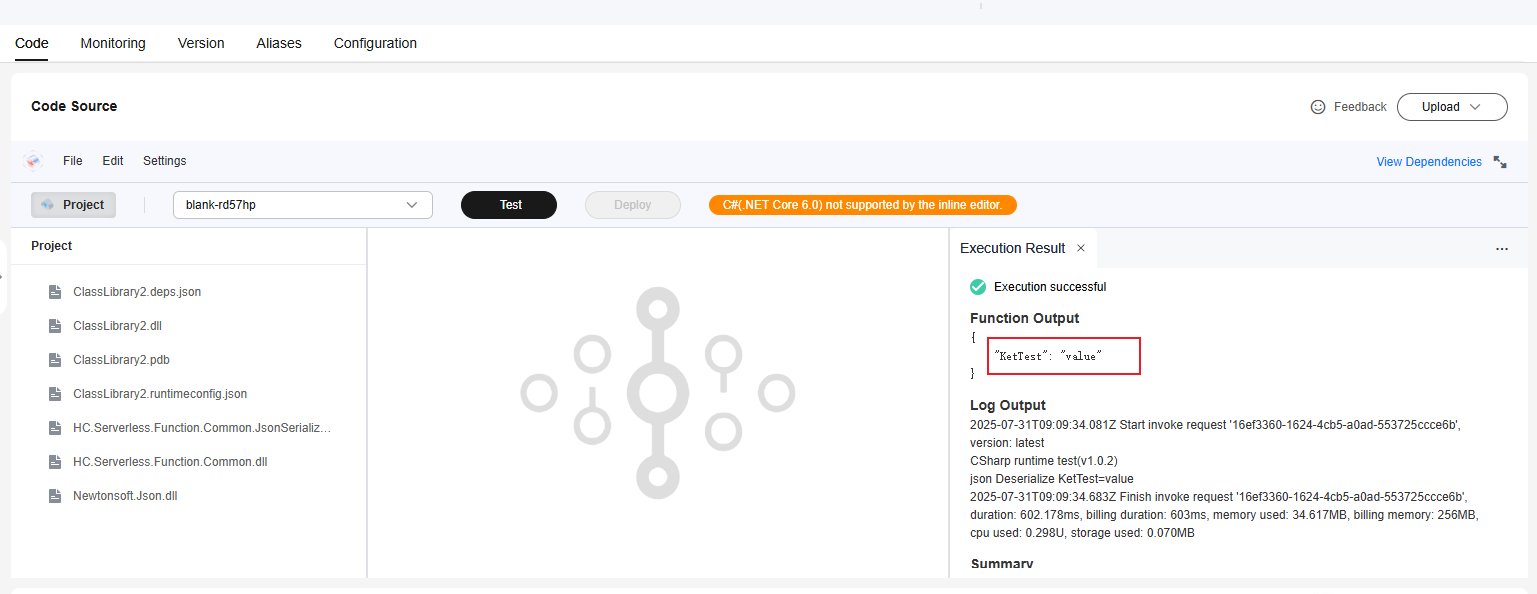
- Click Test and view the execution result.
Figure 9 Viewing the execution result
Feedback
Was this page helpful?
Provide feedbackThank you very much for your feedback. We will continue working to improve the documentation.See the reply and handling status in My Cloud VOC.
For any further questions, feel free to contact us through the chatbot.
Chatbot

