Manually Deploying GitLab (CentOS 7.2)
Overview
This best practice guides you through the manual deployment of GitLab on a Linux ECS. GitLab is an open-source version management system that uses Git as the code management tool. The CentOS 7.2 64bit OS is used as an example in this section.
Prerequisites
- The memory of the target ECS is greater than or equal to 4 GiB.
- The rule listed in the following table has been added to the security group that the target ECS belongs to. For details, see Adding a Security Group Rule.
Table 1 Security group rule Direction
Priority
Action
Type
Protocol & Port
Source
Inbound
1
Allow
IPv4
TCP: 80
0.0.0.0/0
Procedure
- Log in to the ECS.
- Install the dependency package.
- Run the following command to install the dependency packages:
sudo yum install -y curl policycoreutils-python openssh-server
- Run the following commands to enable SSH to start automatically upon ECS startup:
sudo systemctl enable sshd
sudo systemctl start sshd
- Run the following command to install the dependency packages:
- Install Postfix to send emails.
- Run the following command to install Postfix:
sudo yum install postfix
- Run the following commands to enable Postfix to start automatically upon ECS startup and start Postfix:
sudo systemctl enable postfix
sudo systemctl start postfix
- Run the following command to install Postfix:
- Add the GitLab repository and install the software package.
- Run the following command to add the GitLab repository:
curl https://packages.gitlab.com/install/repositories/gitlab/gitlab-ce/script.rpm.sh | sudo bash
- Run the following command to install GitLab:
sudo EXTERNAL_URL="http://gitlab.example.com" yum install -y gitlab-ce
Set EXTERNAL_URL to the IP address of the GitLab server, which can be the server's public IP address or the domain name.

- After the command is executed, you can view the software download speed and the estimated download completion time in the command output.
- The GitLab software package repository may fail to be added due to network issues. You are advised to try again.
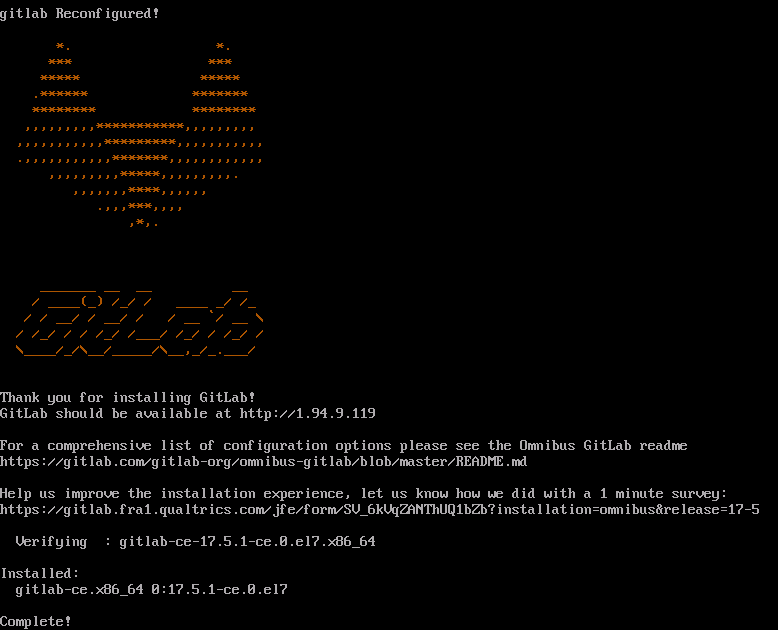
If information similar to the following is displayed, GitLab has been installed.

- Run the following command to add the GitLab repository:
- Test the GitLab deployment.
Enter http://EIP of the ECS in the address bar. If the following page is displayed, GitLab has been set up.
Follow-up Operations
- Obtain the password for logging in to GitLab.
Run the following command to obtain the password for logging in to GitLab:
sudo cat /etc/gitlab/initial_root_password
Information similar to the following is displayed.


The file that stores the default password will be automatically deleted 24 hours after the first configuration. You are advised to change the initial password immediately after the first login.
- Log in to GitLab.
In the address bar of a browser, enter http://EIP of the ECS to go to the GitLab login page.
For the first login, enter the username root and password obtained in step 1.
- Change the initial password
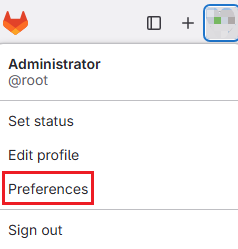
- Log in to GitLab, click the user avatar in the upper left corner of the page, and choose Preferences from the shortcut menu.

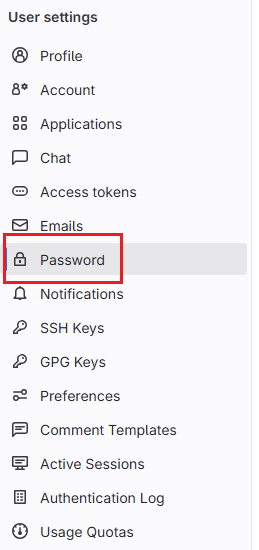
- On the User settings page, choose Password in the navigation pane on the left.

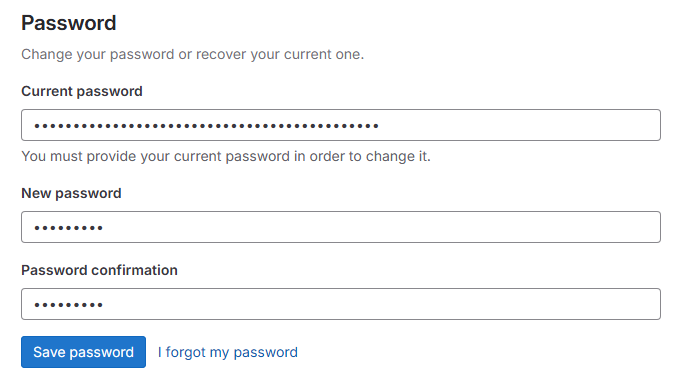
- Enter the current password and new password, confirm the password, and click Save password.

- Log in to GitLab, click the user avatar in the upper left corner of the page, and choose Preferences from the shortcut menu.
For more information about GitLab operations, such as common GitLab commands, data backup, configuration options, user management, integration with other services, and troubleshooting, see GitLab official documents.
Feedback
Was this page helpful?
Provide feedbackThank you very much for your feedback. We will continue working to improve the documentation.See the reply and handling status in My Cloud VOC.
For any further questions, feel free to contact us through the chatbot.
Chatbot


