

Deploying MySQL on a CentOS ECS
Overview
This section describes how to deploy a MySQL database on an ECS running CentOS.
Prerequisites
- An EIP has been bound to the ECS.
- The rules listed in the following table have been added to the security groups that the target ECS belongs to. For details, see Adding a Security Group Rule.
Table 1 Security group rules Direction
Priority
Action
Type
Protocol & Port
Source
Inbound
1
Allow
IPv4
TCP: 22
0.0.0.0/0
Inbound
1
Allow
IPv4
TCP: 3306
0.0.0.0/0
Procedure
Deploying MySQL
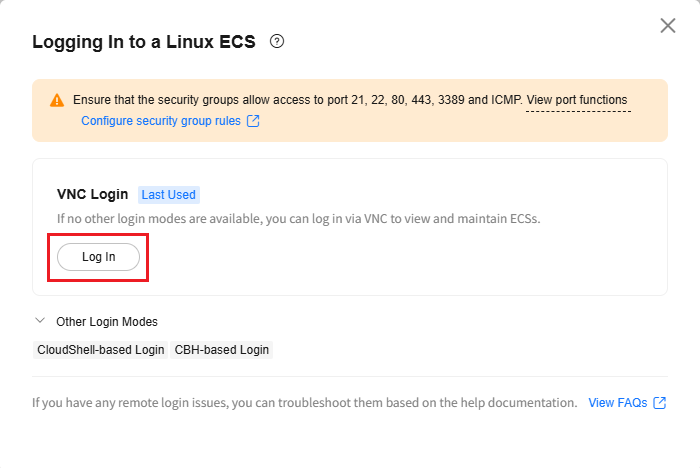
- Create a CentOS ECS that can access the public network. Select VNC or SSH login and log in to the ECS as user root.
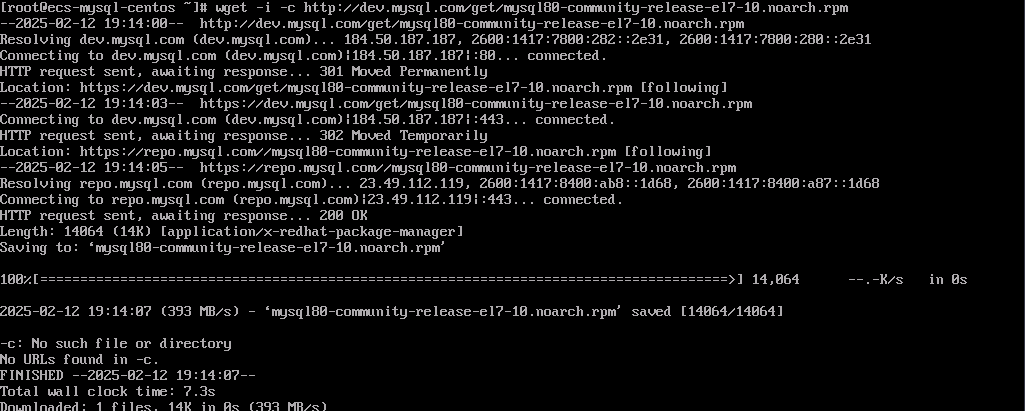
- Run the following command to download the MySQL 8.0 RPM software package from the MySQL official website:
wget -i -c https://dev.mysql.com/get/mysql80-community-release-el7-10.noarch.rpm
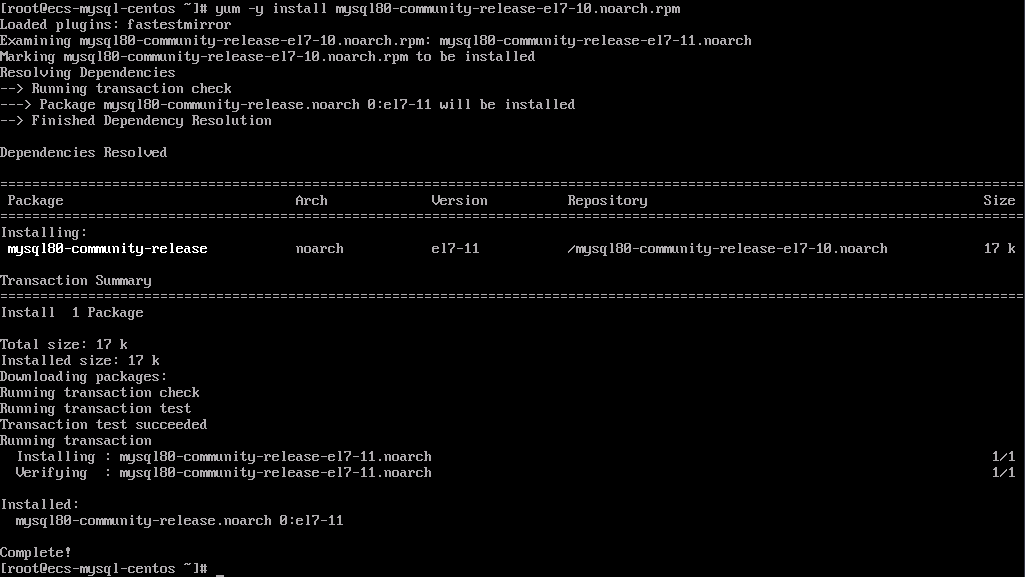
- Run the following command to install the package downloaded in 2:
yum -y install mysql80-community-release-el7-10.noarch.rpm
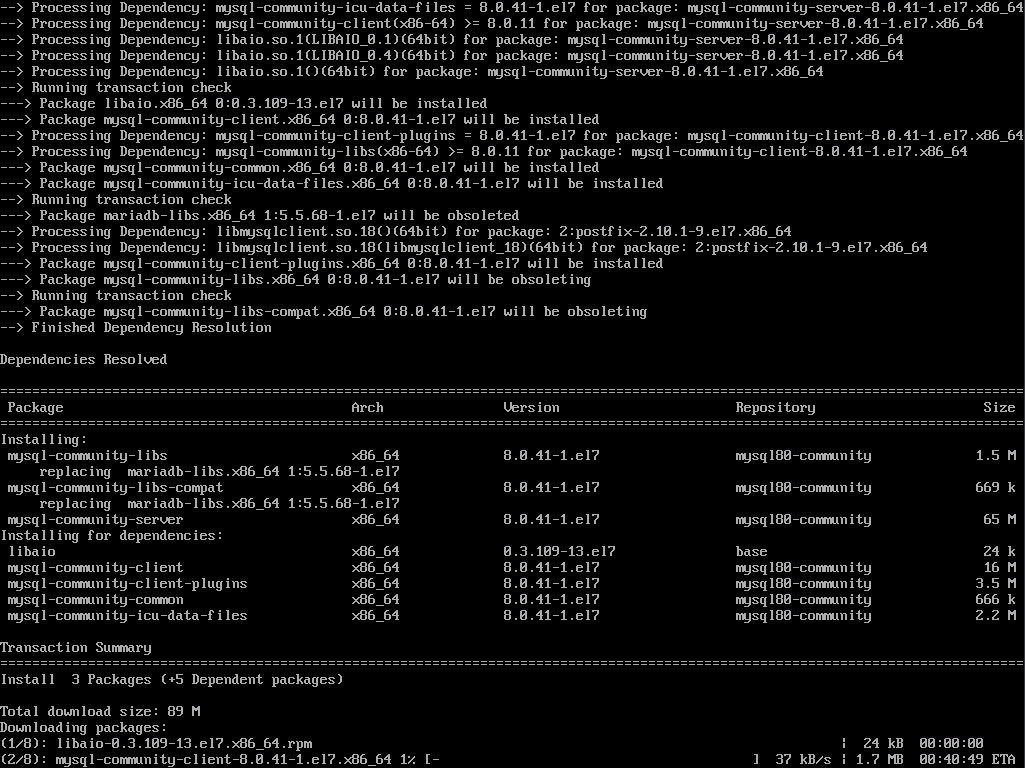
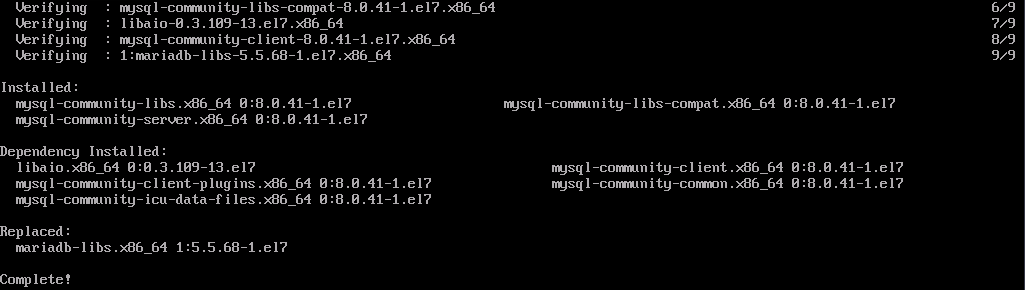
- Run the following command to install the MySQL community server and its dependency packages (skip the GPG signature verification):
yum -y install mysql-community-server --nogpgcheck
- Run the following command to check the MySQL version:
mysql -V

- Start MySQL and configure it to automatically start upon ECS startup:
systemctl start mysqld
systemctl enable mysqld

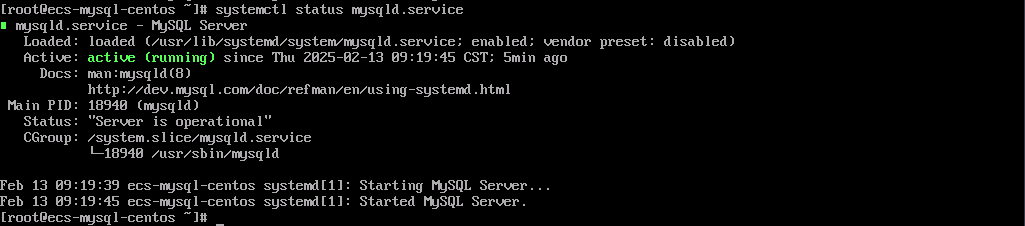
- Check the status of MySQL:
systemctl status mysqld.service
Information similar to that shown in the following figure indicates that MySQL is running properly.
- Obtain the password of user root that was automatically set during MySQL installation:
grep 'temporary password' /var/log/mysqld.log

- Run the following command to harden the MySQL security:
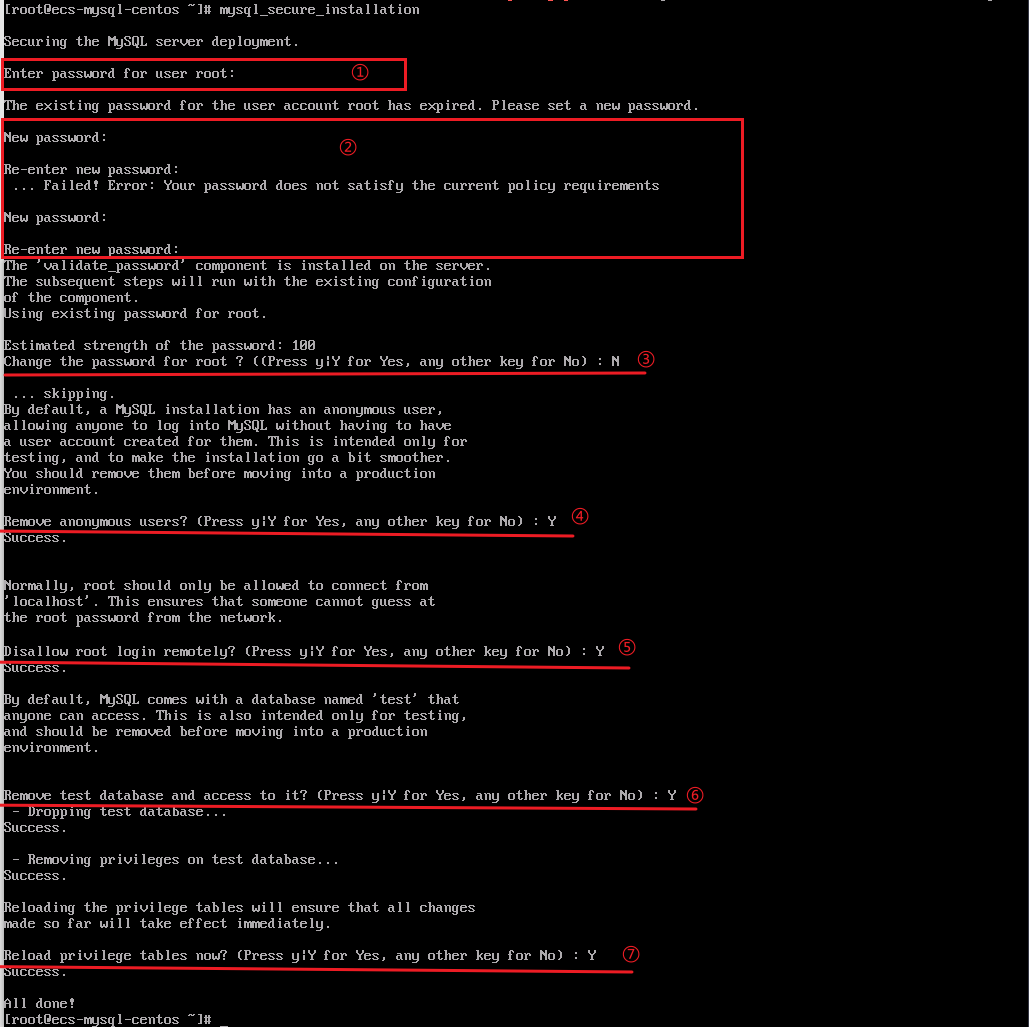
mysql_secure_installation
Set the following parameters as required:
(1) Enter the default password obtained in 8.
(2) Set a password. The password must contain at least eight characters and consist of uppercase letters, lowercase letters, digits, and special characters.
(3) Enter N for Change the password for user root?.
(4) Enter Y for Remove anonymous users?.
(5) Enter Y for Disallow root login remotely?.
(6) Enter Y for Remove test database and access to it?.
(7) Enter Y for Reload privilege tables now?.
Adding a user for remote MySQL access
- Run the following command to log in to the MySQL database as user root and enter the password configured in 9 as prompted:
sudo mysql -u root -p

- Run the following command to create a database named workspace:
CREATE DATABASE workspace;

- Create a user and grant the user full access to the database. In the command, workspaceuser indicates the database username, and xxxxx indicates the password of the database user.
CREATE USER 'workspaceuser'@'localhost' IDENTIFIED BY 'xxxxx';
GRANT ALL ON workspace.* TO workspaceuser@localhost;

- Run the following command to update the MySQL permission table to ensure that the permissions granted in 3 take effect:
FLUSH PRIVILEGES;

- Run the following command to exit the MySQL CLI:
exit

- (Optional) Run the following commands in sequence to check that the database and user have been created and then exit the MySQL CLI (after the first command is executed, enter the password configured in 3):
mysql -u workspaceuser -p
SHOW DATABASES;
exit

What is your overall rating for this page?
Thank you very much for your feedback. We will continue working to improve the documentation.See the reply and handling status in My Cloud VOC.
For any further questions, feel free to contact us through the chatbot.
Chatbot


