Creating an Account
You can use the management account to create new accounts in your organization. The accounts you created are referred to as resource accounts. For details, see What Are the Differences Between a Resource Account and a Cloud Account in the Unified Accounting Model? If you want to convert a resource account to a cloud account, refer to Converting a Resource Account to a Huawei Cloud Account.
This section includes the following content:
- Creating an Account
- Logging In with the New Account Via an Agency
- Logging In with the New Account via IAM Identity Center
Constraints
- An organization administrator can create a maximum of five accounts at a time.
- Accounts created via Organizations can be used for login only by switching roles via an agency or by accessing the IAM Identity Center console.
- The accounting of accounts created via Organizations is hosted by the organization management account by default.

- An agency will be created in the new account created via Organizations for the management account. You can delete this agency in the new account. Before deleting the agency, enable IAM Identity Center and configure related identities and permissions to ensure that the service owner can access the account.
Creating an Account
- Log in to Huawei Cloud as the organization administrator or using the management account, navigate to the Organizations console, and access the Organization page.
- On the Organization page, choose Add > Add Account.
Figure 1 Adding an account

- Click Create new in the displayed dialog box.
- Enter an account name. You can enter the account description as required. The account name must be unique.
You can retain the default agency name or change it as required.Figure 2 Creating an account

- (Optional) Add one or more tags to the account.
A tag consists of a key-value pair. Tags are used to identify, classify, and search for accounts. You can add up to 20 tags to an account.
Table 1 describes the key and value descriptions of a tag.Table 1 Tag description Element
Description
Example
Tag key
A tag key of an account must be unique. You can create a custom key or select a key of an existing tag created in Tag Management Service (TMS).
A tag key:
- Cannot be an empty string.
- Contains 1 to 128 characters.
- Consists of letters, digits, underscores (_), hyphens (-), and Unicode characters (\u4E00-\u9FFF).
Key_0001
Tag value
A tag value can be repetitive or an empty string.
A tag value:
- Can be an empty string.
- Contains 1 to 225 characters.
- Consists of letters, digits, underscores (_), periods (.), hyphens (-), and Unicode characters (\u4E00-\u9FFF).
Value_0001
- Click OK. The new account is added to the list.
Logging In with the New Account Via an Agency
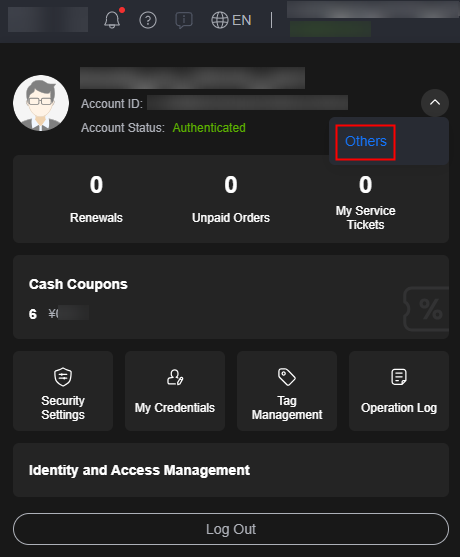
- Hover over the username in the upper right corner and click Others. The role switching page is displayed.
Figure 3 Switching the role

- On the Switch Role page, enter the account name.
Figure 4 Entering the account name


After you enter the account name, the agencies created under this account will be automatically displayed when you click the agency name text box. An agency name starting with cbc_ will also be displayed. This agency is mainly used by an enterprise master account to centrally manage expenditures and grant permissions to member accounts. You need to select the agency name entered when creating the account.
- Click OK to switch to the account.
Logging In with the New Account via IAM Identity Center
After an account is created, you can associate it with users and permission sets in IAM Identity Center. Then, you can log in to the Organizations console through the user portal URL of IAM Identity Center and access resources of the account in the organization. The specific access permission for resources is controlled by the permission set in IAM Identity Center.
Feedback
Was this page helpful?
Provide feedbackThank you very much for your feedback. We will continue working to improve the documentation.See the reply and handling status in My Cloud VOC.
For any further questions, feel free to contact us through the chatbot.
Chatbot


