Groups and Tags
Overview
A device group is a collection of devices. You can create groups for all the devices in a resource space based on rules (such as regions and types), and operate these devices by group. For example, you can perform a firmware upgrade on a group of water meters in the resource space. Devices in a group can be added, deleted, modified, and queried. A device can be bound to and unbound from multiple groups.
|
Group Type |
Description |
|---|---|
|
Static group |
You need to manually add devices to or remove devices from a group. Group nesting is supported. Constraints:
|
|
Dynamic group |
Devices are automatically added to or removed from the group based on the dynamic query rules of SQL-like statements. You cannot manually manage devices in a dynamic group. Constraints:
|
Group Management
- Access the IoTDA service page and click Access Console. Click the target instance card.
- In the navigation pane, choose .
- You can add, modify, or delete a group.
Figure 1 Device - Group

Static Groups
- Access the IoTDA service page and click Access Console. Click the target instance card.
- In the navigation pane, choose .
- Click to add a group. Set group type to Static Group, set parameters as prompted, and click OK.
Figure 2 Group - Creating a static group

- Access the static group details page. Bind or unbind devices in the group. For details, see Table 2.
Figure 3 Static group - Binding a device
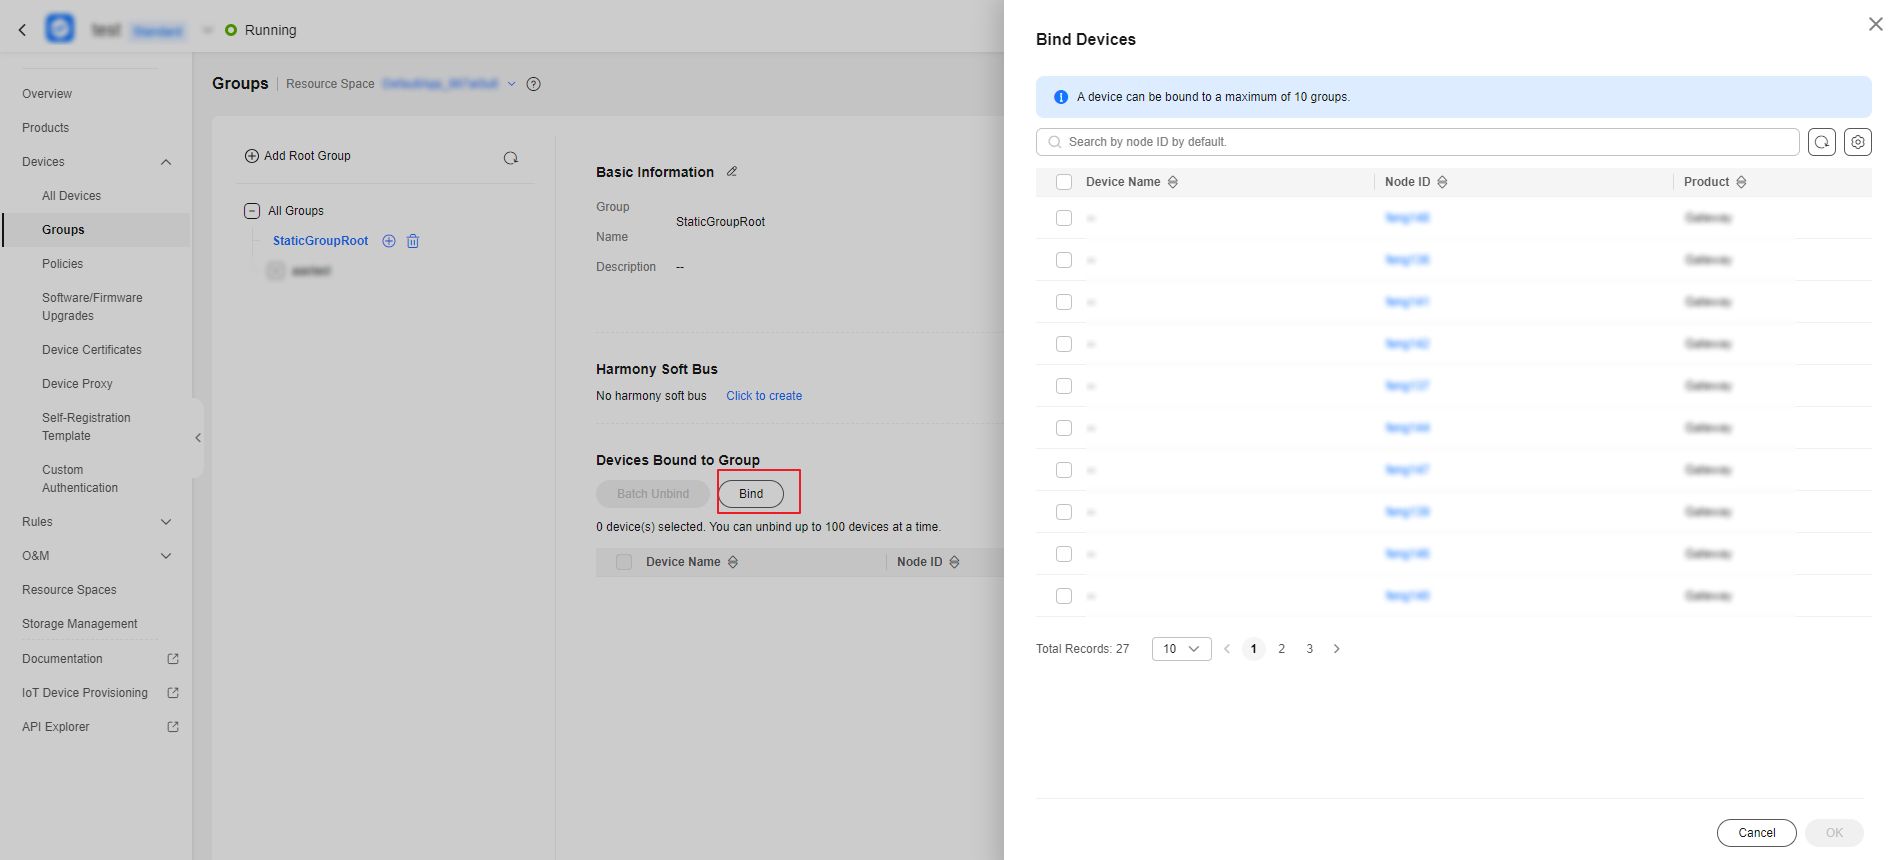
Table 2 Description Operation
Description
Binding
Click Bind to bind a device to a group.
Batch unbinding
Select multiple devices (up to 100 devices at a time) and click Batch Unbind to unbind the selected devices from the current group.
Unbinding
Locate the target device and click Unbind to unbind the device from the group.
- In the navigation pane, choose Devices > All Devices. On the displayed page, locate the target device, click View in the Operation column. Click the Groups tab page to check and manage the associated groups. For details, see Table 2.
Figure 4 Device - Group management

Dynamic Groups
- Access the IoTDA service page and click Access Console. Click the target instance card.
- In the navigation pane, choose .
- Click Add Root Group to add a group. Set Group Type to Dynamic.
- Set parameters as prompted, enter SQL-like statements, and click Configure Rule to check the matched devices. Click OK to complete the dynamic group creation.
Figure 5 Group - Creating a dynamic group


- For details about the dynamic rule syntax, see Advanced Search.
- The difference between dynamic group rules and advanced search is that dynamic group rules do not support app_id and group_id filtering.
- You can click Try to enter a dynamic rule. After you enter a dynamic rule, click OK. The rule is automatically written back.
Dynamic Group Example
Create a dynamic group based on the device name fuzzy match rule (other conditions can be selected based on the site requirements) and select the dynamic group to execute the OTA upgrade task.
Devices in a dynamic group are dynamically adjusted based on device names, and the status of the OTA upgrade task associated with the dynamic group also changes dynamically.
For details, see Upgrading the Firmware for a Batch of Devices and Dynamic Groups.
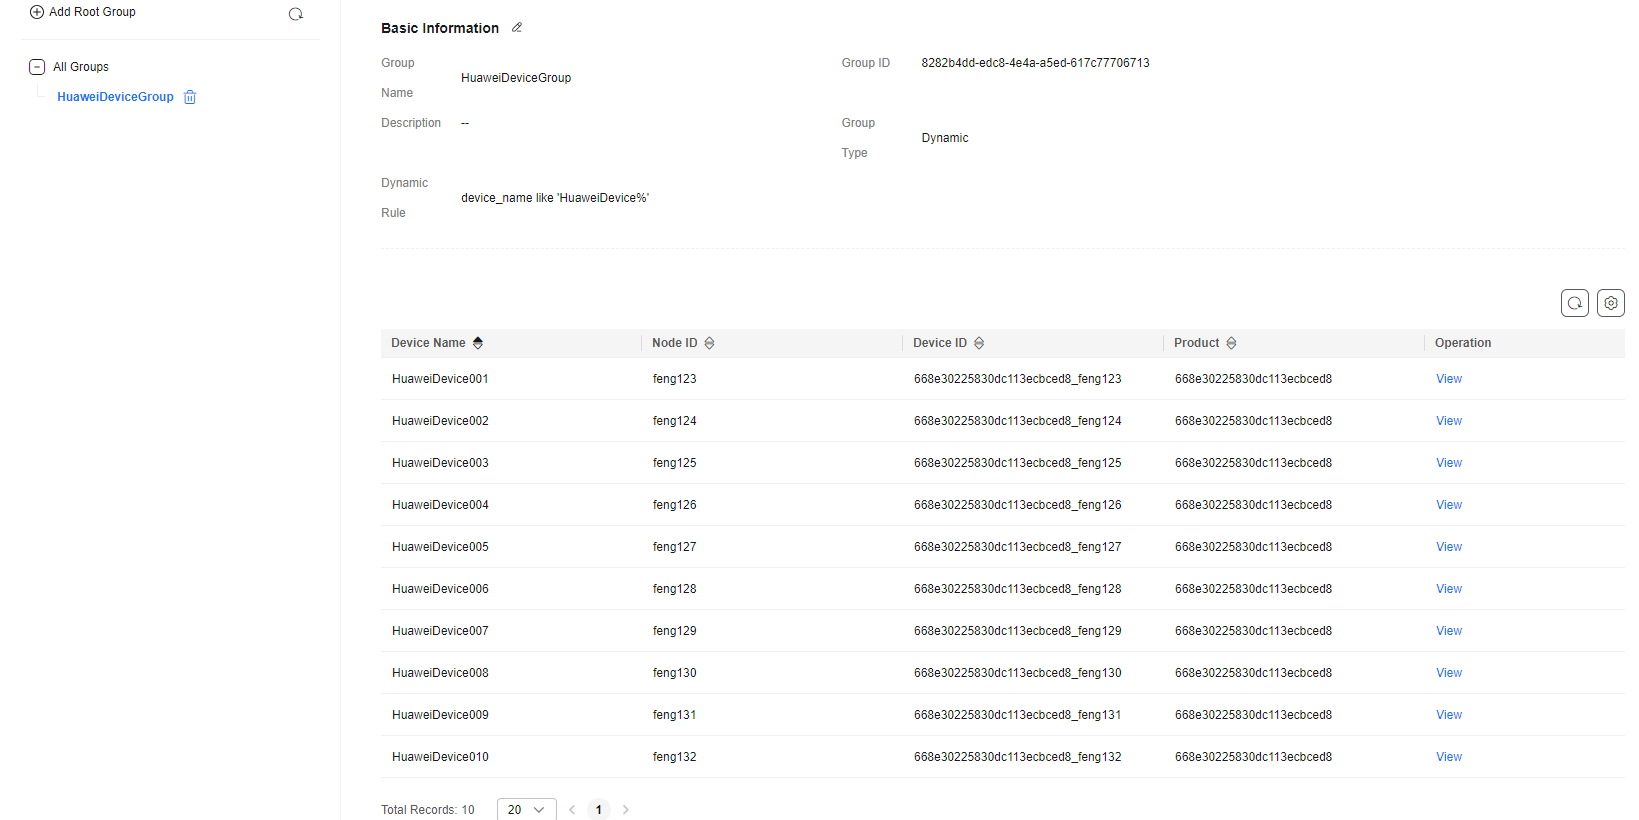
- Create a dynamic group named HuaweiDeviceGroup and set the group rule to device_name like'HuaweiDevice %'.
Figure 6 Dynamic group - Details

- Create a device firmware upgrade task and select the dynamic group HuaweiDeviceGroup.
Figure 7 Creating a firmware upgrade task - Dynamic group

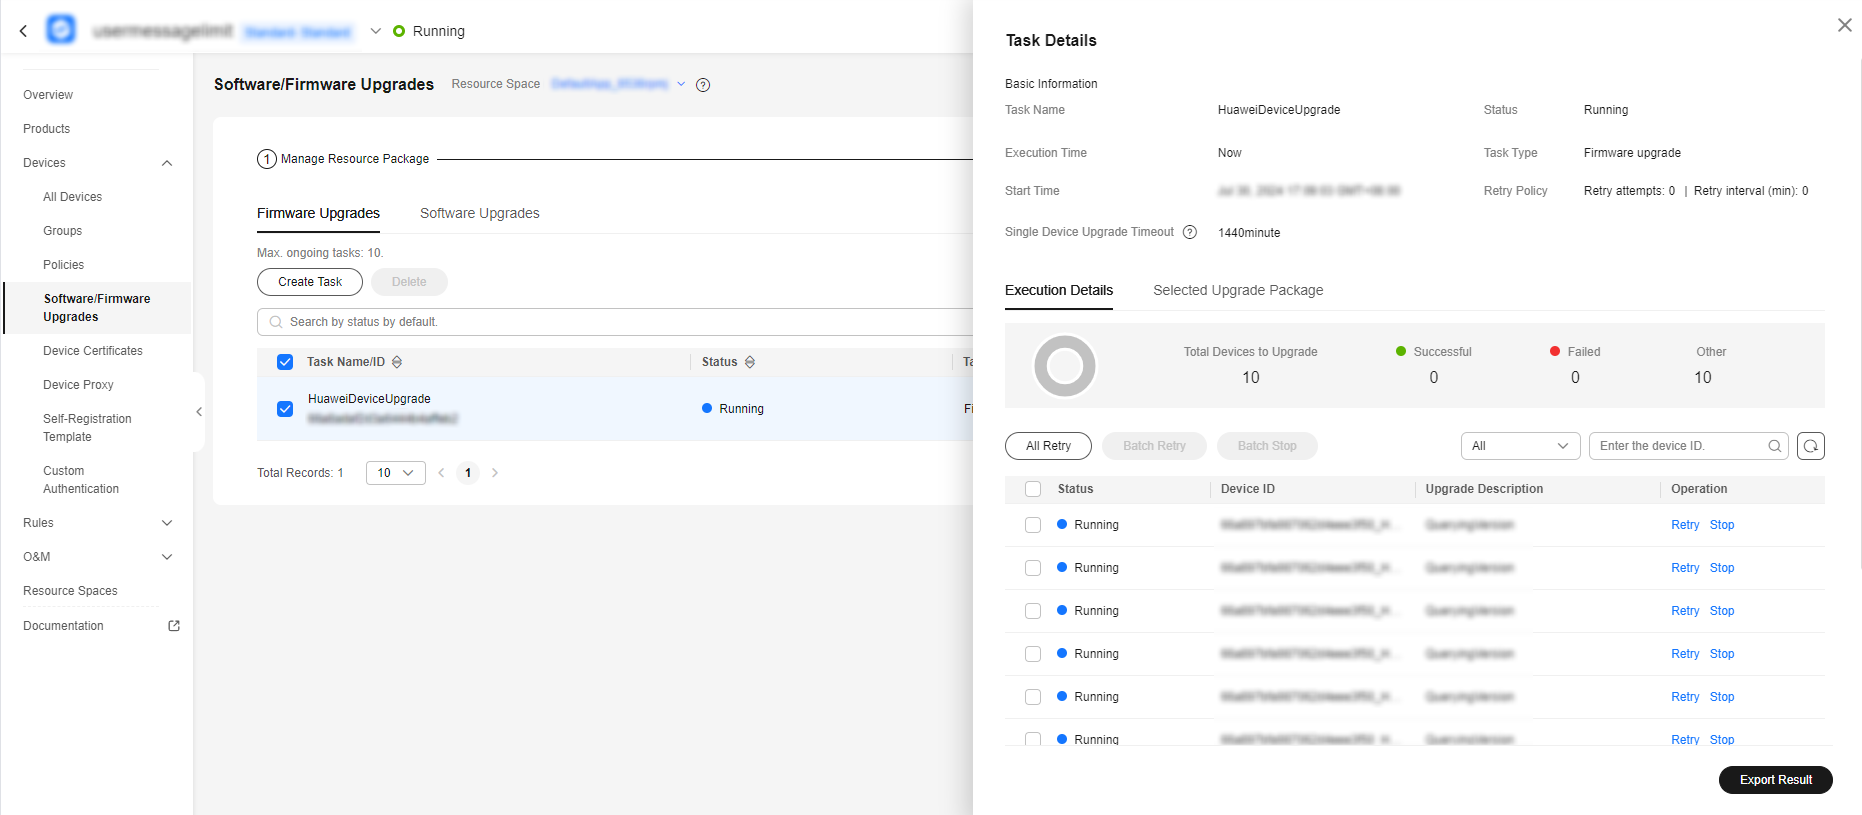
- After the dynamic group is created, you can view that the devices in the dynamic group are added to the upgrade task.
Figure 8 Firmware upgrade task - Details (dynamic group)
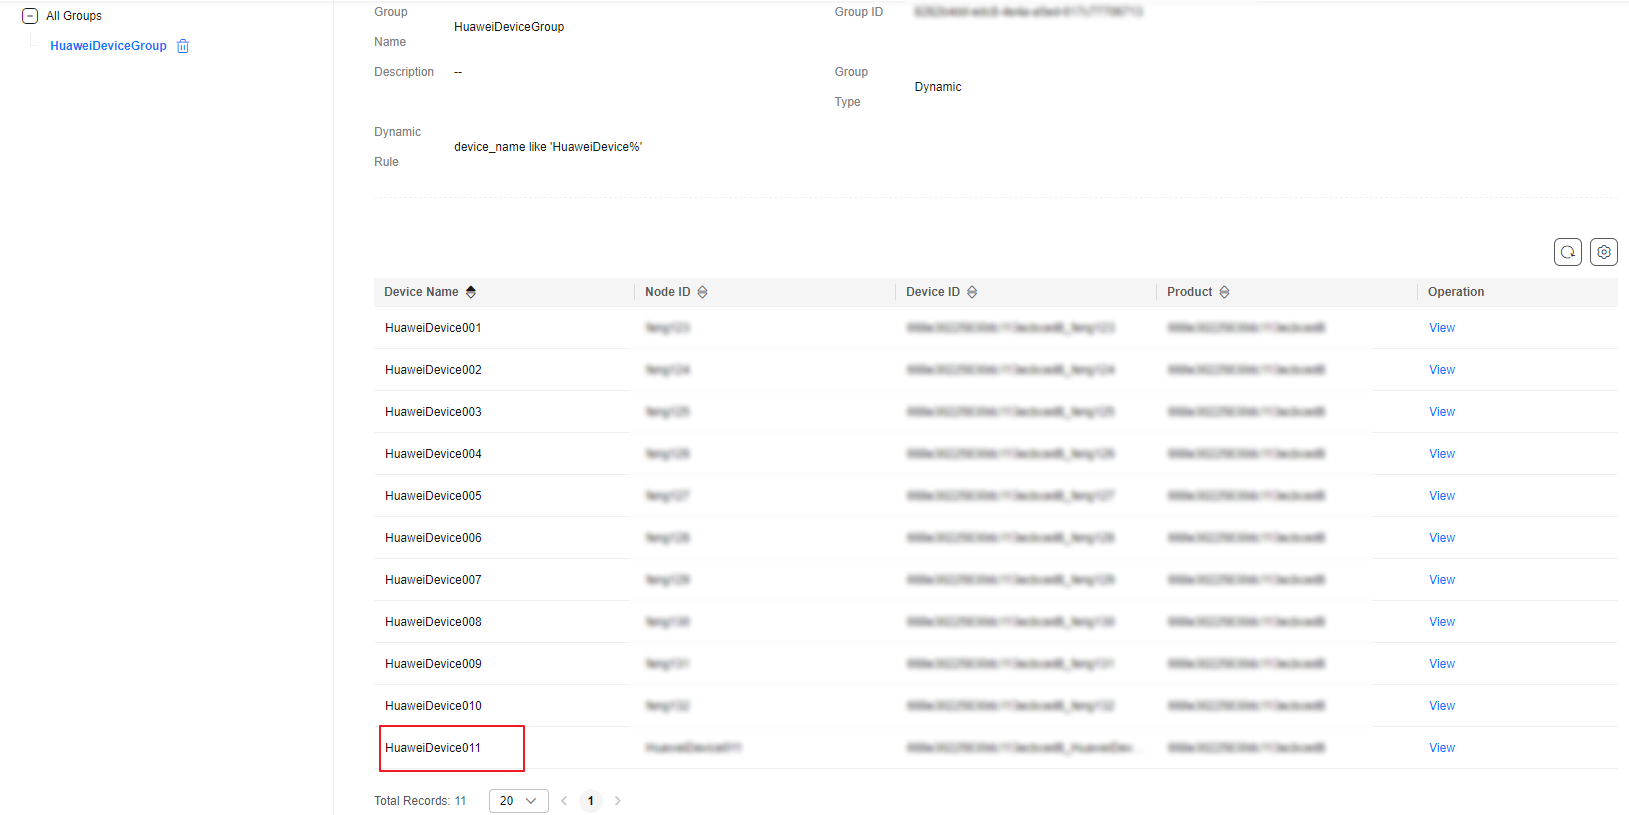
- Register a device by referring to Registering a Single Device. The device name is HuaweiDevice011. After the registration is successful, you can view that the device has been automatically added to the dynamic group HuaweiDeviceGroup.
Figure 9 Dynamic group - Adding a device
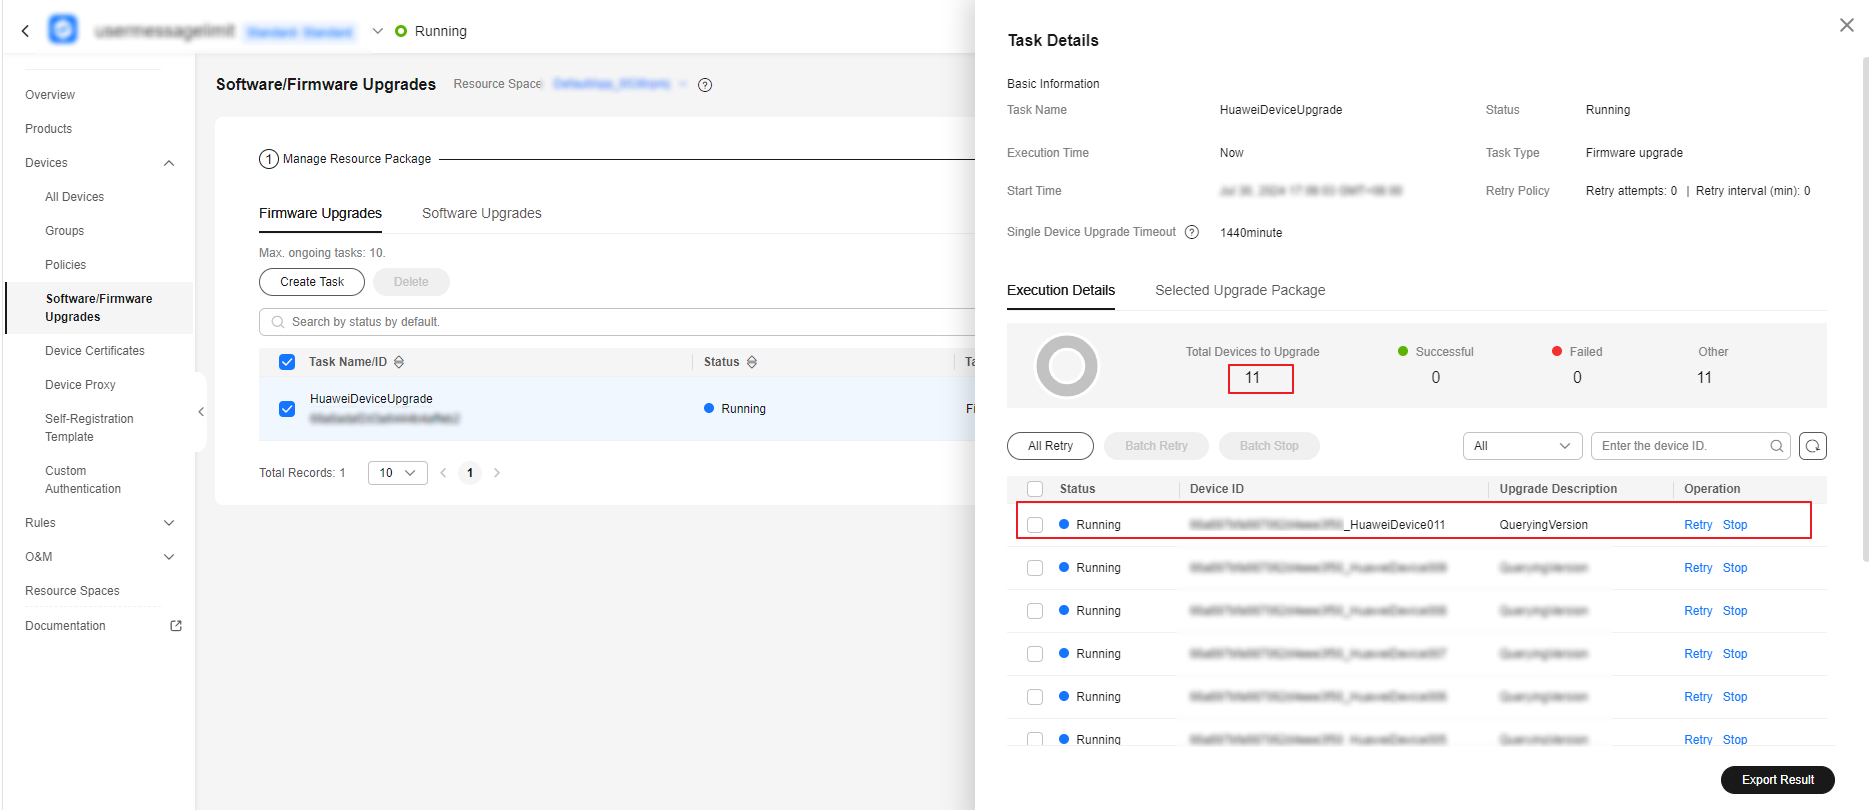
- View the sub-task details of the software and firmware upgrade task. You can see that the device has been automatically added to the upgrade task.
Figure 10 Firmware upgrade task - Adding a device to a dynamic group
- On the HuaweiDevice001 details page, change the device name to AbandonedHuaweiDevice001.
Figure 11 Device - Changing device name

- After the device name is changed successfully, the device is automatically removed from the HuaweiDeviceGroup dynamic group.
Figure 12 Dynamic group - Removing a device
- Check the sub-task details of the software and firmware upgrade task. The upgrade status of the device is Removed.
Figure 13 Firmware upgrade task - Removing a device from a dynamic group

Tag Introduction
Tags are used to classify devices. You can bind tags to devices on the device details page to manage devices.
- Access the IoTDA service page and click Access Console. Click the target instance card.
- In the navigation pane, choose Devices > All Devices. On the displayed page, locate the target device, and click View in the Operation column to access its details page.
- On the Tags tab page, click Bind Tags to bind one or more tags to the device.
Figure 14 Device - Binding a tag

Group-related APIs
Feedback
Was this page helpful?
Provide feedbackThank you very much for your feedback. We will continue working to improve the documentation.See the reply and handling status in My Cloud VOC.
For any further questions, feel free to contact us through the chatbot.
Chatbot


