このページは、お客様の言語ではご利用いただけません。Huawei Cloudは、より多くの言語バージョンを追加するために懸命に取り組んでいます。ご協力ありがとうございました。
- What's New
- Product Bulletin
- Service Overview
- Billing
-
Getting Started
-
Quick Device Access - Property Reporting and Command Receiving
- Subscribing to IoTDA
- Connecting a Smart Smoke Detector to the Platform (Quick Usage)
- Registering a Simulated Smart Street Light Device
- Using MQTT.fx to Simulate Communication Between the Smart Street Light and the Platform
- Using a Virtual Smart Street Light to Communicate with the Platform (Java SDK)
- Using a Virtual Smart Street Light to Communicate with the Platform (C SDK)
- Quick Device Access - Message Sending and Receiving
- Quick Application Access
-
Quick Device Access - Property Reporting and Command Receiving
-
User Guide
- Overview
- IoTDA Instances
- Resource Spaces
- Device Access
- Message Communications
- Device Management
-
Rules
- Overview
- Data Forwarding Process
- SQL Statements
- Connectivity Tests
- Data Forwarding to Huawei Cloud Services
- Data Forwarding to Third-Party Applications
- Data Forwarding Channel Details
- Data Forwarding Stack Policies
- Data Forwarding Flow Control Policies
- Abnormal Data Target
- Device Linkage
- Monitoring and O&M
- Granting Permissions Using IAM
-
Best Practices
- Introduction
-
Device Access
- Developing an MQTT-based Simulated Smart Street Light Online
- Developing a Smart Street Light Using NB-IoT BearPi
- Developing a Smart Smoke Detector Using NB-IoT BearPi
- Connecting and Debugging an NB-IoT Smart Street Light Using a Simulator
- Developing a Protocol Conversion Gateway for Access of Generic-Protocol Devices
- Connecting a Device That Uses the X.509 Certificate Based on MQTT.fx
- Connecting to IoTDA Based on the BearPi-HM_Nano Development Board and OpenHarmony 3.0
- Testing MQTT Performance Using JMeter
- Device Management
- Data Forwarding
- Device Linkage
-
Developer Guide
- Before You Start
- Obtaining Resources
- Product Development
- Development on the Device Side
- Development on the Application Side
-
API Reference
-
API Reference on the Application Side
- Before You Start
- Calling APIs
- API Overview
-
API
- Product Management
- Device Management
- Device Message
- Device Command APIs
- Device Property
- AMQP Queue Management
- Access Credential Management
- Data Forwarding Rule Management
-
Transition Data
- Push a Device Status Change Notification
- Push a Device Property Reporting Notification
- Push a Device Message Status Change Notification
- Push a Batch Task Status Change Notification
- Push a Device Message Reporting Notification
- Push a Device Addition Notification
- Push a Device Update Notification
- Push a Device Deletion Notification
- Push a Product Addition Notification
- Push a Product Update Notification
- Push a Product Deletion Notification
- Push an Asynchronous Device Command Status Change Notification
- Rule Management
- Device Shadow
- Group Management
- Tag Management
- Instance Management
- Resource Space Management
- Batch Task
- Device CA Certificate Management
- OTA Upgrade Package Management
- Message Broadcasting
- Device Tunnel Management
- Stack policy management
- Flow control policy management
- Device Proxy
- Device Policy Management
- Bridge Management
- Pre-provisioning Template Management
- Custom Authentication
- Codec Function Management
- Permissions and Supported Actions
- Examples
- Appendix
-
MQTT or MQTTS API Reference on the Device Side
- Before You Start
- Communication Modes
- Topics
- Device Connection Authentication
- Device Commands
- Device Messages
- Device Properties
-
Gateway and Child Device Management
- Platform Notifying a Gateway of New Child Device Connection
- Platform Notifying a Gateway of Child Device Deletion
- Gateway Synchronizing Child Device Information
- Gateway Updating Child Device Status
- Responding to a Request for Updating Child Device Statuses
- Gateway Requesting for Adding Child Devices
- Platform Responding to a Request for Adding Child Devices
- Gateway Requesting for Deleting Child Devices
- Platform Responding to a Request for Deleting Child Devices
- Software and Firmware Upgrade
- File Upload and Download
- Device Time Synchronization
- Device Reporting Information
- Device Log Collection
- Remote Configuration
- Device Tunnel Management
- HTTPS API Reference on the Device Side
- LwM2M API Reference on the Device Side
- Security Tunnel WebSocket API Reference
- Module AT Command Reference
- Change History
-
API Reference on the Application Side
- SDK Reference
-
FAQs
- Top FAQs
-
Solution Consulting
- In What Scenarios Can the IoT Platform Be Applied?
- What Are the Changes Brought by the Integration of IoT Device Management and IoTDA?
- Can I Enable IoTDA for IAM Users or Sub-Projects?
- Which Regions of Huawei Cloud Are Supported by the IoT Platform?
- Does Huawei Provide Modules, Hardware Devices, and Application Software?
- What Should I Do If I Want to Call an API But Have No Permissions to Do So as an IAM User? (Is It Edition-specific?)
- Why Was I Prompted to Grant Security Administrator Permissions When I Create a Rule or Set Resource File Storage?
- Which Resource Space Will Be Set As Default on the IoT Platform?
- How Does IoTDA Obtain Device Data?
- Is There Any Limitation on the Number of Resource Spaces and Devices I Can Add on the IoT Platform?
- Does the IoTDA Support Device Registration in Batches?
- Are There Any Limitations on the Use of the IoT Platform?
- What DTLS Encryption Algorithms Are Supported by the IoT Platform?
- Does the IoT Platform Support Conversion Between Big-Endian and Little-Endian for Binary Data?
- What Is NB-IoT?
- What Are the Components of the IoT Platform and What Hardware Architectures Does It Support?
- How Do I Obtain the Platform Access Address?
- Device Integration
- IoT Device SDKs
- LwM2M/CoAP Device Access
- MQTT-based Device Access
- Products Models
- Message Communications
- Subscription and Push
- Codecs
- OTA Upgrades
- Application Integration
- General Reference
Show all
Copied.
Node.js SDK Access Example
This topic describes how to use a Node.js AMQP SDK to connect to the Huawei Cloud IoT platform and receive subscribed messages from the platform.
Development Environment
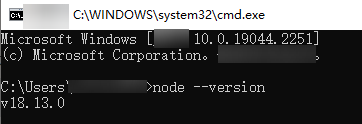
Node.js 8.0.0 or later is used. Download it from the Node.js official website. After installation, run the following command to check the version:
node --version
If the version is displayed and is later than 8.0.0, the installation is successful.
Sample Code
- Create a JavaScript file (for example, HwIotAmqpClient.js) on the local computer and save the following sample code to the file. Modify related connection parameters by referring to AMQP Client Access.
const container = require('rhea'); // Obtain the timestamp. var timestamp = Math.round(new Date()); // Set up a connection. var connection = container.connect({ // Access domain name. For details, see AMQP Client Access. 'host': '${UUCID}.iot-amqps.cn-north-4.myhuaweicloud.com', 'port': 5671, 'transport': 'tls', 'reconnect': true, 'idle_time_out': 8000, // Method to assemble username. For details, see AMQP Client Access. 'username': 'accessKey=${yourAccessKey}|timestamp=' + timestamp + '|instanceId=${instanceId}', // accessCode. For details, see AMQP Client Access. 'password': '${yourAccessCode}', 'saslMechannisms': 'PLAIN', 'rejectUnauthorized': false, 'hostname': 'default', }); // Create a Receiver connection. You can use DefaultQueue. var receiver = connection.open_receiver('${yourQueue}'); // Callback function for receiving messages pushed from the cloud container.on('message', function (context) { var msg = context.message; var content = msg.body; console.log(content); // Send an ACK message. Note that the callback function should not contain time-consuming logic. context.delivery.accept(); });
- Go to the directory where the HwIotAmqpClient.js file is located and run the following command to install the rhea library:
npm install rhea
After installation, the project files shown in the following figure are displayed.
- Run the following command to start the AMQP client:
node HwIotAmqpClient.js
- Running result examples
- Successful subscription:
If the following log information is displayed, the AMQP client successfully subscribes to the IoT platform and obtains data from the platform.
- Failed subscription:
The following log indicates that the AMQP client authentication fails on the IoT platform. Check whether the access code is correct and whether the difference between the timestamp and the standard time is greater than 5 minutes.
Feedback
Was this page helpful?
Provide feedbackThank you very much for your feedback. We will continue working to improve the documentation.See the reply and handling status in My Cloud VOC.
For any further questions, feel free to contact us through the chatbot.
Chatbot