
Buying a DDM Instance and Connecting to a Schema Using a Windows System
You can connect to your DDM schema using a Windows ECS installed with a database client (for example, MySQL-Front) over a private network.
Step 1: Buy a DDM Instance
- Go to the Buy DDM Instance page.
- On the displayed page, configure the required parameters and click Next.
Table 1 Parameter description Parameter
Description
Billing Mode
DDM instance billing mode, which can be Yearly/Monthly or Pay-per-use. You can change the billing mode after creating an instance.
- Yearly/Monthly: Specify a required duration. The system deducts the fees incurred from your account based on the service price.
- Pay-per-use: Do not specify any required duration because the system bills you based on how much the service is used.
Region
Region where the DDM instance is located. Select a required region.
Project
Project that the DDM instance belongs to.
Instance Name
Name of the DDM instance, which:
- Cannot be left blank.
- Must start with a letter.
- Must be 4 to 64 characters long.
- Can contain letters, digits, underscores (_) and hyphens (-).
Time Zone
Select a time zone based on the region you selected.
Instance Nodes
Number of nodes in a DDM instance. Up to 32 nodes are supported.
NOTE:- At least 2 nodes are recommended because using a single node cannot guarantee high availability.
- Disk usage of a single node: system disk 40 GB and data disk 1 GB
AZ
Availability zone where the DDM instance is deployed.
Nodes in a DDM instance can be deployed on different physical servers in the same AZ to keep services always available even if one physical server becomes faulty.
A DDM instance can be deployed across AZs to provide cross-AZ DR.
If necessary, you can select multiple AZs when you create a DDM instance. Then nodes of the instance will be deployed in multiple different AZs.
NOTE:Deploy your application, DDM instance, and required RDS instances in the same AZ to reduce network latency. Cross-AZ deployment may increase network latency.
Node Class
Class of the DDM instance node. You can select General-enhanced or Kunpeng general computing-plus and then specify a node class.
NOTE:Estimate compute and storage requirements of your applications based on your service type and scale before you buy a DDM instance, and then select an appropriate node class so that the CPU and memory specifications of your DDM instance can better meet your needs.
Password
Select Configure or Skip.
NOTE:Configure information about an administrator account. If you select Skip, you can configure information about an administrator account later as needed by following Creating an Administrator Account.
Administrator
This parameter is mandatory when Configure is selected for Password. Enter an administrator account name, which cannot be the same as any account on the Accounts page. It cannot be deleted after being created.
Password
This parameter is mandatory when Configure is selected for Password. Enter the password of the administrator account again.
NOTE:You can reset the password later as needed by following Resetting the Administrator Password.
Confirm Password
This parameter is mandatory when Configure is selected for Password. Enter the password of the administrator account again.
VPC
VPC that the DDM instance belongs to. This VPC isolates networks for different services. It allows you to manage and configure private networks, simplifying network management.
Click View VPC to show more details and security group rules.
NOTE:- The DDM instance should be in the same VPC as the required RDS for MySQL instance.
- To ensure network connectivity, the DDM instance you created must be in the same VPC as your applications and RDS for MySQL instances.
- After the DDM instance is created, the VPC cannot be changed. Exercise caution when performing this operation.
Subnet
A subnet provides dedicated network resources that are logically isolated from other networks for network security. A floating IP address is automatically assigned when you create a DDM instance. After the instance is created, you can change the floating IP address.
Security Group
Select an existing security group.
You are advised to select the same security group for your DDM instance, application, and RDS for MySQL instances so that they can communicate with each other. If different security groups are selected, add security group rules to enable network access.
Enterprise Project
EPS provides a unified method to manage cloud resources and personnel by enterprise project.
Parameter Template
Select an existing parameter template. You can also click View Parameter Template to set parameters on the displayed page.
Tags
(Optional) Adding tags helps you better identify and manage your DDM resources.
You can add tags to your instance. Each instance can have a maximum of 20 tags.
- Creating a tag
You can create tags on the DDM console. A tag key and a value are required when you create a tag.
Tag key: This parameter is mandatory and cannot be left empty. It:
- Adding a predefined tag
Predefined tags can be used to identify multiple cloud resources.
To tag a cloud resource, you can select an available predefined tag from the drop-down list, without entering a key and value for the tag.
For example, if you have created a predefined tag with key Usage and value Project1, you can select it from the drop-down list when creating tags for DDM.
After an instance is created, you can click the instance name to view its tags, modify or delete the tags on the Tags tab page. In addition, you can quickly search for and filter specified instances by tag.
You can add a tag to an instance after the instance is created.
Required Duration
Duration of the DDM instance. This parameter is available only if Billing Mode is set to Yearly/Monthly.
You can select 1 month, 2 months, 3 months, 4 months, 5 months, 6 months, 7 months, 8 months, 9 months, or 1 year.
If you select Auto-renew, the renew cycle is the same as the selected duration.
- Perform subsequent operations based on the billing mode you select:
- If you select Pay-per-use, click Submit.
- If you select Yearly/Monthly, click Pay Now.
- View the purchased instance. Figure 1 Instance successfully purchased

Step 2: Buy an RDS for MySQL DB Instance
- Go to the Buy DB Instance page.
- Configure the instance information and click Next.

- A DDM instance can be associated with RDS for MySQL instances of versions 5.7 and 8.0.
- The RDS for MySQL instance must be in the same VPC and subnet as your DDM instance. If they are not in the same subnet, configure routes to ensure network connectivity.
- Specifications of associated RDS for MySQL instances should be greater than that of the DDM instance. Otherwise the performance will be affected.
Figure 2 Network configurations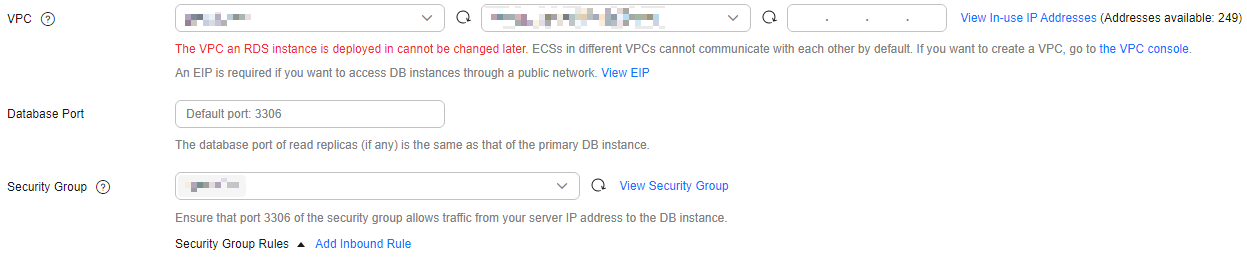
- Confirm the configurations and click Submit. Wait 1 to 3 minutes for the RDS instance to be created.
- View the purchased RDS instance.
Step 3: Create a DDM Account and Associate It with an RDS for MySQL Instance
- Log in to the DDM console.
- In the instance list, locate the required DDM instance and click its name.
- In the navigation pane, choose Accounts.
- On the displayed page, click Create Account.
- In the dialog box that is displayed, configure the account information and click OK.
The value of the password validity period must be an integer ranging from 0 to 65535, in days. If the value is 0, the password never expires. If this parameter is not set, the password will always be valid.
- On the Instances page, locate the required DDM instance and click Create Schema in the Operation column.
- On the Create Schema page, set required parameters and click Next.
- On the displayed page, enter a database account with the required permissions and click Test Availability. Figure 3 Testing availability of data nodes

- After the test is successful, click Finish.
- View the associated RDS for MySQL instance. Figure 4 DB instance successfully associated

Step 2: Buy an ECS
- Go to the Buy ECS page.
- Configure basic settings and click Next: Configure Network. Keep the region and AZ of the ECS the same as those of the DDS instance to be connected.
An image is an ECS template that contains an OS and applications. In this example, the Windows OS image is from the Marketplace and provided by third parties.
Figure 5 Basic settings Figure 6 Selecting an image
- Configure the ECS network and click Next: Configure Advanced Settings.
To download a MySQL client to the ECS, bind an EIP to the ECS. The ECS must be in the same VPC as the DDM instance for mutual communications.
Figure 7 Network configuration Figure 8 Selecting an EIP
- Configure a password for the ECS and click Next: Confirm. Figure 9 Advanced settings

- Confirm the configurations and click Submit. Figure 10 Confirming the configurations

- View the purchased ECS.
- Check whether the ECS and RDS for MySQL instance are in the same region and VPC.
- If yes, go to Step 5: Connect to a DDM Schema.
- If they are not in the same region, buy another instance. The ECS and DB instance in different regions cannot communicate with each other. To reduce network latency, deploy your DB instance in the region nearest to your workloads.
- If the ECS and DB instance are in different VPCs, change the VPC of the ECS to that of the DB instance. For details, see Changing a VPC.
Step 5: Connect to a DDM Schema
- Test connectivity and install MySQL-Front.
- Log in to the ECS. For details, see Login Using VNC in the Elastic Cloud Server User Guide.
- In the instance list, click the name of the target instance to go to the Basic Information page.
- In the Network Information area, obtain the private IP address and DDM service port.
- Open the cmd window on the ECS and check whether the floating IP address and database port of the DDM instance can be connected.
- If yes, network connectivity is normal.
- If no, check the security group rules.
- If in the security group of the ECS, there is no outbound rule with Destination set to 0.0.0.0/0 and Protocol & Port set to All, add an outbound rule for the floating IP address and port of the DDM instance. Figure 11 ECS security group

- If in the security group of the DDM instance, there is no inbound rule allowing the access from the private IP address and port of the ECS, add an inbound rule for the private IP address and port of the ECS.
- If in the security group of the ECS, there is no outbound rule with Destination set to 0.0.0.0/0 and Protocol & Port set to All, add an outbound rule for the floating IP address and port of the DDM instance.
- Open a browser, and download and install the MySQL-Front tool on the ECS (version 5.4 is used as an example).
- Use MySQL-Front to connect to the DDM schema.
- Start MySQL-Front.
- In the displayed dialog box, click New.... Figure 12 Connection management

- Enter the information of the DDM schema to be connected and click Ok. Figure 13 Adding an account

Table 2 Description Parameter
Description
Name
Database connection task name. If you do not set this parameter, it will be the same as Host by default.
Host
Private IP address of the DDM schema.
Port
Port of the DDM schema. Set this parameter to 5066.
User
Username used for accessing the DDM instance. The default user is root.
Password
Password of the user who will access the DDM instance.
- In the displayed window, select the connection that you have created in 2.c and click Open. If the connection information is correct, the DDM instance is successfully connected. Figure 14 Opening a session

Feedback
Was this page helpful?
Provide feedbackThank you very much for your feedback. We will continue working to improve the documentation.See the reply and handling status in My Cloud VOC.
For any further questions, feel free to contact us through the chatbot.
Chatbot


