
Running a Multi-Task Maven Build Project (Built-in Executors, Code)
Scenario
A build task is the smallest unit that a build project can be broken down into for simple service scenarios. However, for more complex requirements, you may need to set up multiple build tasks in a modular and fine-grained way, and run them in a specific order. This means that each task depends on the successful completion of its dependency task.
To handle such complex builds, CodeArts Build offers a task model called BuildFlow, which organizes multiple build tasks in a directed acyclic graph (DAG) and runs them concurrently based on their dependencies.
In this practice, your build project involves three build tasks (Job1, Job2, and Job3). Job3 depends on Job1 and Job2. Your code is stored in CodeArts Repo repositories.
Requirements
- You can only use the code hosted in CodeArts Repo for a BuildFlow task.
- You have permissions for CodeArts Repo.
Procedure
| Step | Description |
|---|---|
| Create a project. | |
| Create a CodeArts Repo repository to store code files. | |
| Define the entire build process in build.yml. | |
| Create a script for the whole build. | |
| Create and run a BuildFlow task. | |
| View the build results. |
Creating a Project
- Log in to the Huawei Cloud console with your Huawei Cloud account.
- Click
 in the upper left corner and choose from the service list.
 - Click Access Service. The homepage of CodeArts is displayed.
- Click Create Project, and select the Scrum template.
- Set the project name to build-bestpractice, and leave the other parameters as default.
- Click OK to access the project.
Creating a CodeArts Repo Repository
- In the navigation pane, choose .
- On the displayed page, click New Repository. Select Template, and click Next.
- On the template selection page, select the Java Maven Demo template and click Next.
- On the displayed page, set Repository Name to Repo01 and keep the default values for other parameters.
- Click OK.
Creating a build.yml File
- On the code repository details page, click Create and select Create Directory from the drop-down list.
- Name the directory .cloudbuild and describe the files it contains. Click OK.
- In the .cloudbuild directory, click Create and select Create File from the drop-down list. Name the file build.yml and add the following code to the file:
version: 2.0 # The version number is a mandatory and unique parameter that must be set to 2.0.
params: # Parameters that can be referenced by builds.
  - name: condition_param
    value: 1
# The envs configuration is optional.
envs:
  - condition: condition_param == 0 # The following host specification and type are not used if this condition is not met.
    resource:
      type: docker
      arch: ARM
  - condition: condition_param == 1 # The following host specification and type are used if this condition is met.
    resource:
      type: docker
      arch: X86

buildflow:
  jobs: # Build tasks
    - job: Job3 # Define the task name.
      depends_on: # Define the task dependency. In this practice, the configuration indicates that Job3 depends on Job1 and Job2.
        - Job1
        - Job2
      build_ref: .cloudbuild/build_job3.yml # Define the YAML build script to run for Job3.
    - job: Job1
      build_ref: .cloudbuild/build_job1.yml # Define the YAML build script to run for Job1.
    - job: Job2
      build_ref: .cloudbuild/build_job2.yml # Define the YAML build script to run for Job2.
build.yml defines the entire build process, with three build tasks currently specified. Job3 depends on Job1 and Job2 and will be run only after they are completed. Job1 and Job2 have equal priority and will be triggered at the same time. build_ref defines the build script to be run for each build task.
Creating Task Scripts Used in build.yml
- In the .cloudbuild directory, click Create and select Create File from the drop-down list. Name the file build_job1.yml and add the following code to the file:
version: 2.0 steps: BUILD: - maven: image: cloudbuild@maven3.5.3-jdk8-open # The image is used for your build and can be customized. inputs: settings: public_repos: - https://mirrors.huawei.com/maven # Configure the dependency repository. cache: true # Determine whether to enable caching. command: mvn package -Dmaven.test.failure.ignore=true -U -e -X -B # The command to be run. - Create build_job2.yml and build_job3.yml with the same code samples by following the instructions in 1.
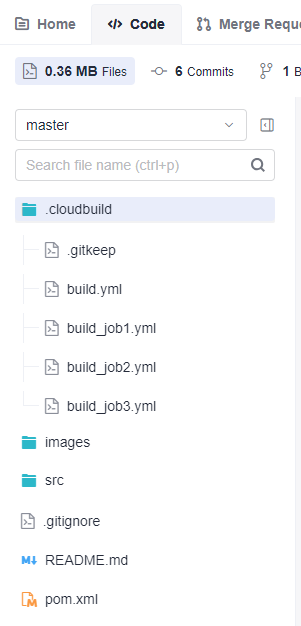
- The following figure shows the directory that stores files of the code repository. Figure 1 Directory
Creating and Running a Build Task
- In the navigation pane, choose .
- Click Create Task. On the displayed Basic Information page, set parameters according to Table 2.
Table 2 Basic information Parameter
Description
Name
Assign a custom name to the build task, for example, BuildFlow.
Code Source
Select Repo.
Repository
Select Repo01, the code repository created in Creating a CodeArts Repo Repository.
Default Branch
Keep the default value master.
Description
Enter additional information to describe the build task.
- Click Next and select the Maven template. Click OK. The Build Actions page is displayed.
- Click the Code tab. The build scripts in the Repo01 code repository will be loaded automatically.
- Click Save and Execute. In the displayed dialog box, click OK. The build task execution page is displayed.
Viewing the Build Results
The Build Processes tab page shows the complete flowchart of the current build tasks. While the build tasks are still running, you can see that Job1 and Job2 are running in parallel, and Job3 only runs after Job1 and Job2 are finished.
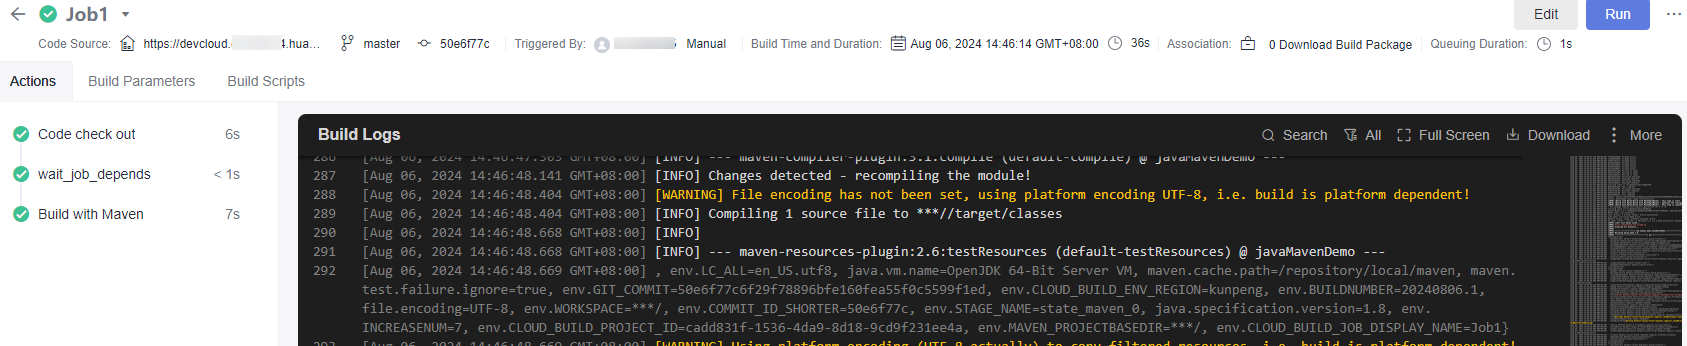
- On the Build Processes tab page, click either the Job1 node in the left-hand menu or the green Job1 rectangle in the right pane. The run details page of Job1 is displayed, where you can view the build logs of Job1, as shown in Figure 2.
The details page includes the following tabs:
- The Actions tab shows the resource scheduling information and sequential position of this task within the whole build process.
- The Build Parameters tab shows the global parameters of the current build task.
- The Build Scripts tab shows the script run for the current build task.
- You can view the run details of Job2 and Job3 by following instructions in 1.
Related Operations
For Maven build questions, see Maven Build FAQs.
Feedback
Was this page helpful?
Provide feedbackThank you very much for your feedback. We will continue working to improve the documentation.See the reply and handling status in My Cloud VOC.
For any further questions, feel free to contact us through the chatbot.
Chatbot


