Getting Started with CDN
By following the procedure in this section, you can quickly get started with Huawei Cloud CDN to accelerate your business. This section describes how to enable CDN, add a domain name, and configure CNAME.
Step 1: Enable CDN
- Log in to Huawei Cloud console. Choose .
The CDN console is displayed.
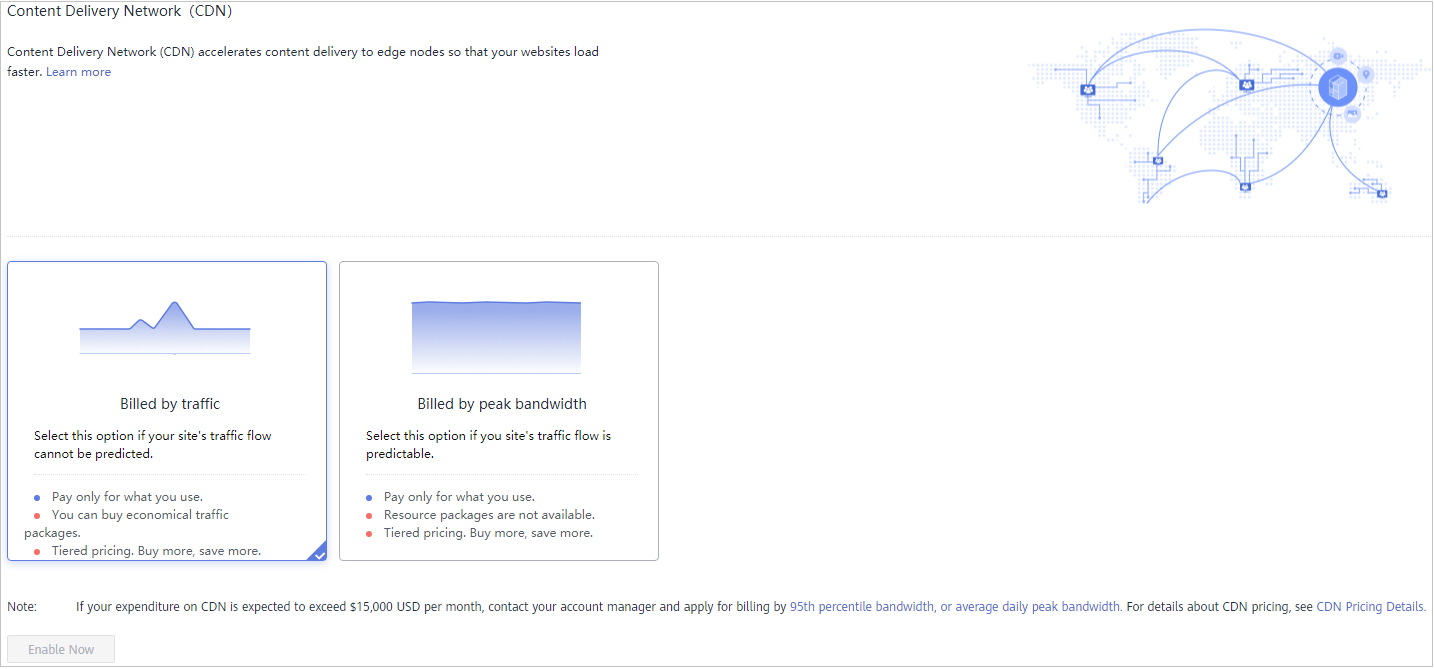
- Enable CDN as prompted and choose to be billed by traffic or peak bandwidth.

- Log in to the CDN console again.
Step 2: Add a Domain Name
- Log in to Huawei Cloud console. Choose .
The CDN console is displayed.
- In the navigation pane, choose Domains.
- On the Domains page, click Add Domain Name and configure a domain name, service area, service type, and origin server address.
- Click OK.
- Test your domain name before configuring a CNAME record to ensure that domain configurations are correct.
Step 3: Configure the CNAME Record
After a domain name is added, Huawei Cloud CDN assigns a CNAME address to you. You need to point the domain name to the CNAME address so that requests destined for the domain name can be redirected to CDN PoPs for acceleration.
download.game-apk1.com is used as an example. This domain name is resolved on Huawei Cloud.
- Obtain the CNAME record of the domain name.
- Log in to the CDN console. In the navigation pane, choose Domains.
- On the Domains page, copy the CNAME record download.game-apk1.com.c.cdnhwc1.com.
- Add the CNAME record.
- Log in to Huawei Cloud console. Choose .
The DNS console is displayed.
In the navigation pane, choose Public Zones.
The public zone list is displayed.
- Click the domain name you want to add a record set to. In this example, the domain name is game-apk1.com.
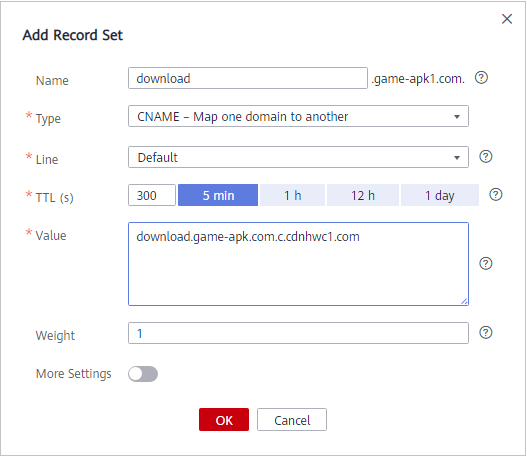
- Click game-apk1.com. On the displayed page, click Add Record Set in the upper right corner. The Add Record Set dialog box is displayed.

- Configure the parameters as instructed. Table 1 describes the parameters. Retain the default values for the parameters that are not listed in the table.
Table 1 Parameter description Parameter
Description
Example
Name
Domain name prefix
download
Type
Type of the record set, which should be CNAME-Canonical name here
CNAME – Map one domain to another
Line
Used when the DNS server is resolving a domain name. It returns the IP address of the server according to the visitor source.
You must add a Default line to ensure that the website is accessible to users of all carriers.
Default
TTL (s)
Cache duration of the record set on a local DNS server. If your service address changes frequently, set TTL to a smaller value.
The default value is 300 seconds, which is, 5 minutes.
Value
Domain name alias
If CDN acceleration is not enabled, the value is the bucket domain name. If CDN acceleration is enabled, the value of this parameter is the CNAME record allocated by CDN.
download.game-apk1.com.c.cdnhwc1.com
- Click OK.
- Log in to Huawei Cloud console. Choose .
- Verify that the CNAME record has taken effect.
Open the Windows command line interface and run the following command:
nslookup -qt=cname Acceleration domain name
If the CNAME record is displayed, the CNAME record has taken effect.

Feedback
Was this page helpful?
Provide feedbackThank you very much for your feedback. We will continue working to improve the documentation.See the reply and handling status in My Cloud VOC.
For any further questions, feel free to contact us through the chatbot.
Chatbot


