
Local Upload
Audio/Video files stored on local disks can be uploaded to VOD.

During local upload, do not refresh the page, clear the browser cache, or close the browser. If no operation is performed for a long time during file upload, you will be logged out. As a result, the upload fails.
Procedure
- Log in to the VOD console.
- In the navigation pane, choose Audio and Video Uploads > Local Upload.
- Click Upload File. The Upload File dialog box is displayed.
- Click Add File to add a local media file, or directly drag a file to the file area.
Figure 1 Local upload
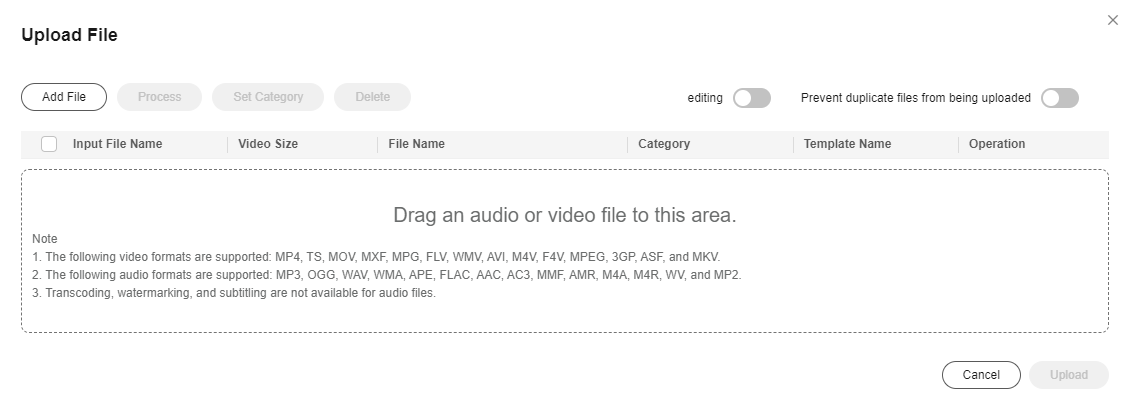
- Toggle on the Prevent duplicate files from being uploaded switch to avoid waste of time and storage space.
Configure this parameter as required. If you add a duplicate media file, an error message is displayed in the upper right corner.
- Categorize uploaded files, change the file names, or process these files.
If audio/video processing is not required, retain the default settings. If audio/video processing is required, click Process and configure the parameters by referring to Table 1.Figure 2 Processing media files
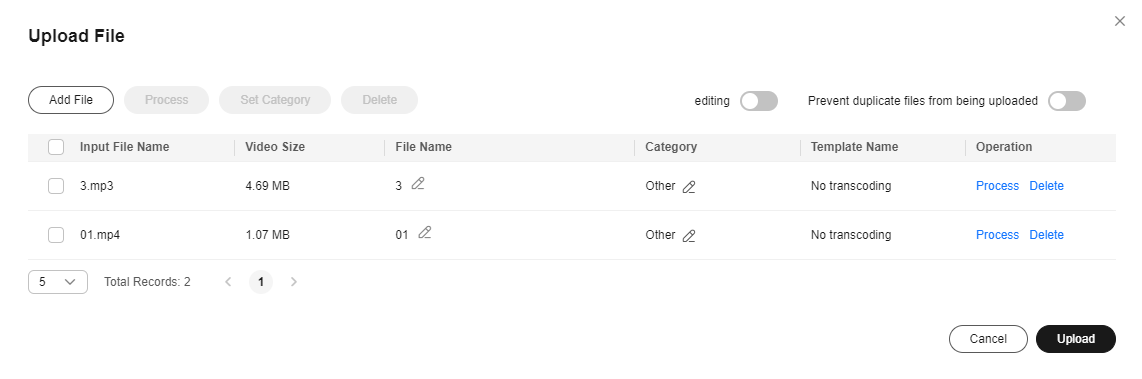
Table 1 Parameters Parameter
Description
Transcoding template group
Select a preset template group or customize a template group by referring to Transcoding Settings.
Workflow
Select an existing workflow or create a workflow template by referring to Workflow Settings.
- Click Upload.
How long upload takes depends on the file size and network conditions.
- View media file information on the Audio and Video Management page.
After a video file is uploaded, the first frame of the video is used as the thumbnail by default. If a transcoding template group or workflow was configured during media file upload, the configured parameters will automatically apply to the media file processing.
Feedback
Was this page helpful?
Provide feedbackThank you very much for your feedback. We will continue working to improve the documentation.See the reply and handling status in My Cloud VOC.
For any further questions, feel free to contact us through the chatbot.
Chatbot


