Changing a Single DB Instance to a Cluster DB Instance
Scenarios
After a single DB instance is created, you can upgrade it to a cluster DB instance by adding read replicas to it. This change takes about 7 to 10 minutes, during which workloads are not affected.
Constraints
- Once a single DB instance is changed to a cluster DB instance, it cannot be rolled back to a single DB instance.
- The time required for changing a single DB instance to a cluster DB instance is irrelevant to the storage space and workload data volume.
Billing
|
Billing Mode |
Operation |
Impact on Price |
|---|---|---|
|
Yearly/Monthly |
Single to cluster |
You need to pay for the difference in price based on the remaining period. The following prices are for reference only. The actual prices are displayed on the console. Suppose you purchased a one-month TaurusDB single instance (instance specifications: dedicated, 2 vCPUs | 8 GB; storage: DL6, 10 GB) in CN-Hong Kong on April 1, 2025. The instance price was $151 USD per month. On April 15, 2025, you changed the instance type from single to cluster. The instance price was $296 USD per month. Price difference = Price for the cluster instance x Remaining period – Price for the single instance x Remaining period The remaining period is the remaining days of each calendar month divided by the maximum number of days in each calendar month. In this example, the remaining period and price difference are calculated as follows: Remaining period = 15 (Remaining days in April)/30 (Maximum number of days in April) = 0.5. Price difference = $296 USD x 0.5 – $151 USD x 0.5 = $72.5 USD |
|
Pay-per-use |
Single to cluster |
The cluster DB instance is billed by the hour. For details, see Product Pricing Details. |
Procedure
- Log in to the TaurusDB console.
- On the Instances page, locate the row containing the target single instance, and choose in the Operation column.
Figure 1 Selecting a single instance

Alternatively, click the instance name to go to the Basic Information page. In the upper right corner of the page, click
 and choose Create Read Replica.
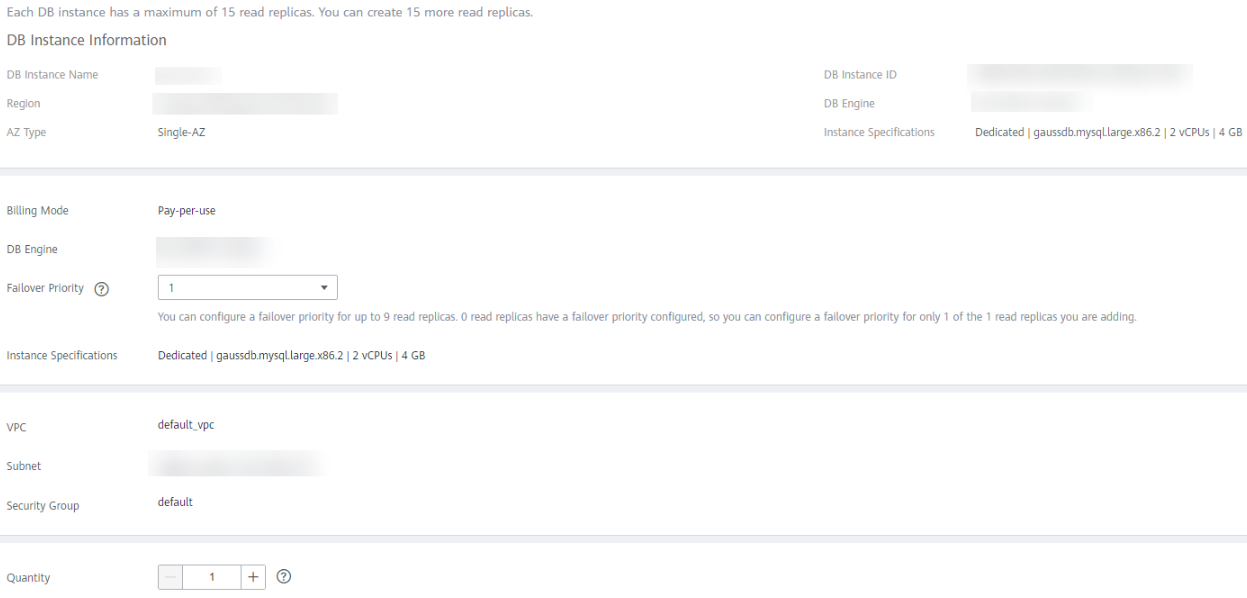
- On the displayed page, set the number of read replicas.
Figure 2 Setting the number of read replicas

- Click Next.
- Confirm the information and click Submit.
On the Instances page, check that the instance status is Creating read replicas. You can also go to the Task Center page to view the task progress.
Figure 3 Creating read replicas
- After the read replicas are created, check that the instance status becomes Available and the instance type becomes Cluster.
Figure 4 Change succeeded

Feedback
Was this page helpful?
Provide feedbackThank you very much for your feedback. We will continue working to improve the documentation.See the reply and handling status in My Cloud VOC.
For any further questions, feel free to contact us through the chatbot.
Chatbot


